Golden, crispy chicken meets a flavorful marinara sauce and gooey melted cheese in this Baked Chicken Parmesan dish. This no-fry, lighter version of the classic features easy-to-follow steps for a family-friendly dinner that’s every bit as delicious as the original.
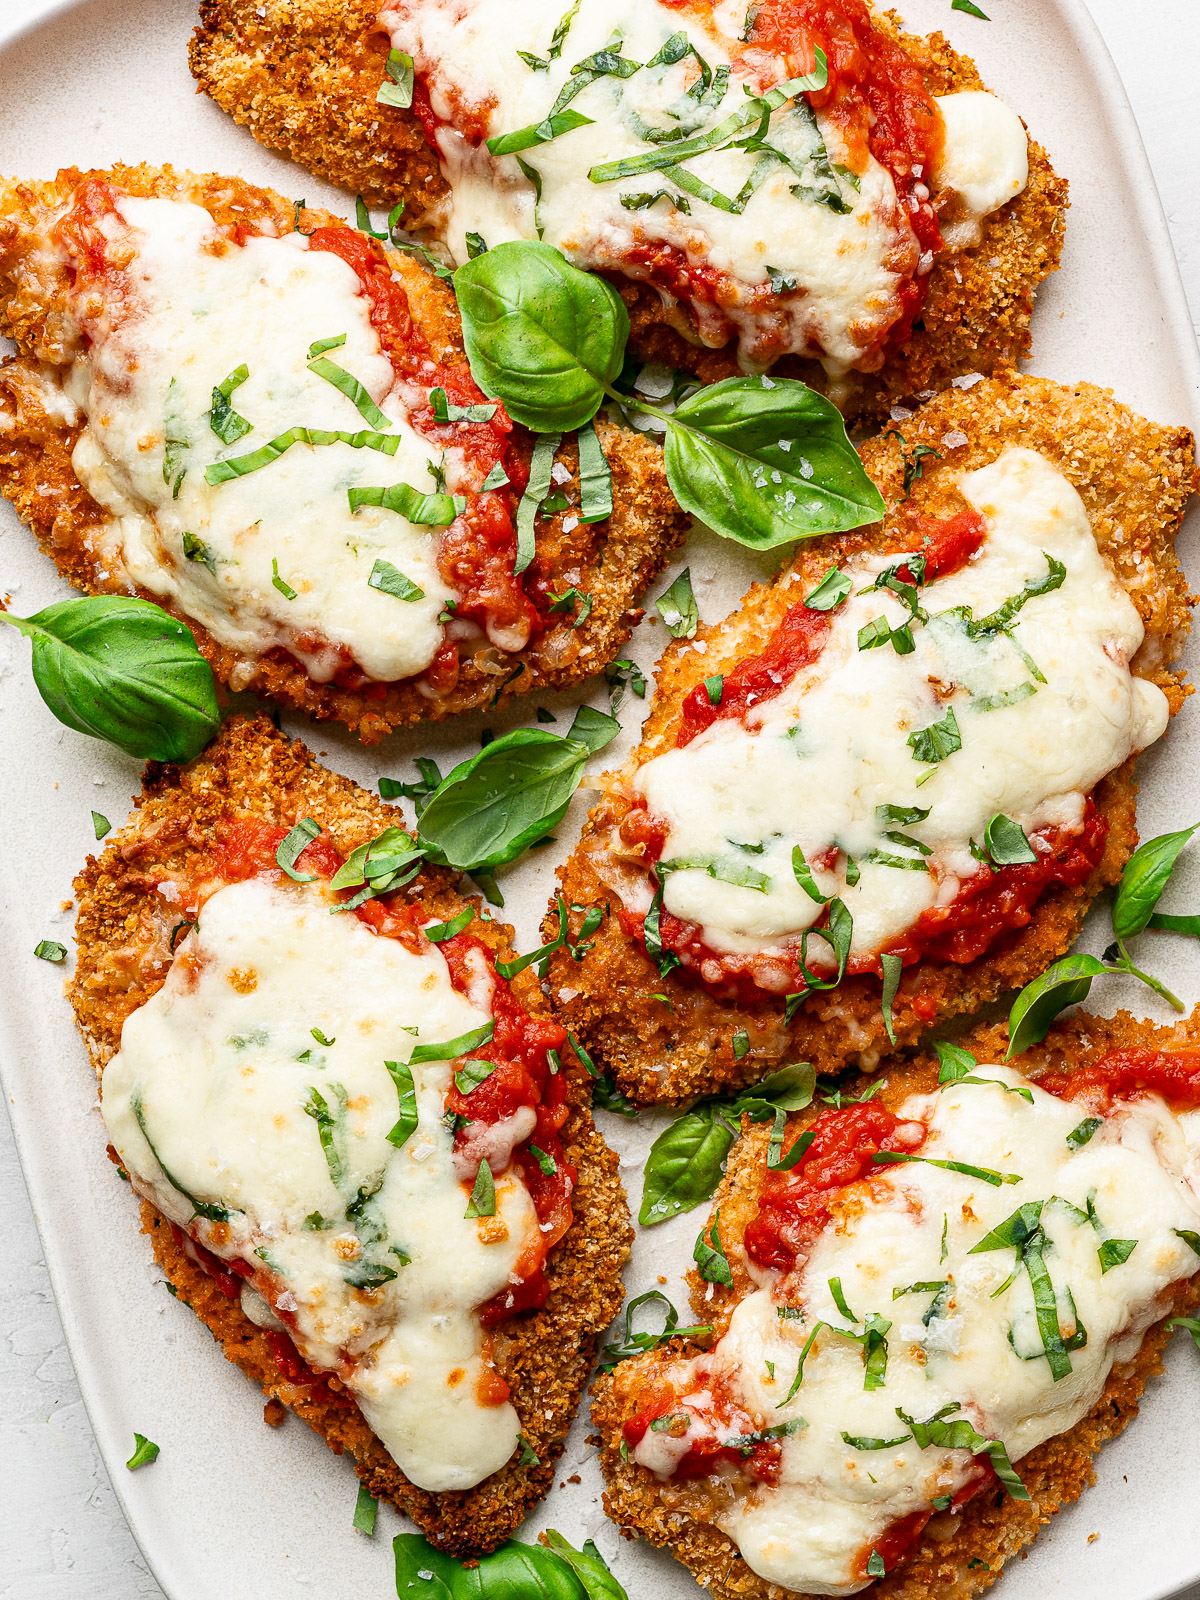
My family goes crazy for a cheesy, bubbling pan of chicken parmesan. Problem is, frying 6-8 breaded chicken cutlets takes time and makes a supreme mess. That’s why I’m thrilled to share this baked chicken parmesan recipe with you.
I know you’ll be skeptical, after all chicken parmesan is all about starting with the crispiest chicken possible. But I found that with a few simple tricks, we can achieve very similar results.
The secret to the crispiest breaded chicken, lies in a few key steps: tenderizing the chicken for ultimate juiciness, using toasted panko breadcrumbs, and roasting the chicken on a wire rack in a very hot oven. When layered with a tangy tomato sauce, gooey melted cheese, and fresh basil, it will have all the comforting, rich flavors you expect from a classic chicken parmesan.
Best of all, this easier, more hands-off approach means you can make it on a weeknight, or for a larger crowd. I promise, this lighter version of chicken parm is going to make your heart sing.
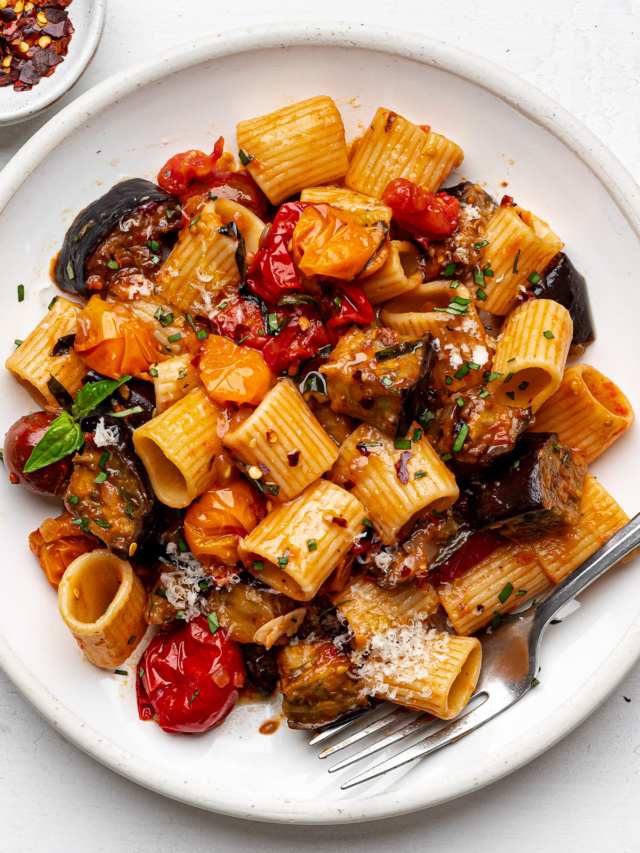
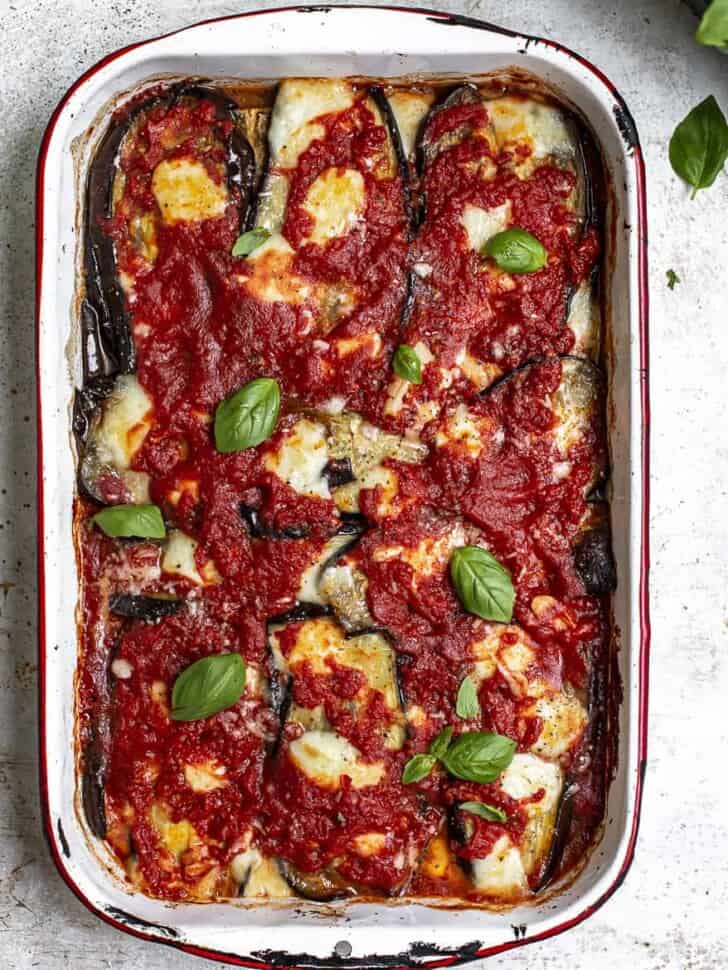
If you’d like a vegetarian version of the Parm genre, give my eggplant parmesan a try!
Ingredient Notes
Chicken parmesan may sound and look fancy, but it’s made with very straightforward ingredients. Here’s some notes and tips on the ingredients you’ll need:
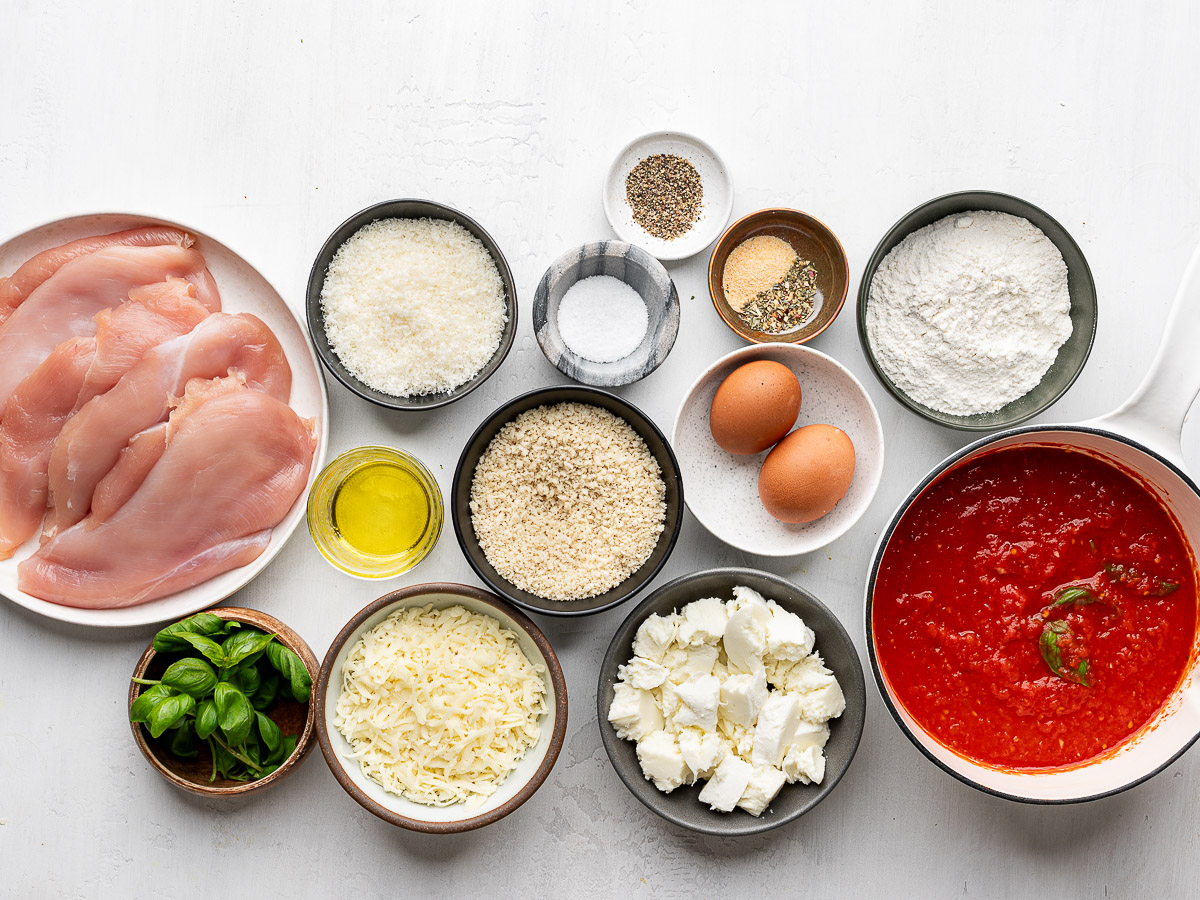
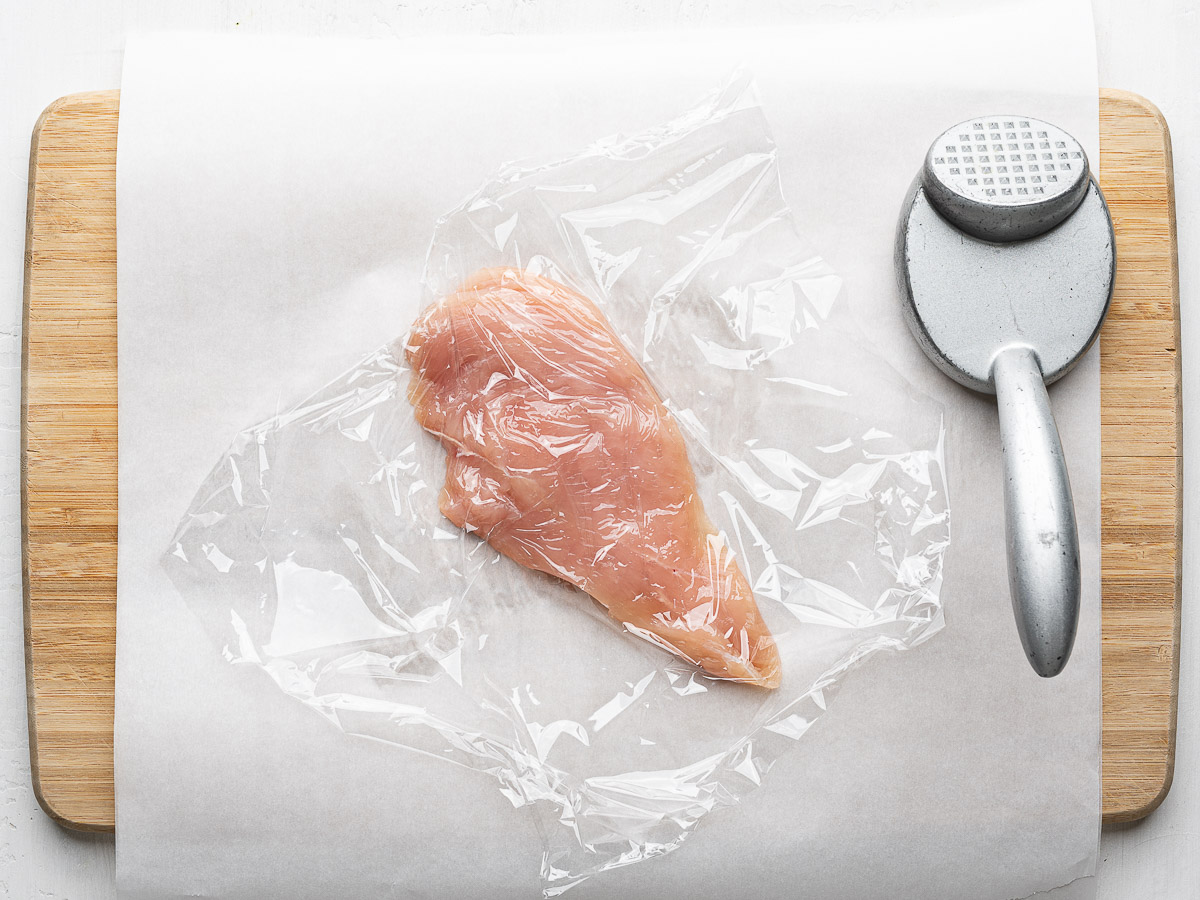
- Chicken breasts – Chicken parmesan is typically made with boneless skinless chicken breasts. Because using whole chicken breasts would take too long to cook, here we slice each breast in half length-wise to create two cutlets. We’re also going to lightly pound them so they have an equal thickness throughout. However, it is important not to pound them too thin. Otherwise, the meat would overcook while we wait for the outer layer of breadcrumbs to crisp up in the oven.
- Panko breadcrumbs – For this baked chicken parmesan, I like to use pre-toasted panko breadcrumbs. The airy light texture of panko is lighter, flakier, and cooks up more crispy than regular breadcrumbs. See section below on why it’s important to pre toast the panko for this recipe.
- Eggs – Once coated in flour the cutlets are submerged into lightly beaten eggs which ensures the breadcrumbs will stick to the cutlet.
- All-purpose flour – Coating the chicken in flour helps the egg adhere to it. For a gluten-free version of chicken parm, use rice flour (or GF flour) and gluten-free Panko breadcrumbs.
- Marinara – You can use a good quality store-bought marinara sauce but my quick homemade tomato sauce takes very little time to make and is super delicious.
- Olive oil – To flavor and toast the breadcrumbs.
- Parmesan cheese – We can’t have chicken parmesan without parmesan cheese! Please do your best to use freshly grated parmesan which tastes so much better than the packaged pre-grated.
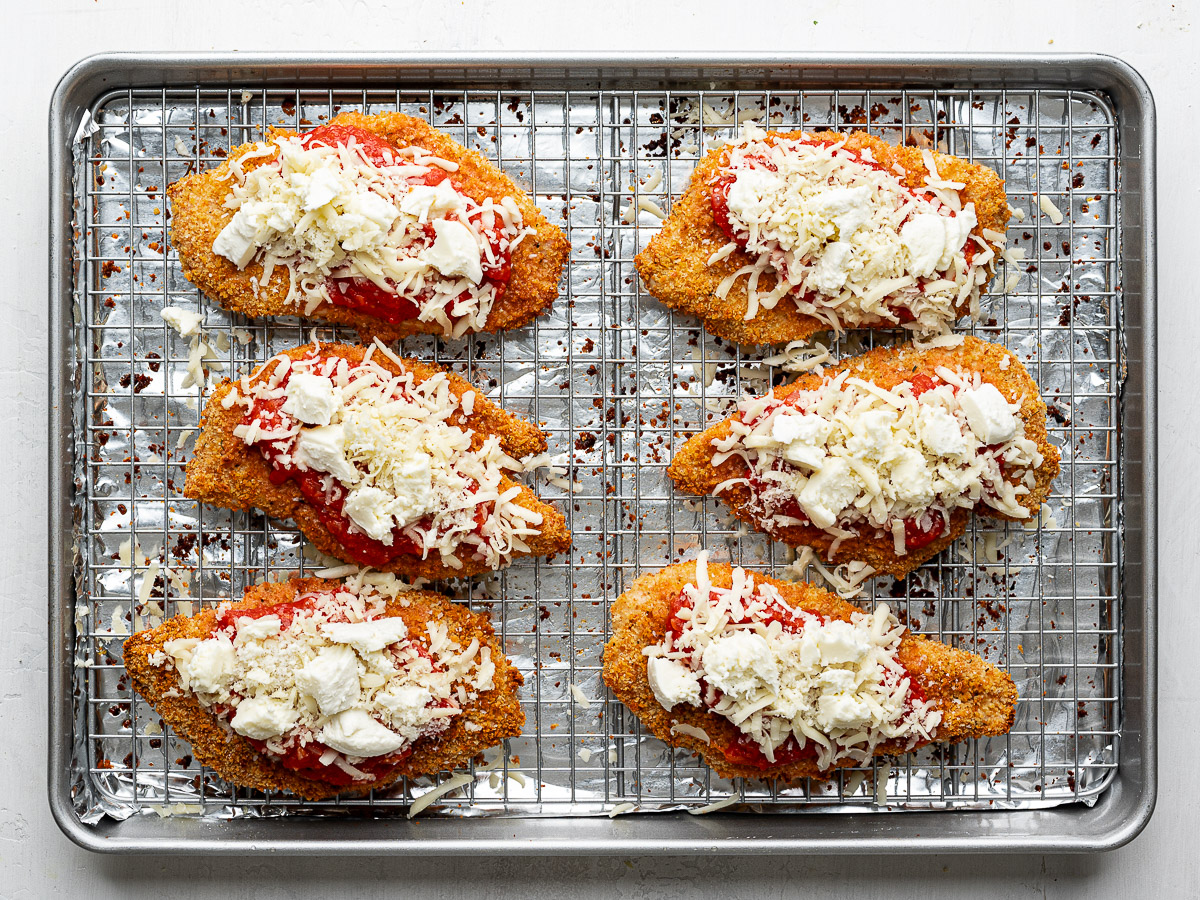
- Mozzarella cheese – Here I like to use both fresh mozzarella, and low-moisture shredded mozzarella. I adore fresh mozzarella cheese which is super creamy and milky, however, here I like to use it sparingly because I find it gets a little too watery when it melts under the broiler. So I like to use some shredded low-moisture mozzarella and a few torn chunks per cutlet of fresh mozzarella. Feel free to use just one kind of mozzarella, if you wish—the chicken parm will still be delicious.
- Dried Italian herbs – To season the breadcrumbs, I like to use a good quality Italian seasoning blend. If you don’t have Italian seasoning, use a mix of dried thyme and dried oregano.
- Granulated garlic (or garlic powder) – For flavoring the breadcrumb mixture.
- Kosher salt and black pepper – for seasoning the chicken, eggs and breadcrumbs.
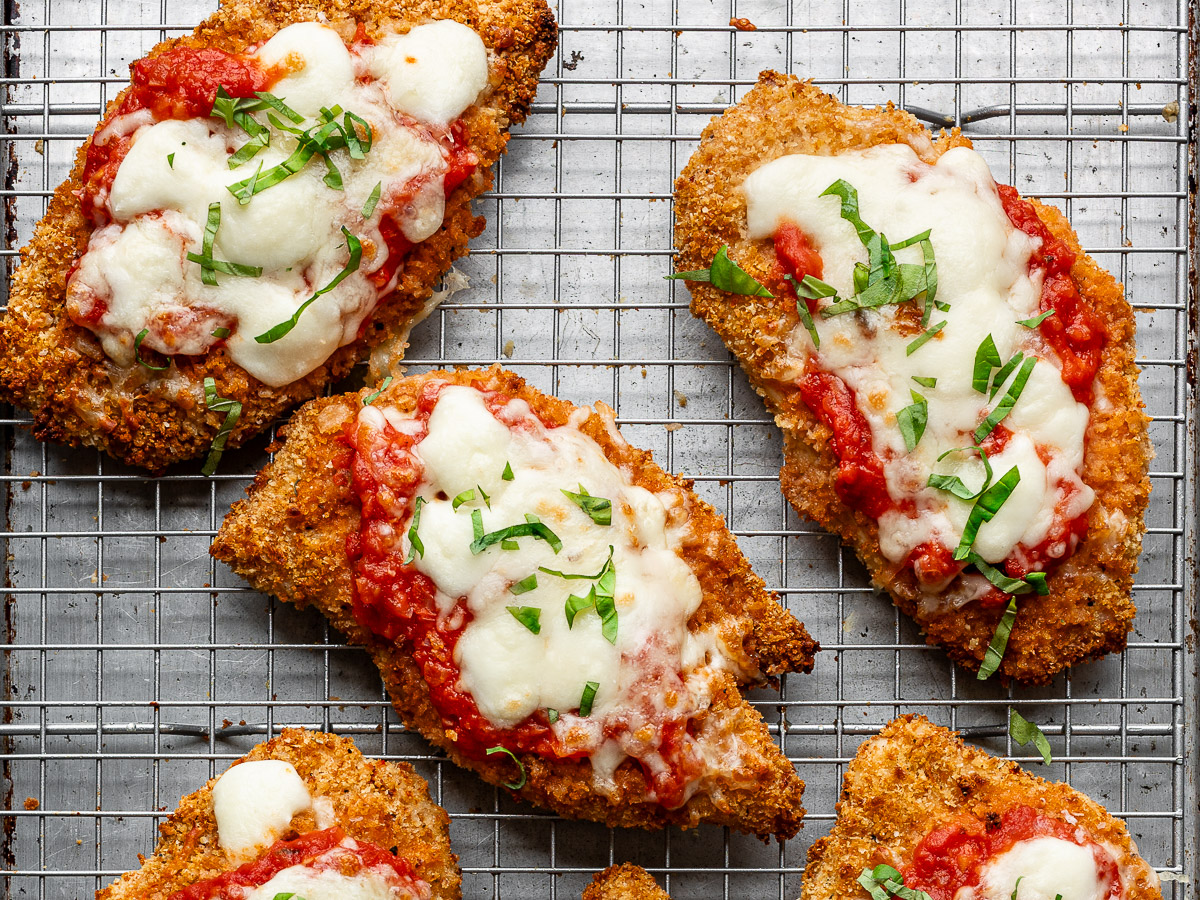
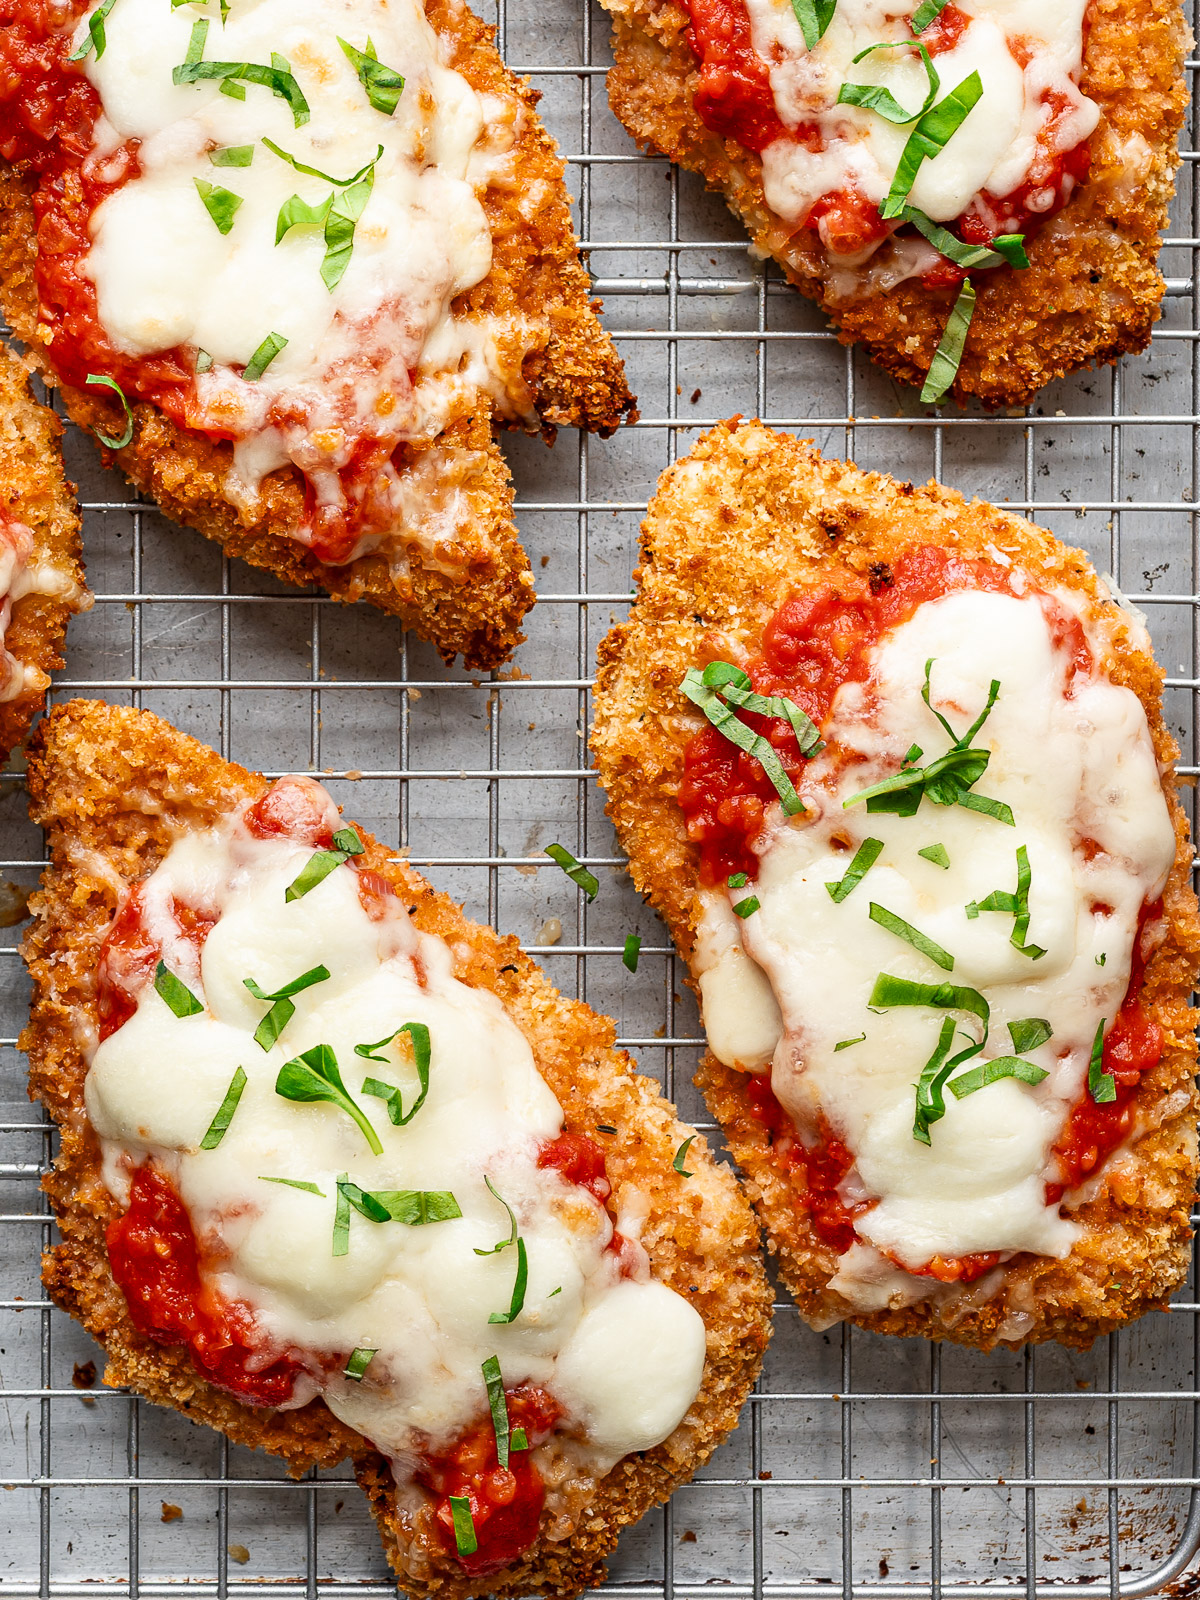
- Fresh basil – To finish, sprinkling fresh basil over the chicken parm is a must.
*For a complete list of ingredients and measurements, scroll down to the recipe card.
Why Toast The Panko?
The chicken breasts bake for a relatively short time in the oven which means the panko doesn’t have a lot of time to get golden and crispy. So to ensure we get a really crispy exterior, it is essential to start off with pre-toasted breadcrumbs.
All it takes is tossing the panko in a hot skillet with some olive oil until they’re just turning golden (not brown!). The olive oil will also add wonderful flavor to the panko. Note that I haven’t tried this with dried fine breadcrumbs as I feel they might burn too quickly. If using these finer breadcrumbs, I recommend skipping this step and simply spraying them with cooking spray.
How to Make Baked Chicken Parmesan – Step by Step
Start by preparing the tomato sauce. If making a homemade sauce, make it now so it gently cooks while you prepare everything else. If using sauce from a jar, heat it over low heat until just warm.
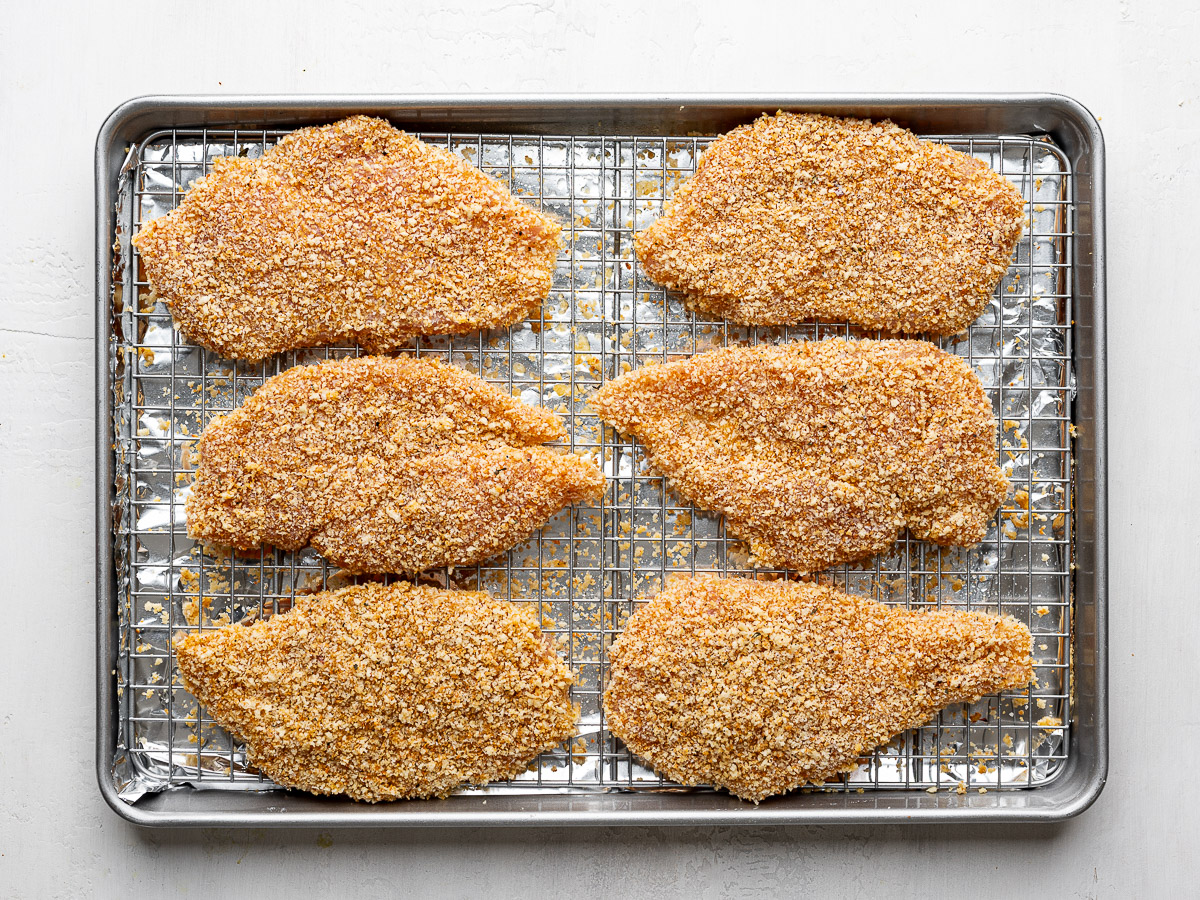
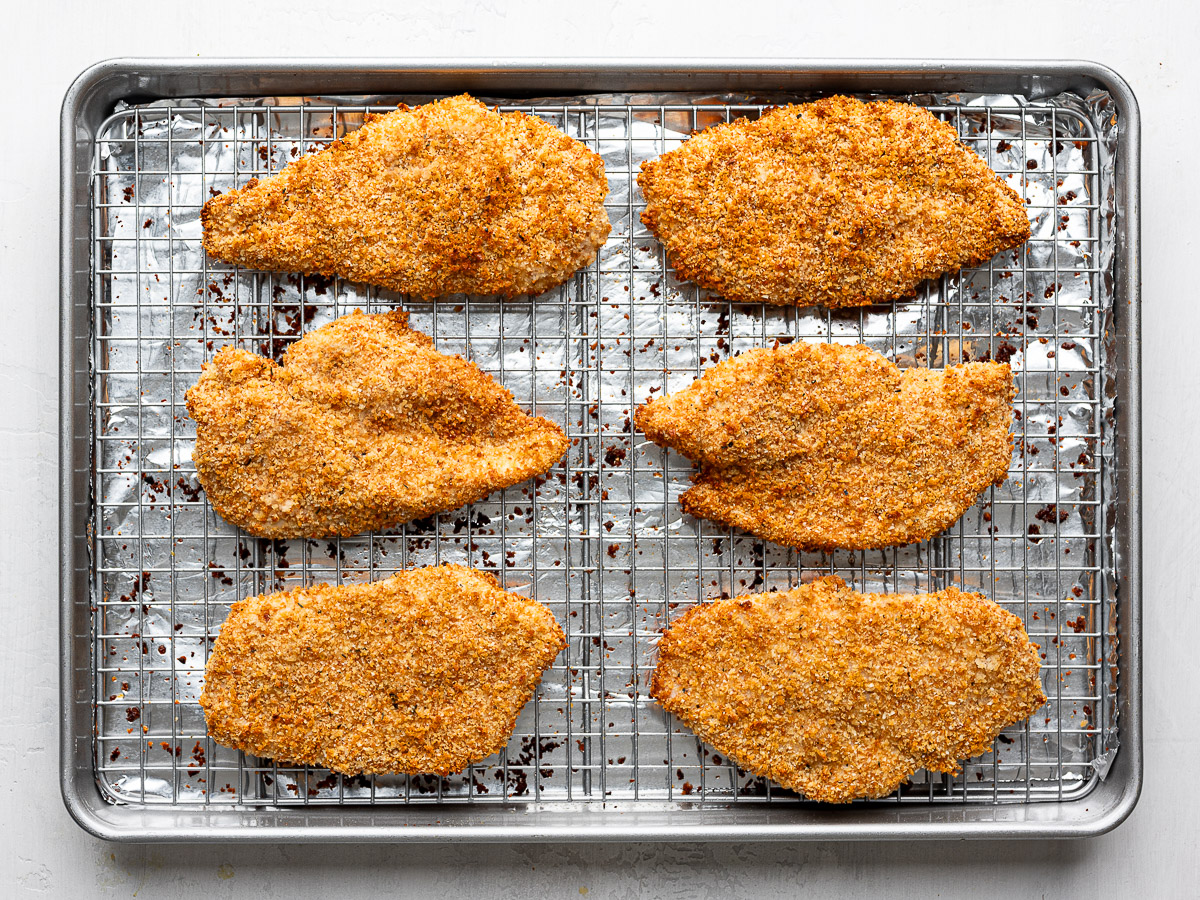
Preheat oven to 425ºF. Fit a large sheet pan with a wire rack and set aside. TIP: Lightly grease the wire rack to ensure the breaded chicken doesn’t stick.
Toast the breadcrumbs. Heat the olive oil in a small skillet over medium-low heat. Stir in the breadcrumbs and toss to coat. Cook, stirring constantly, until most crumbs have turned a deep brown color, 3-4 minutes. Immediately transfer the crumbs to a plate or container so that they stop getting any darker from the heat in the pan.
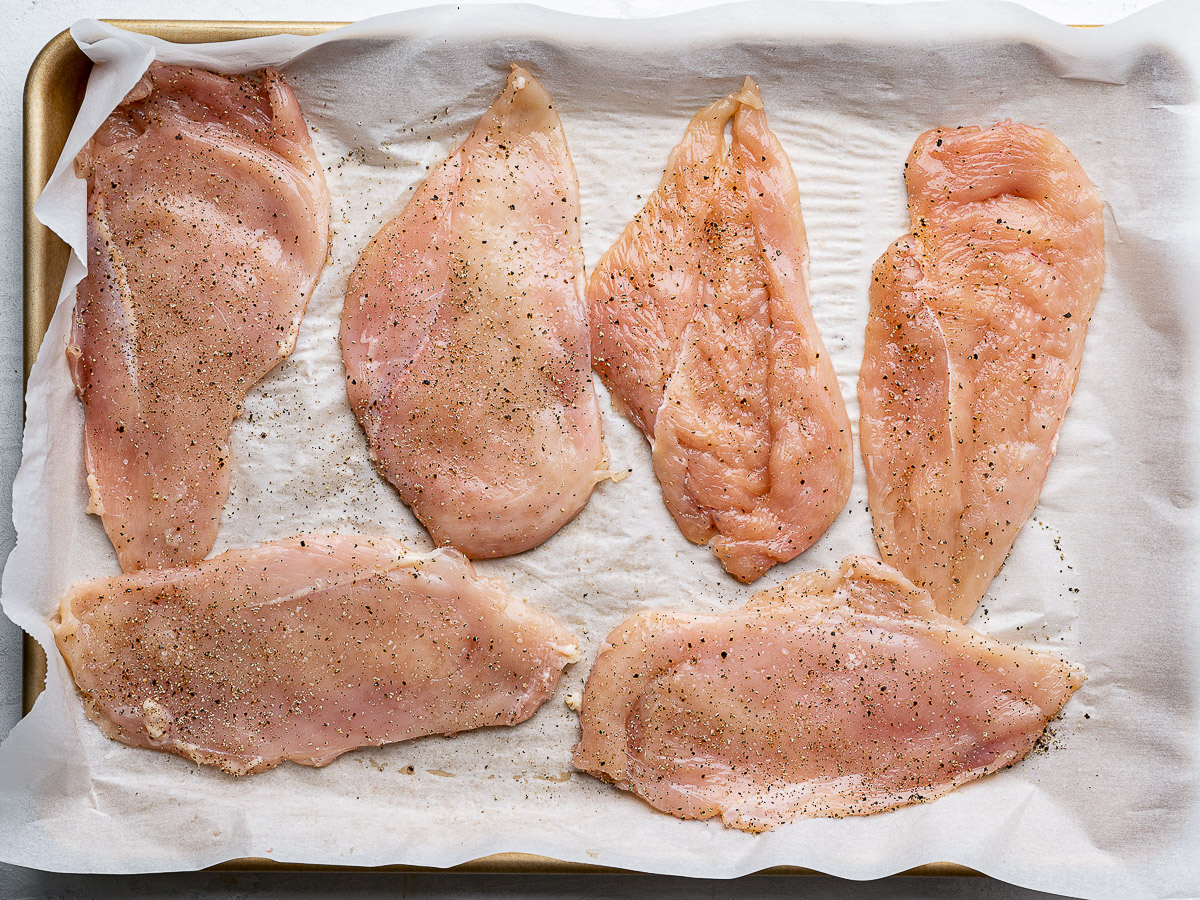
Prepare the chicken. Slice the chicken breasts in half, lengthwise, to create two cutlets. Place one chicken cutlet in a large ziplock bag, or between two sheets of parchment paper. Gently pound the thicker end of the chicken cutlet with a rolling pin or smooth side of a meat mallet to make it a some-what uniform thickness – chicken thickness should be just under 1/2-inch. Repeat with the remaining cutlets, transfer to a sheet pan or large platter and season with salt and pepper on both sides. (Seasoning the chicken at this point will help draw out some moisture which helps with dredging process.) Set aside.

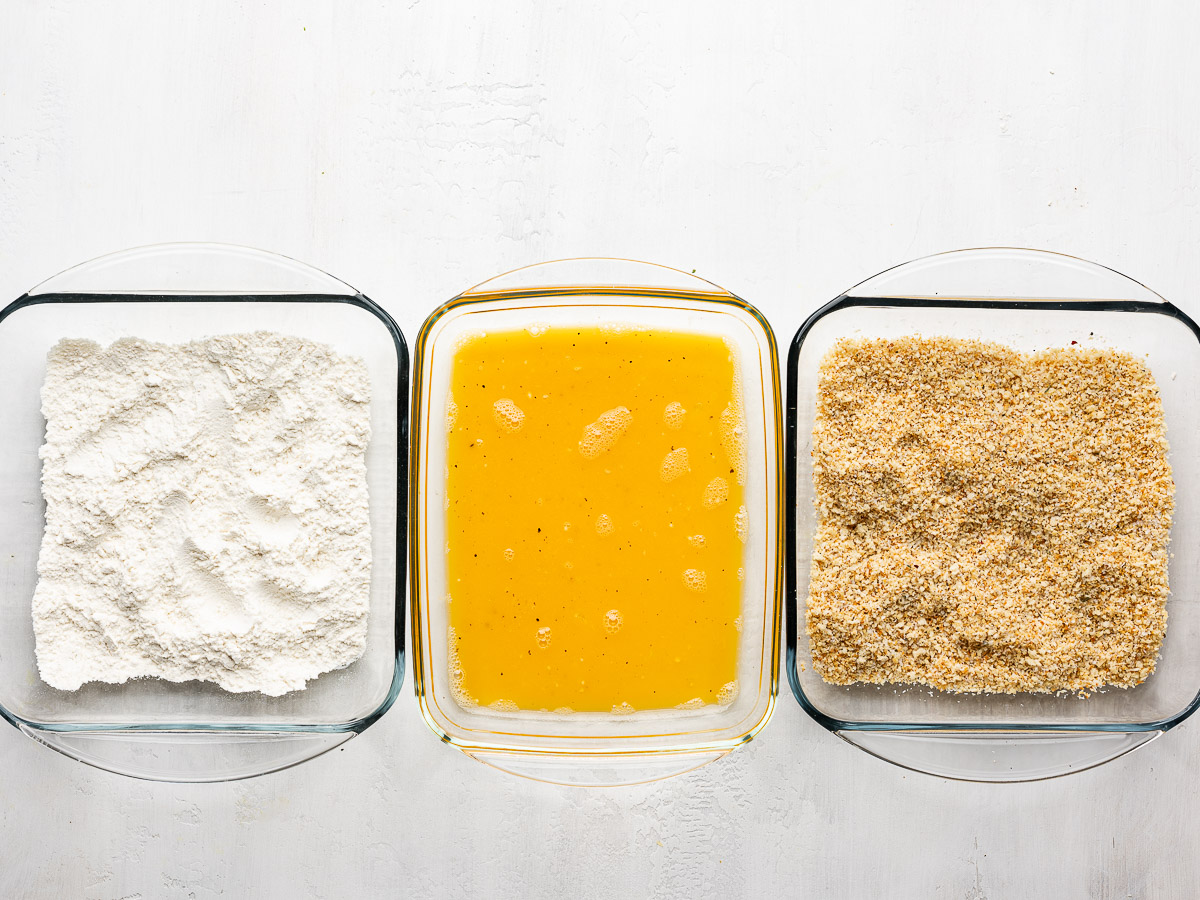
Prepare dredging station. You will need three large shallow bowls for your dredging station. In one bowl, whisk the eggs with a pinch of salt and pepper, 2 Tbsp. water and 1 tablespoon flour. (Adding a bit of flour to the eggs makes them more gluey.) In another bowl, combine the toasted panko with parmesan, Italian seasoning, garlic powder and ½ tsp. salt. Place flour in the remaining bowl.
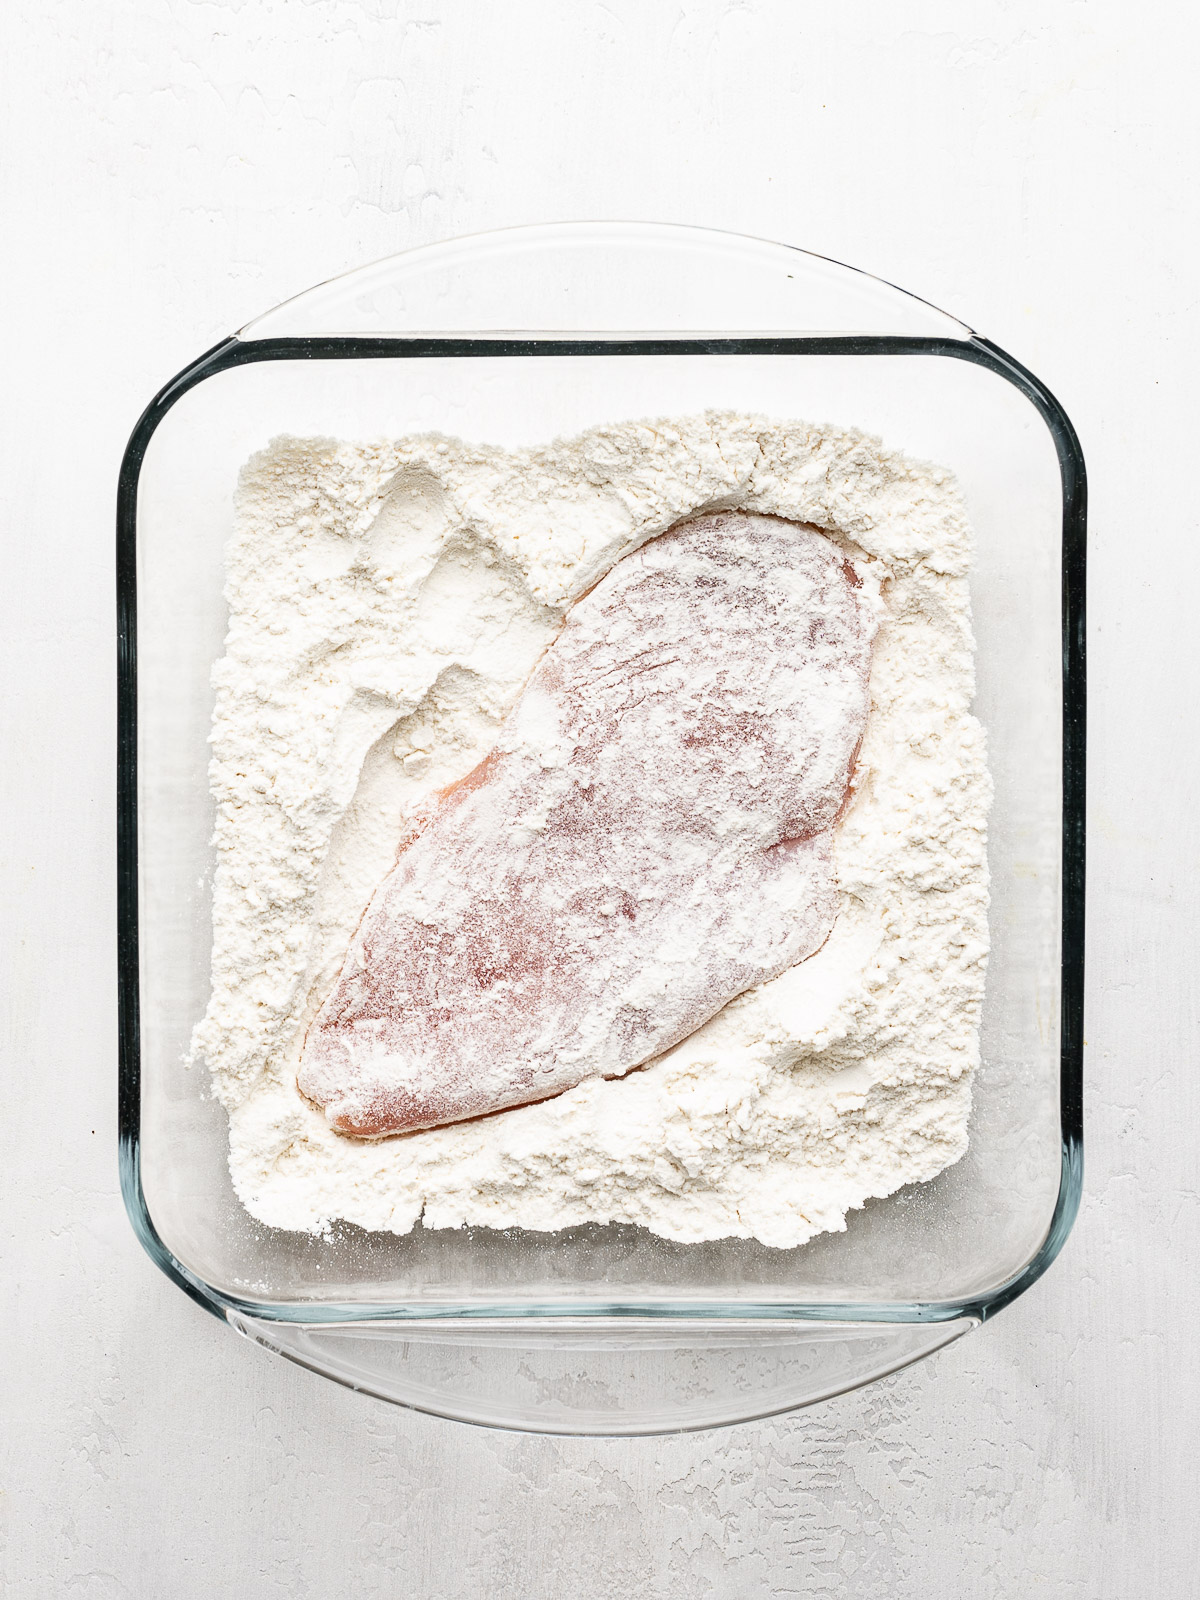
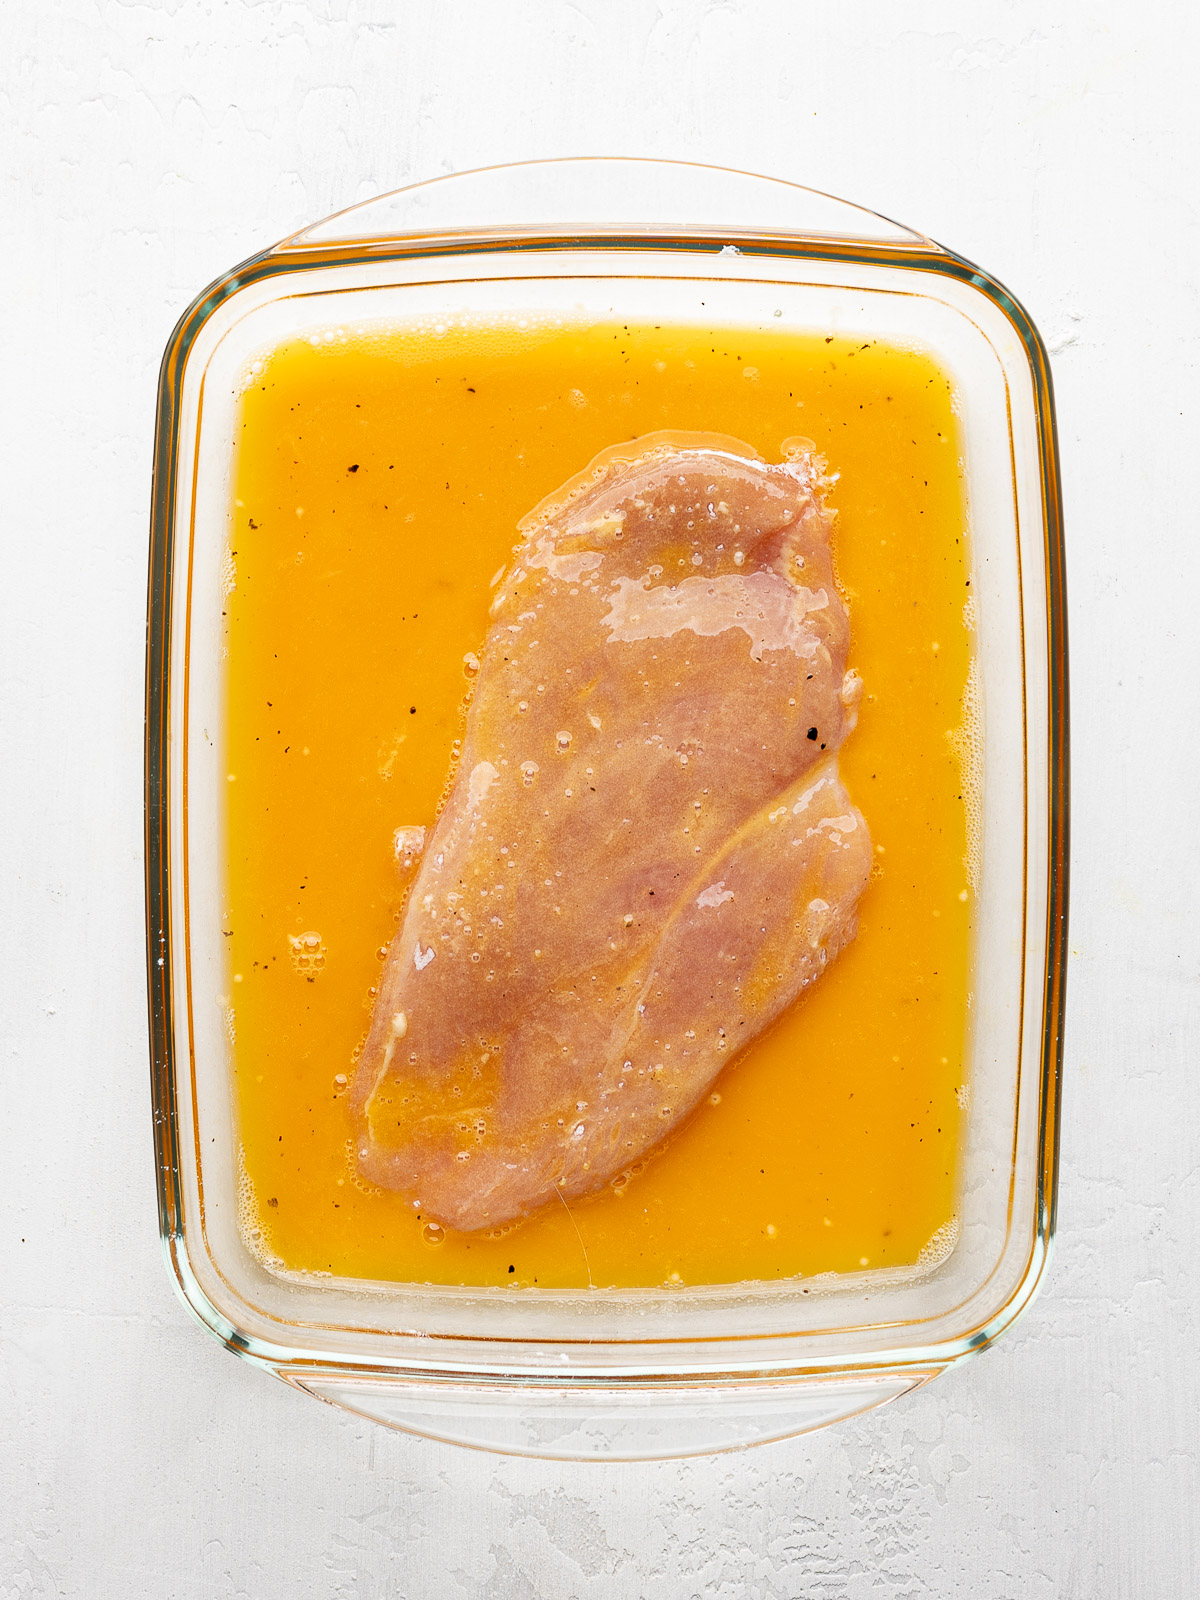
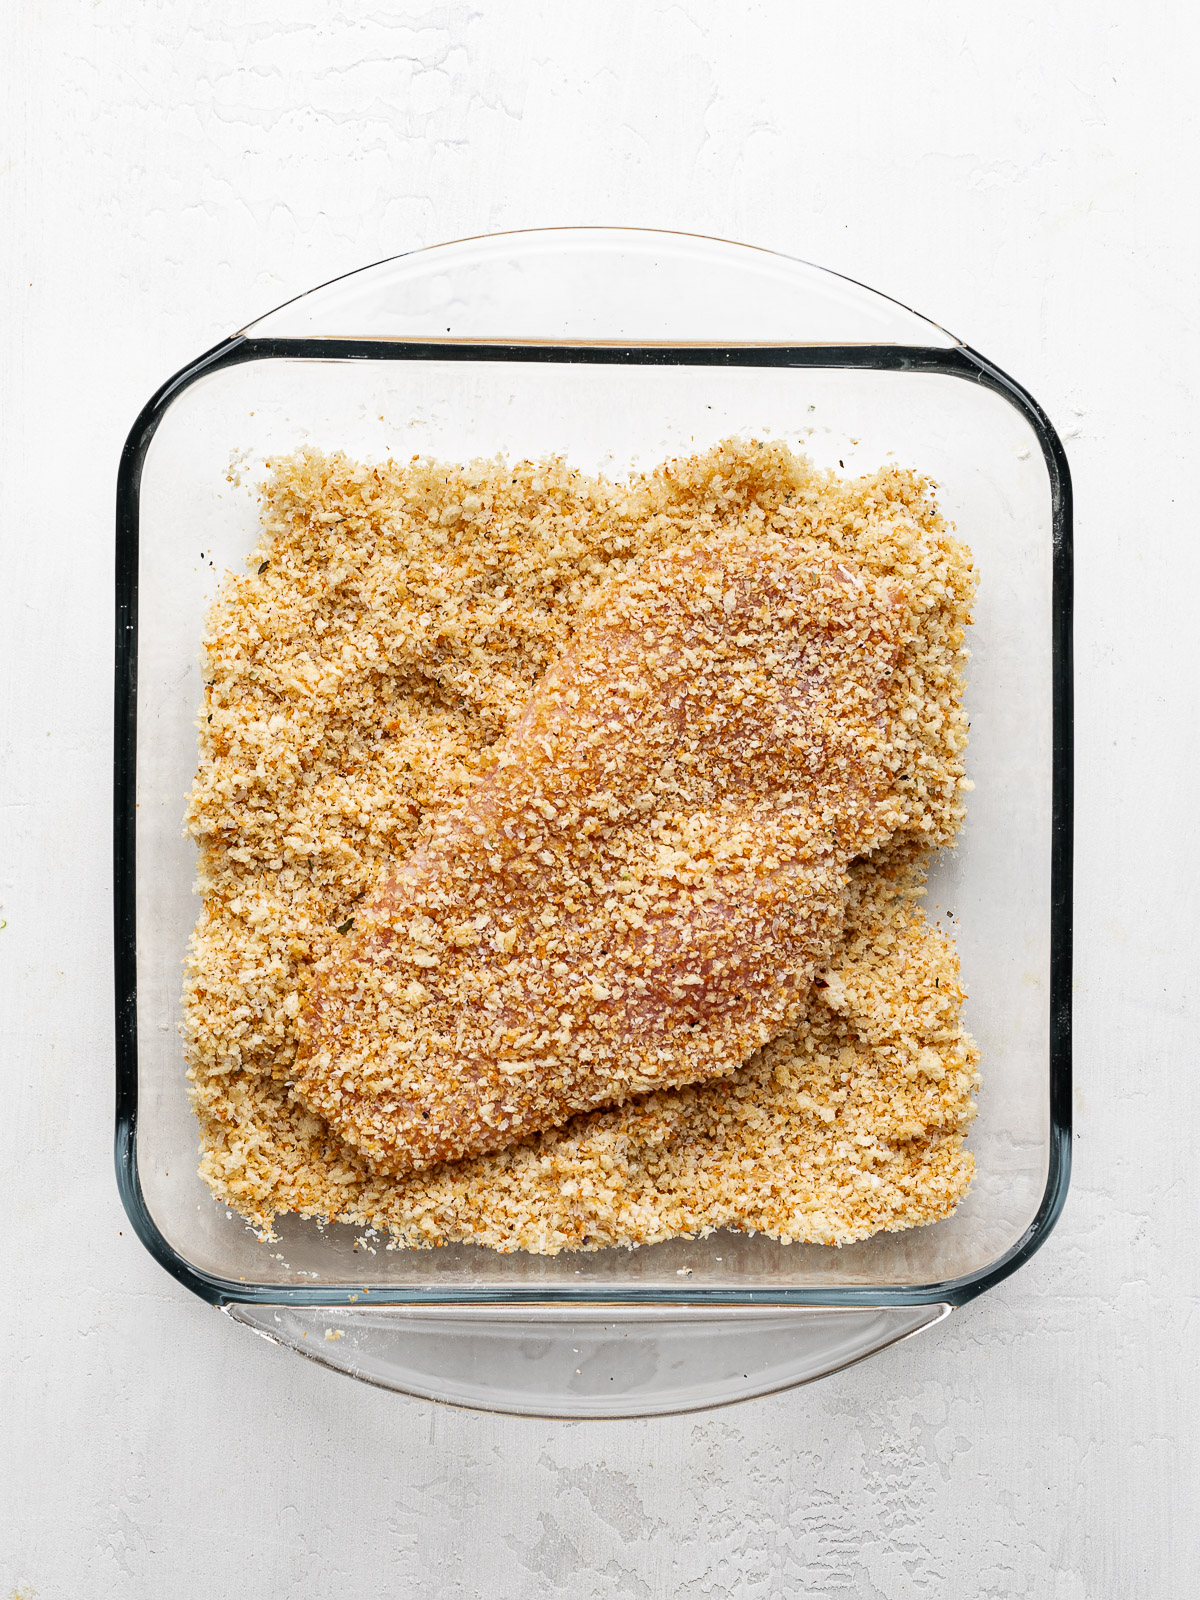
Bread the cutlets. Working with 1 piece of chicken at a time, lightly coat both sides in the flour mixture shaking off any excess, then dip in the eggs, turning once to coat both sides. Dredge the cutlet in the panko mixture, gently pressing them into the chicken so they stick. Place on the prepared baking sheet and continue this process until all the cutlets are breaded.
Bake the chicken. Bake the chicken for bake 20 to 25 minutes, until browned and cooked through (internal temperature should read 165ºF.).
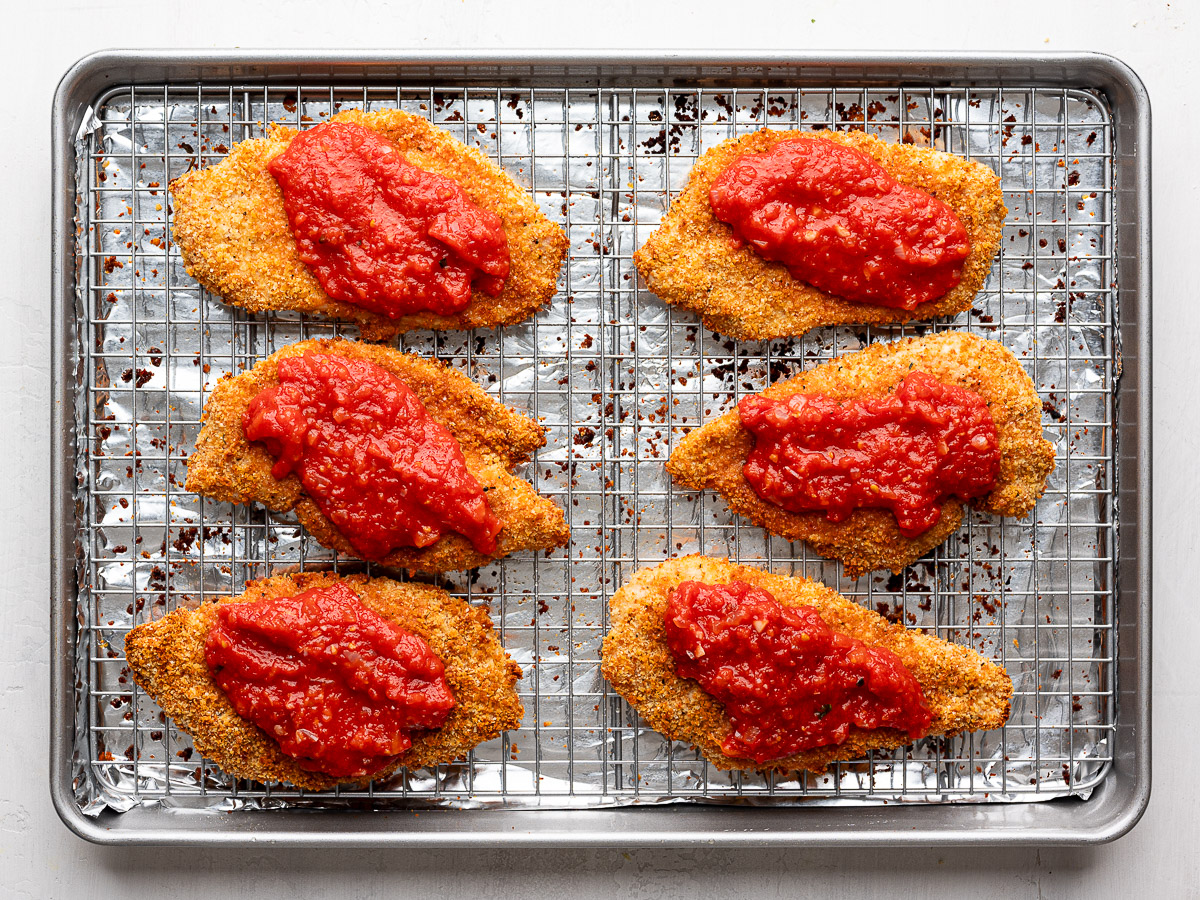
Layer and broil. Remove baking sheet from the oven. Switch the oven to broil on high. Spoon 2-3 tablespoons of marinara sauce over each cutlet, leaving the edges uncovered (save any remaining marinara for tossing with pasta or another use). Top each chicken breast with the grated mozzarella, a sprinkle of parmesan, and the fresh mozzarella pieces. Broil on the upper rack until the cheeses on top are melted and bubbly, 3 to 5 minutes.
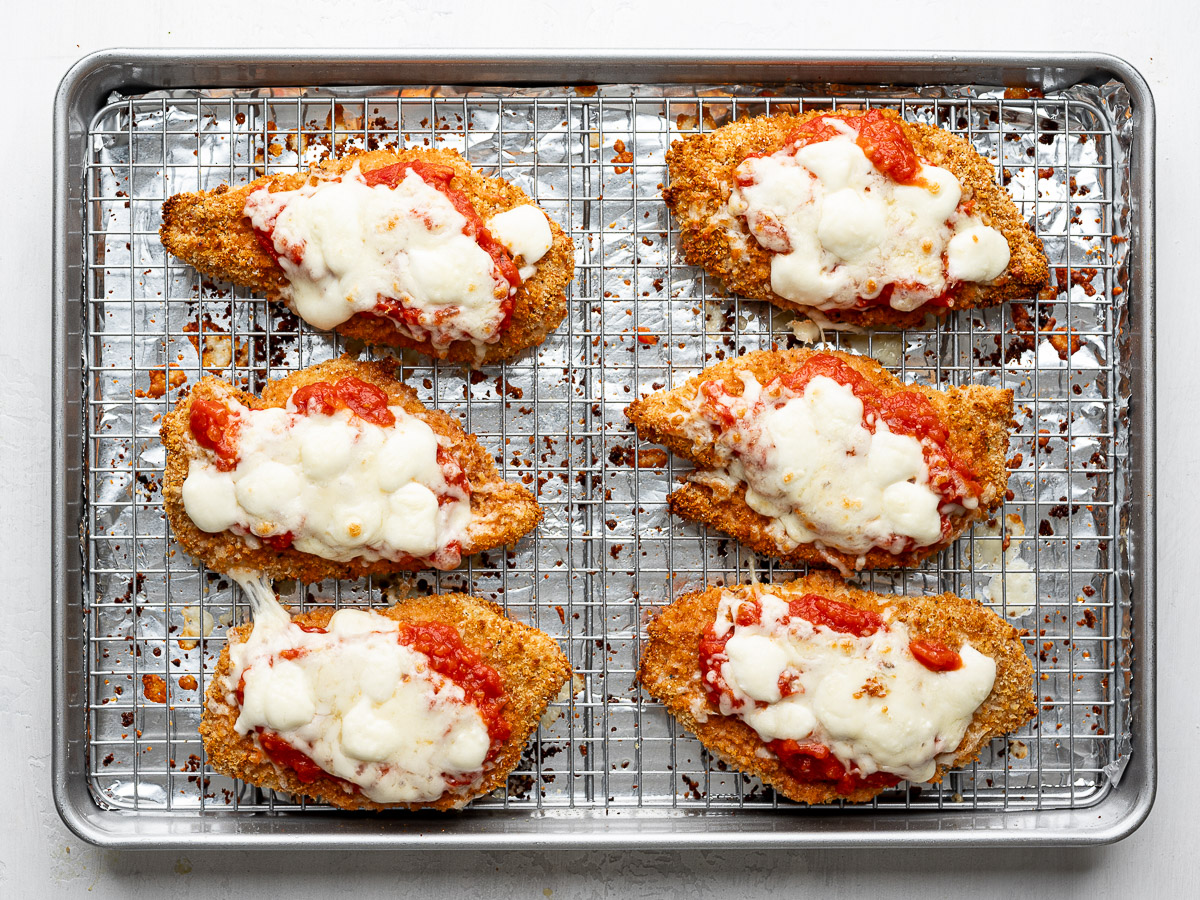
Serve. Garnish the chicken parm with the chopped basil and serve immediately!
Advantages Of Baking Chicken Parm vs. Pan-Frying
Admittedly, a classic pan-fried chicken parmesan is quite delicious. But baking chicken Parmesan instead of pan-frying is just as wonderful and has several advantages, particularly for those looking for a healthier and more convenient way to prepare this classic dish. Here are some key benefits:
Healthier —> Baking requires little to no added oil compared to pan-frying, which often involves frying the breaded chicken in a significant amount of oil. This reduces the fat content and calorie count of the dish.
Less mess and cleanup —> Pan-frying can leave grease splatters on the stovetop and surrounding area, making cleanup more time-consuming. Also, I’m sure I’m not the only one that can’t stand the house smelling of fried food. Baking, on the other hand, keeps everything contained on a baking sheet or dish, and only delicious aromas emerging from the oven!
Easier to cook for a crowd —> Baking allows you to cook multiple portions at once on a single baking sheet, making it ideal for families or dinner parties. Pan-frying is typically limited to cooking a few pieces at a time.
More hands-off —> Once the chicken is in the oven, it requires little attention compared to pan-frying, where you need to watch and flip the pieces to prevent burning. This frees you up to work on other parts of the meal.
Consistent Results —> Baking provides a consistent cooking environment, reducing the chances of burning or undercooking the breading or the chicken itself, which can sometimes happen during pan-frying.
All this being said, if I’m cooking for just two people, I might go the pan-fried method since the cooking process is a little faster.
Tips For Success
Choose the Right Sauce Use a marinara sauce that is not overly watery to prevent the breading from becoming soggy. Consider a homemade sauce for extra flavor!
Don’t skip the oven preheat. Make sure your oven is fully preheated before baking the chicken to ensure even cooking and proper crisping of the breading.
Elevate the chicken. Use a wire rack on a baking sheet to allow air to circulate under the chicken, preventing the bottom from becoming soggy.
Spray the breaded chicken. I don’t always do this but lightly spritzing the breaded chicken with cooking spray will help create a more golden, crispy crust. I use this avocado oil spray.
Don’t over-bake. Check the internal temperature of the chicken with a meat thermometer. It’s done when it reaches 165°F to avoid drying it out.
Don’t use pre-shredded mozzarella. Pre-shredded mozzarella is coated with anti-caking agents like potato starch or cellulose to prevent the shreds from clumping together in the bag. While useful for storage, these additives can hinder the cheese’s ability to melt smoothly, leading to a less gooey and creamy texture.
Broil for a crispy, melty finish. After topping the baked chicken with sauce and cheese, broil the chicken for 1-2 minutes to crisp up the topping and make the cheese bubbly and golden.
Don’t smother the chicken parm with too much sauce. It is crucial to leave at least 1-inch of the edges without sauce or cheese. This ensures you still have crunchy chicken throughout. I also don’t add any sauce under the chicken when serving it. If you’d like more sauce, serve extra sauce on the side for dipping.
Frequently Asked Questions
Make sure to pat the chicken dry before seasoning it, use a wire rack to elevate the chicken, and avoid adding too much marinara sauce before baking it.
Boneless skinless chicken thighs will certainly work here and they are often my preference for most chicken recipes. However, for a chicken parmesan dish, chicken breasts really do work better. You can pound them to an even thickness without going too thin, and in my opinion, their mild flavor allows the breading, sauce and cheese flavors to shine through. If using chicken thighs, make sure to gently pound them to be as uniform as possible.
Chicken parmesan is best served immediately or the breading will start to become soggy. However, you can bake the breaded chicken up to 1 hour ahead, then broil with the sauce and cheese just before serving.
Serving Suggestions
Classic pairings —> I try not to always serve my chicken parmesan with pasta. But, I almost do because it’s so. darn. good. We love it over spaghetti with extra marinara sauce but just about any pasta shape, or gnocchi, will work. Lately, I’ve really been enjoying this brand of gluten-free pasta. Another classic pairing is some warm, crispy bread to soak up any extra sauce, or a fresh and crisp caesar salad (omit the avocado).
Vegetables —> Try zucchini, asparagus, broccolini (my fave!) or broccoli for a light, healthy side. This green bean amandine dish would also be wonderful as would some grilled eggplant in the summer.
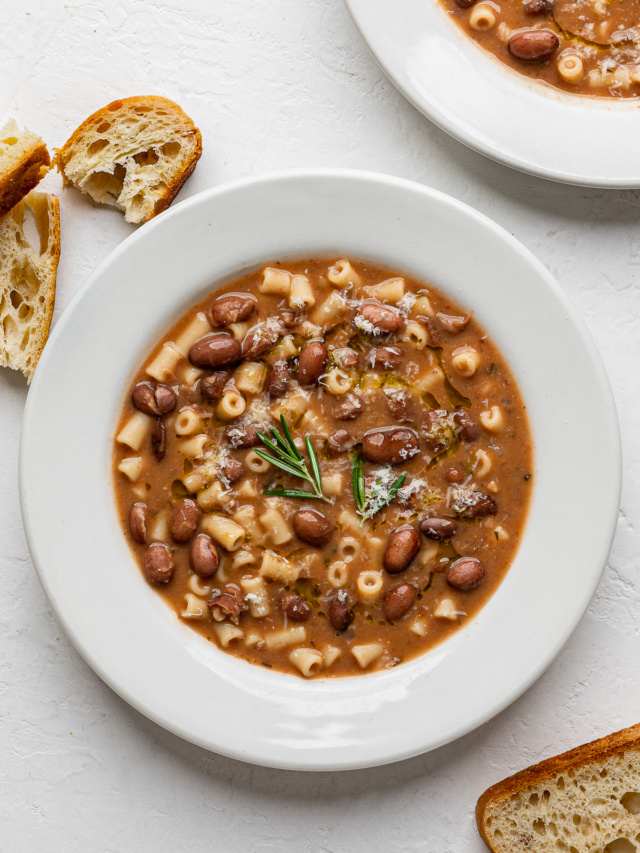
Greens —> Keep it light with leafy greens that have been lightly dressed, or serve with this delicious radicchio salad, or this Tuscan bean salad.
Tips For Storing, Freezing And Reheating
If you’ve ever had leftover fried chicken before, you know it’s never going to be as good as when it first came out of the pan. But that won’t stop you from devouring it the next day, am I right? Well, same-same with this chicken parmesan. While the breading on the chicken will lose its crispiness when refrigerated, it will still be super delicious for days.
- To store in the refrigerator: Let the baked chicken parm cool completely before storing in an airtight container. Store in the fridge for 3–4 days.
- To freeze: Let the baked chicken parm cool completely before wrapping each piece of chicken in plastic wrap and/or aluminum foil to prevent freezer burn. Place the wrapped chicken in a freezer-safe bag or container and freeze for up to 3 months. When ready to use, thaw in the fridge overnight for best results.
- To reheat: Preheat the oven to 375°F (190°C). Place the chicken on a baking sheet lined with foil, then bake for about 15–20 minutes, or until heated through.
More Delicious Italian Recipes To Try
Let Me Know Your Thoughts
If you gave this recipe a try, I would love to hear how it worked out for you. Share your thoughts in the comment section below or feel free to ask me anything — I always enjoy chatting with you.
Don’t forget to leave a star rating, too!~Sandra x
Baked Chicken Parmesan
Ingredients
- 1 tablespoon olive oil
- 1 1/2 cups panko breadcrumbs
- 3 boneless skinless chicken breast
- kosher salt and freshly ground black pepper, to taste
- 1/2 cup flour, plus 1 tablespoon
- 2 large eggs
- 3/4 cup grated parmesan cheese, divided
- 1 teaspoon Italian seasoning
- 1 teaspoon garlic powder
- 2 cups marinara sauce, (use homemade or store-bought)
- 1/2 cup grated low moisture mozzarella
- 1 small ball fresh mozzarella, torn into small pieces
- avocado oil spray (optional)
- 2 tablespoons chopped fresh basil, for serving
Instructions
- If making a homemade sauce, make it now so it gently cooks while you prepare everything else. If using sauce from a jar, heat it over low heat until just warm.
- Preheat oven to 425ºF. Fit a large sheet pan with a wire rack and set aside. TIP: Lightly grease the wire rack to ensure the breaded chicken doesn't stick.
- Heat the olive oil in a small skillet over medium-low heat. Stir in the breadcrumbs and toss to coat. Cook, stirring constantly, until most crumbs have turned a deep brown color, 3-4 minutes. Quickly transfer the crumbs to a plate or container to prevent them from continuing to darken from the residual heat of the pan. Set aside to cool slightly.
- Use a sharp knife to slice each chicken breast in half lengthwise to create two thin fillets. Place the chicken breasts between two pieces of plastic wrap on a cutting board, and gently pound the thicker end of the chicken cutlet with a rolling pin or smooth side of a meat mallet to make it a some-what uniform thickness – chicken thickness should be just under 1/2-inch. Transfer to a sheet pan or large platter and season with salt and pepper on both sides. (Seasoning the chicken at this point will help draw out some moisture which helps with dredging process.) Set aside.
- You will need three large shallow bowls for your dredging station. In one bowl, place the 1/2 cup of flour. In another bowl, whisk the eggs with a pinch of salt and pepper, 2 Tbsp. water and remaining 1 tablespoon flour. (Adding a bit of flour to the eggs makes them more gluey.) In another bowl, combine the toasted panko with 1/2 cup parmesan, Italian seasoning, garlic powder and ½ tsp. salt.
- Working with 1 piece of chicken at a time, lightly coat both sides in the flour mixture shaking off any excess, then dip in the eggs, turning once to coat both sides. Lastly, dredge the cutlet in the panko mixture, gently pressing the breadcrumbs into the chicken so they stick. Place on the prepared baking sheet and continue this process until all the cutlets are breaded.
- Bake the chicken for bake 20 to 25 minutes, until browned and cooked through (internal temperature should read 165ºF.).
- Remove baking sheet from the oven. Switch the oven to broil on high. Spoon 2-3 tablespoons of marinara sauce over each cutlet, leaving some of the edges uncovered (save any remaining marinara for tossing with pasta or for another use). Top each chicken breast with the grated mozzarella, a sprinkle of the remaining parmesan, and the fresh mozzarella pieces. Broil on the upper rack until the cheeses on top are melted and bubbly, 2 to 3 minutes.
- Garnish the chicken parm with the chopped basil and serve immediately!
Notes
- Choose the Right Sauce Use a marinara sauce that is not overly watery to prevent the breading from becoming soggy.
- Elevate the chicken. Use a wire rack on a baking sheet to allow air to circulate under the chicken, preventing the bottom from becoming soggy.
- Spray the breaded chicken. I don’t always do this but lightly spritzing the breaded chicken with cooking spray will help create a more golden, crispy crust. I use this avocado oil spray.
- Don’t over-bake. Check the internal temperature of the chicken with a meat thermometer. It’s done when it reaches 165°F to avoid drying it out.
- Don’t smother the chicken parm with too much sauce. It is crucial to leave at least 1-inch of the edges without sauce or cheese. This ensures you still have crunchy chicken throughout. I also don’t add any sauce under the chicken when serving it. If you’d like more sauce, serve extra sauce on the side for dipping.

Ilmu Komunikasi
Are there more information regarding about this topic for us to research for? Thank you