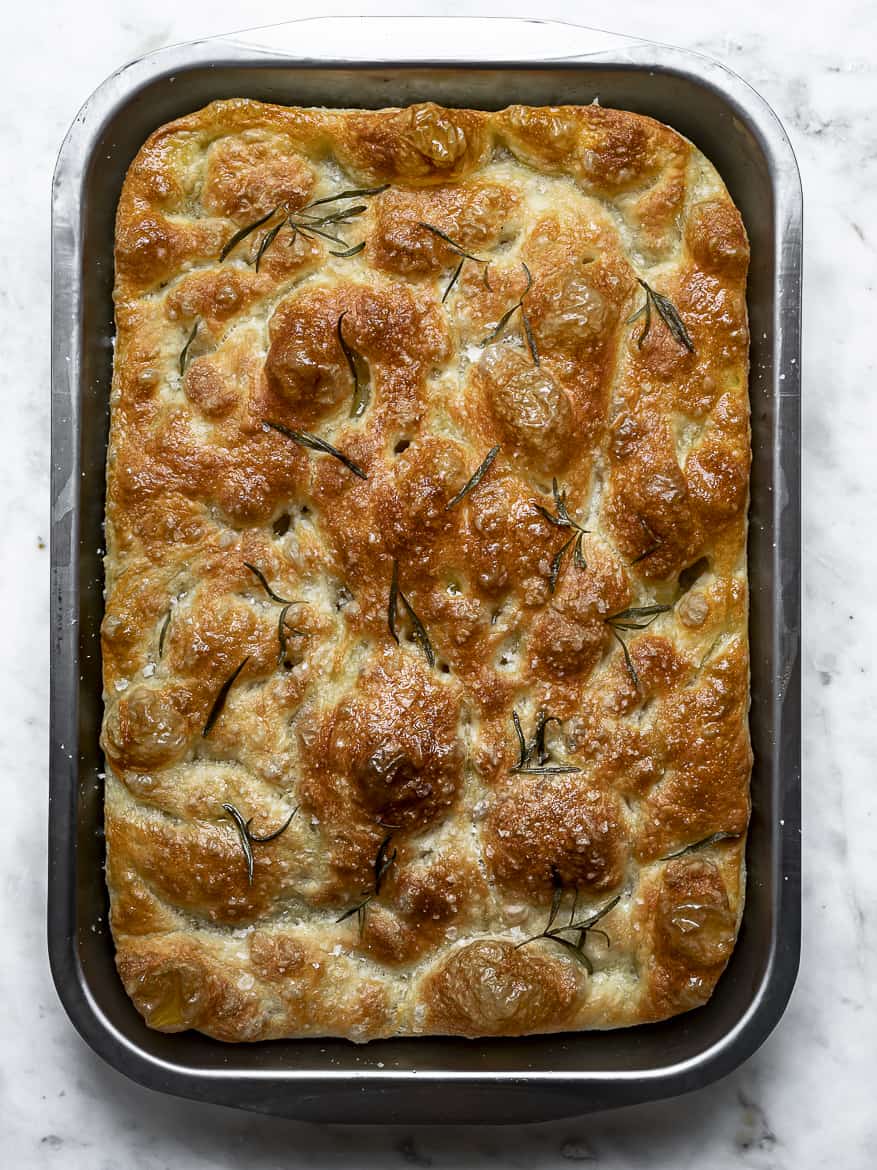
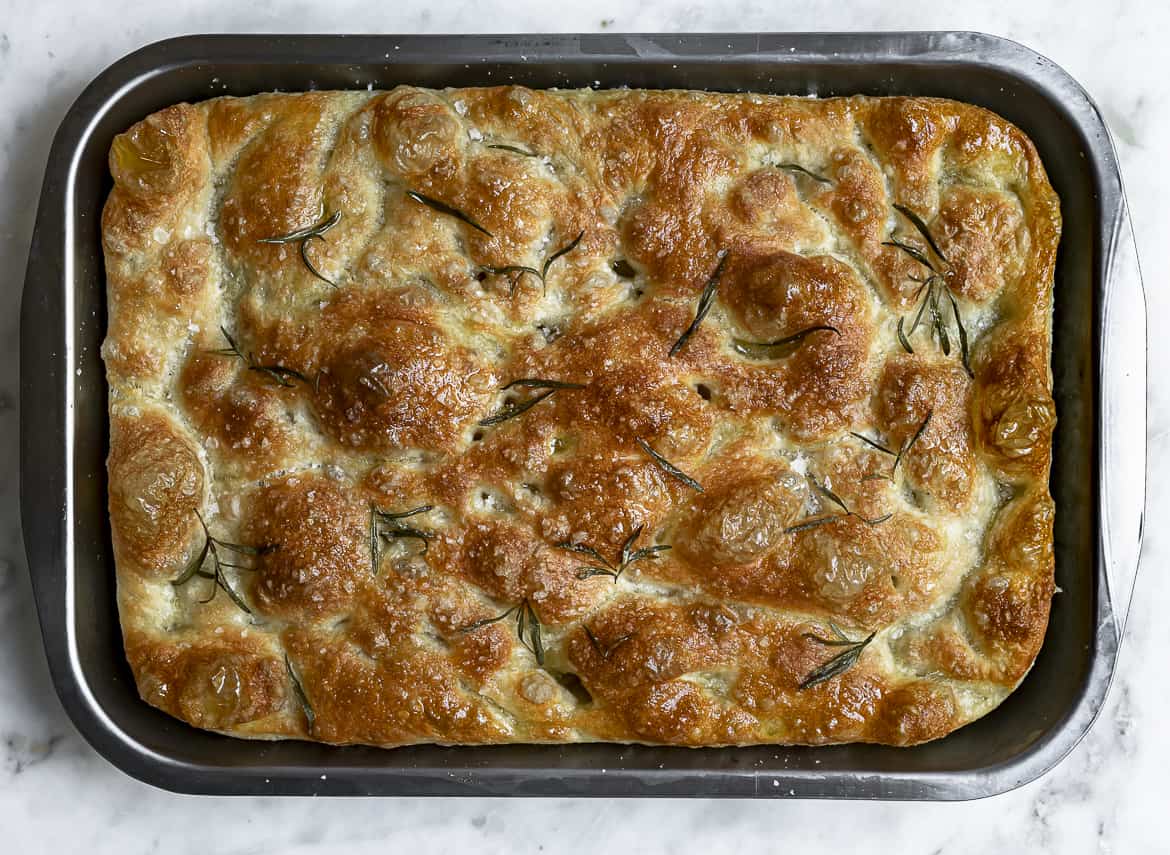
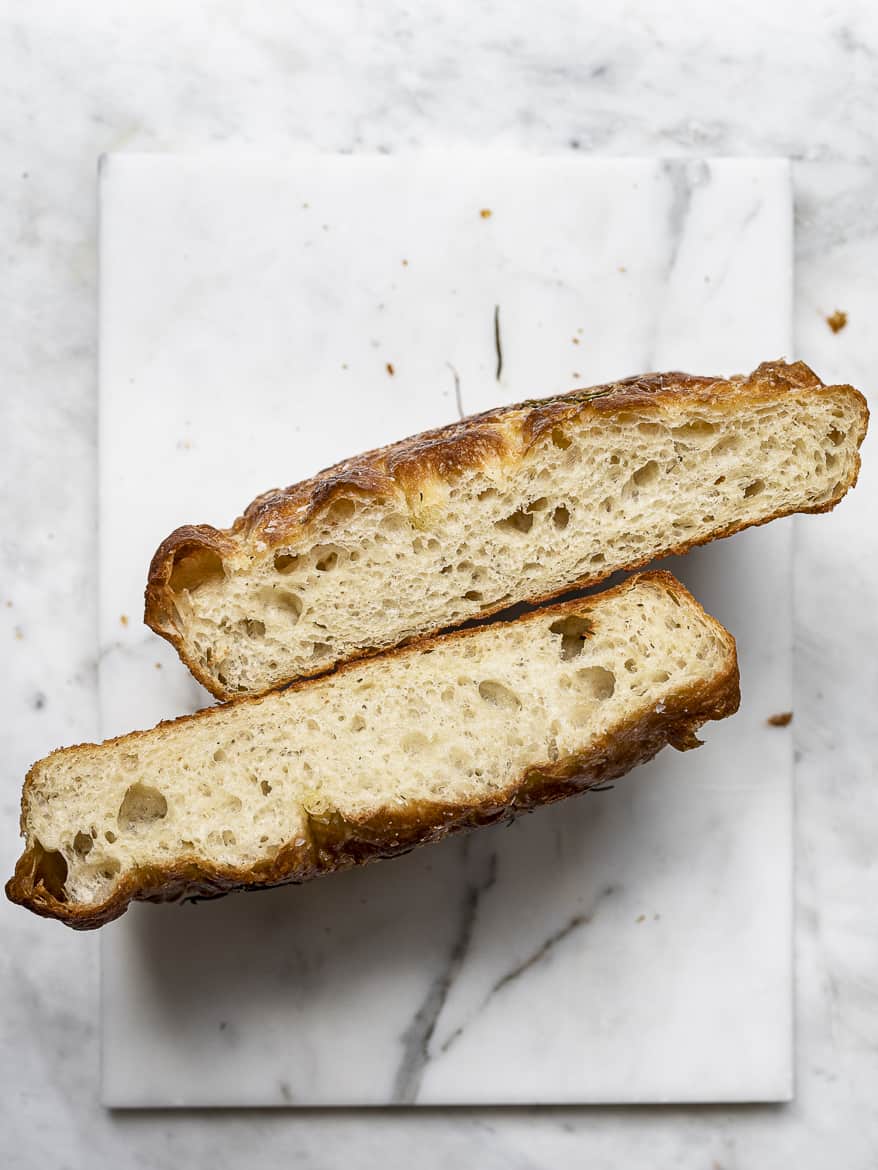
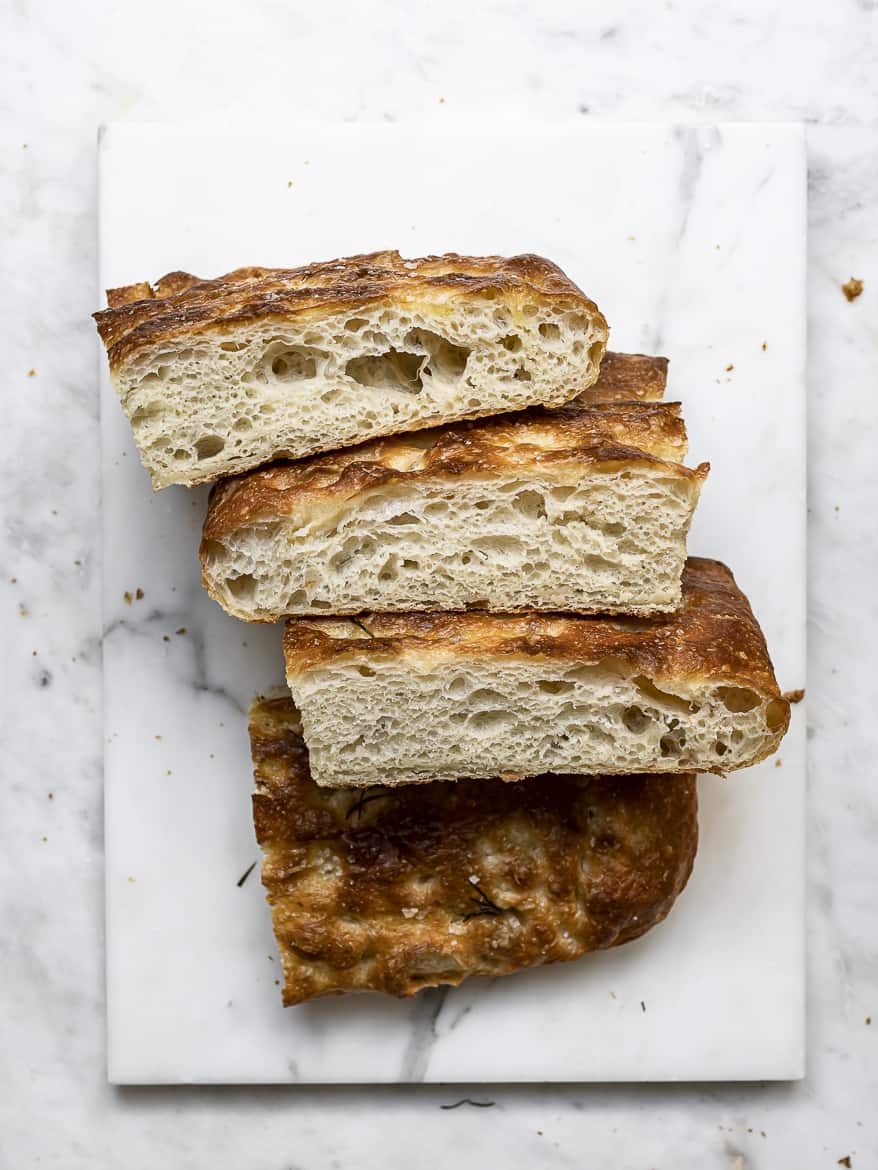
This Easy No-Knead Focaccia is impressively light and airy with a tender, chewy crumb thanks to an overnight rest in the refrigerator. With its classic crackly, crunchy exterior and tender texture on the interior, it will be hard not to devour the whole thing.
If you’ve been looking for a fool-proof, easy focaccia recipe, this is the one for you. Even if, like me, you don’t think you’re much of a baker, or baking isn’t really your thing, baking this focaccia from scratch is a breeze. There are many different styles of focaccia and I have yet to find one I don’t like (if made well, that is). This thick-crusted focaccia with its light and soft interior, woody aroma of rosemary, lots of good olive oil, and flaky salt to finish, feels very Italian and is my absolute favourite. Requiring no kneading, no stand mixer, and no special flour, it is completely unintimidating and doable
About No-Knead Focaccia
The dough for this easy no-knead focaccia is pretty basic – flour, yeast, salt, and water. A good amount of extra-virgin olive prevents it from sticking, while also adding fantastic flavour. The process here is also very straight forward; mix, proof, shape, and bake. The exquisite crumb and flavour of this focaccia, and what makes it truly epic, is achieved by refrigerating a very highly hydrated dough for 12 to 24 hours. This cold fermentation process slows down the activity of the yeast, without completely stopping it. The slow rise will fill the dough with gas cells which give structure and gorgeous flavour to the bread. Simply put, chilling the dough is the easiest way to improve both the taste and texture of bread.
Once the dough has proofed in the refrigerator, it then rests on the counter for a second rise where it will spread out in the pan beautifully. Right before baking, dimpling the dough creates the characteristic crevices of a focaccia where the olive oil pools. So simple, so divine
Inspiration For This Easy No-Knead Focacci
A blog I have loved for years is The Wednesday chef by Luisa Weiss. Her writing is transportive whether its about food or family life. Years ago, when she posted a no-knead, overnight Focaccia recipe from Saltie: A Cookbook, I not only ran to make it, but also ordered the cookbook on the spot. It’s my little treasure.
Like all other no-knead breads, Saltie’s recipe proved to be ridiculously easy to throw together and simply perfect every time. It does however call for a rather indecent amount of flour, 6 1/4 cups to be exact. Focaccia is really best enjoyed the same day you make it, so this recipe is great if you have a large family, or you are feeding a crowd. Given the pandemic circumstances, neither applies to me right now so I have scaled it down. Just a bit
The concept of the no-knead, overnight bread is nothing new, of course, with all the credit going to this Jim Lahey recipe. You could say it is one of the most popular recipes of all times. It had us all investing in Dutch Ovens, if we didn’t already own one, and many recipes and variations of it now abound.
The focaccia recipe I am sharing here, is an adaptation of many tutorials combined. These two in particular, have been very helpful. Many focaccia’s later, I have settled on a ratio which makes a great focaccia for snacking, or for serving alongside any dinner. Beautiful for your holiday table, too
Reasons To Love This Easy No-Knead Focaccia Recipe
- Minimal effort and time to put together. 5 minutes to throw all the ingredients in a bowl is all it takes to make this dough. From there, the cold fridge, and time, will do all the work for you.
- If you love bread that is airy and flavourful, with complex textures and a porous crumb on the inside, then you must give this recipe a try.
- Bakes quickly; 20-25 minutes is all it takes to bake this focaccia.
- If you love Italian-style slab sandwiches, you will love using this focaccia as your bread.
- Leftovers make incredibly good croutons for salads, panzanellas, or stuffings.
- Rave reviews will abound. Whenever I serve this focaccia everyone goes on (and on) about how good it, as if it was the first time I made it.
Instant vs Active Dry Yeast
You can use either one for this easy no-knead focaccia recipe. If you are sure that your instant yeast is not old, you can mix it right into the bowl with the rest of the dry ingredients. Active dry yeast will need to be proofed in a bowl with water and a pinch of sugar before mixing it with the flour. For the sake of simplicity, this recipe will focus only on using instant yeast.
Best Flour To Make Focaccia
Bread flour, if you can find it, is really ideal to make any bread. The higher protein content in bread flour will give strength to the dough which yields beautiful yeasted bread. That said, I almost exclusively use all-purpose flour to make this focaccia with fantastic results
How To Make No-Knead Focaccia
It is important to note that this is not a dough that is conducive to handling. The dough is very wet and sticky which is why there is very minimal interaction with the dough. The wetter the dough the better your focaccia will be as this is what contributes to an open flavourful crumb that has the perfect texture.
Here are the basic steps for how to make this easy no-knead focaccia:
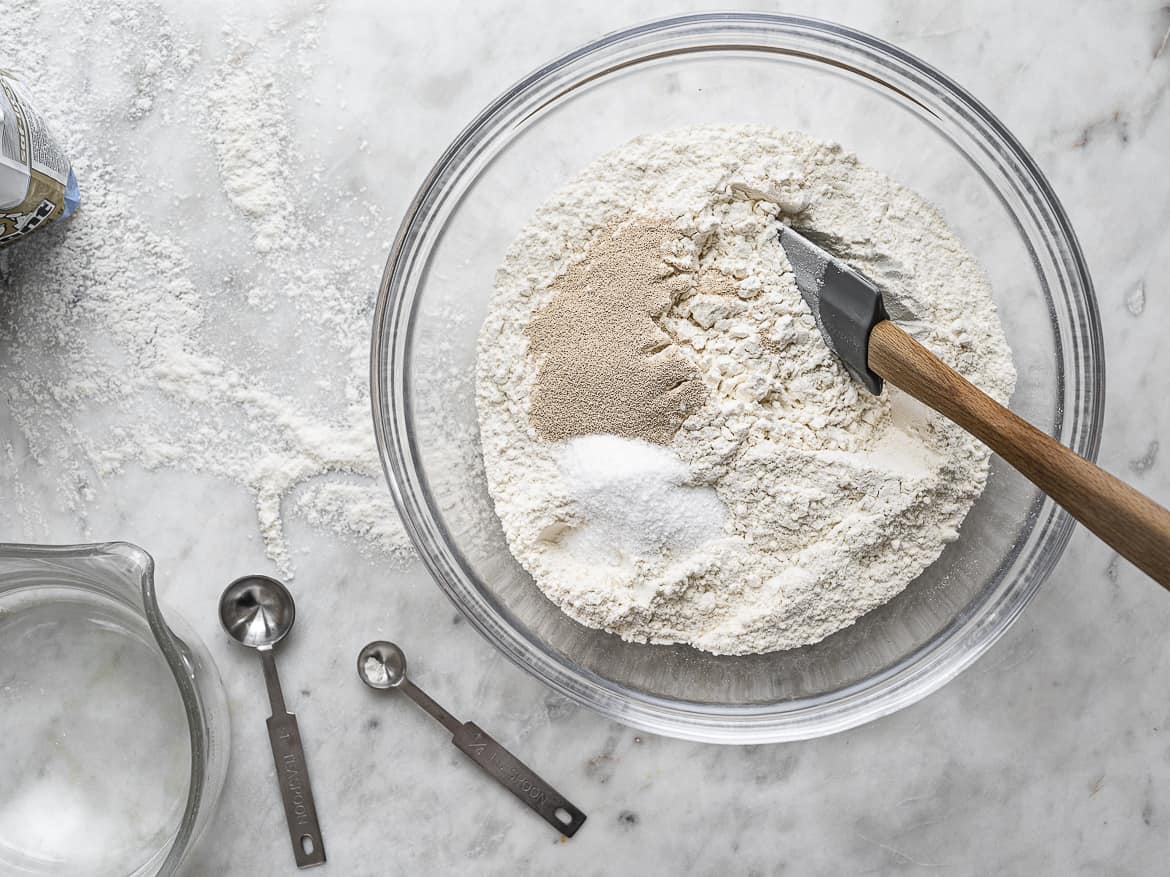
- Mix the dough. In a large bowl, whisk together the dry ingredients; flour, salt, and instant yeast.
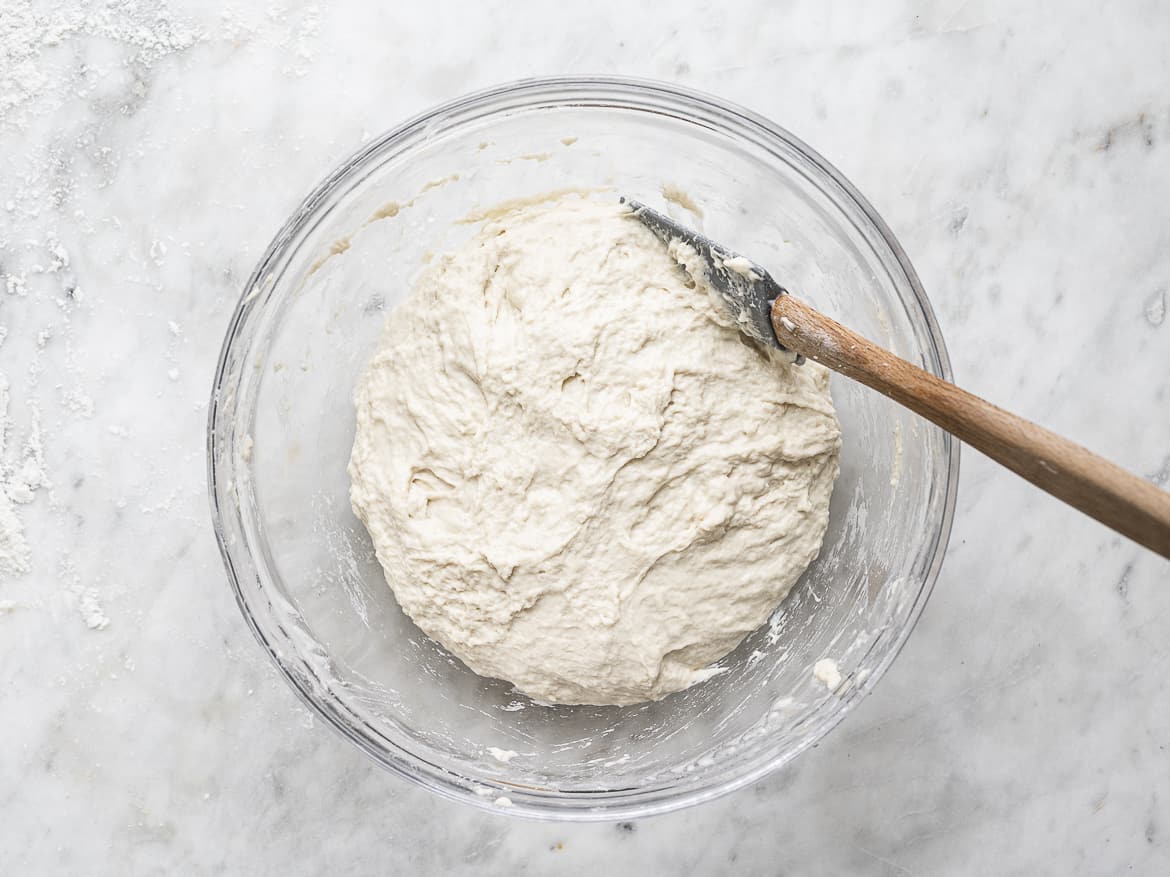
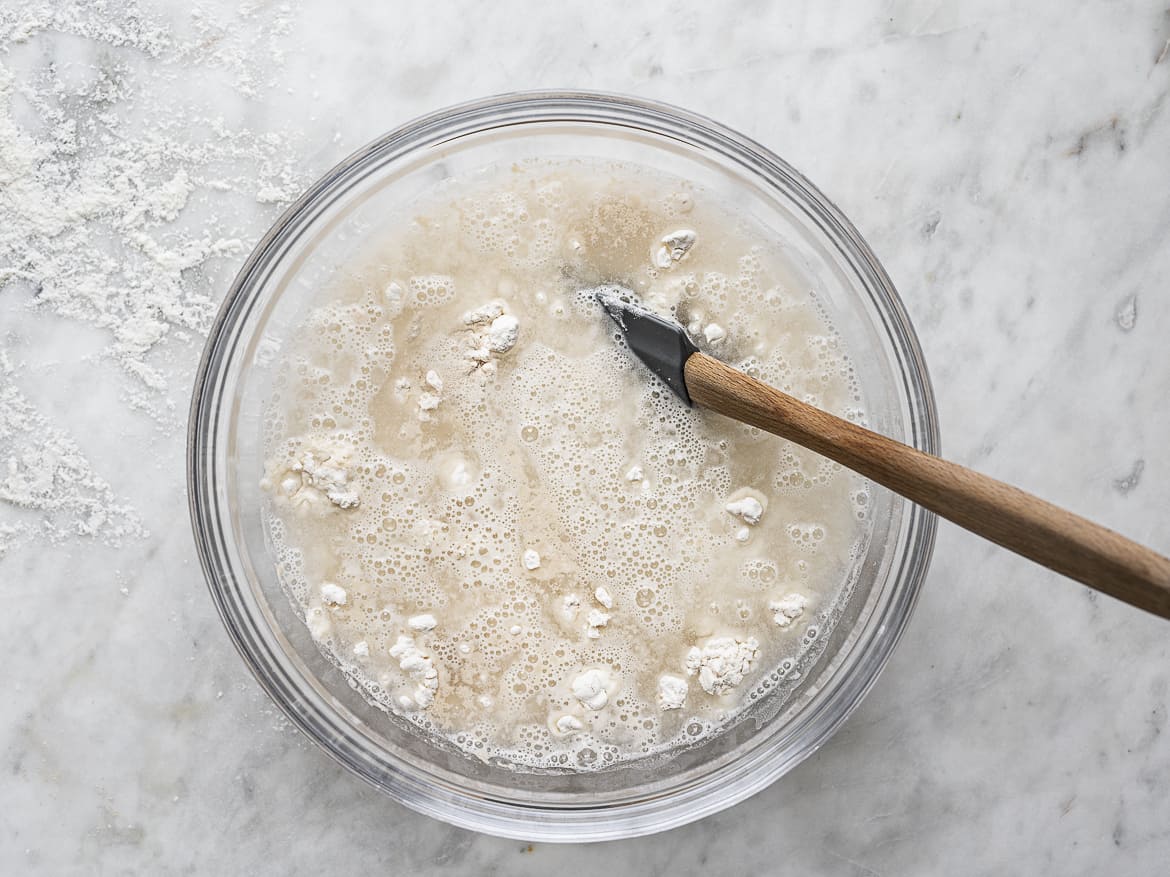
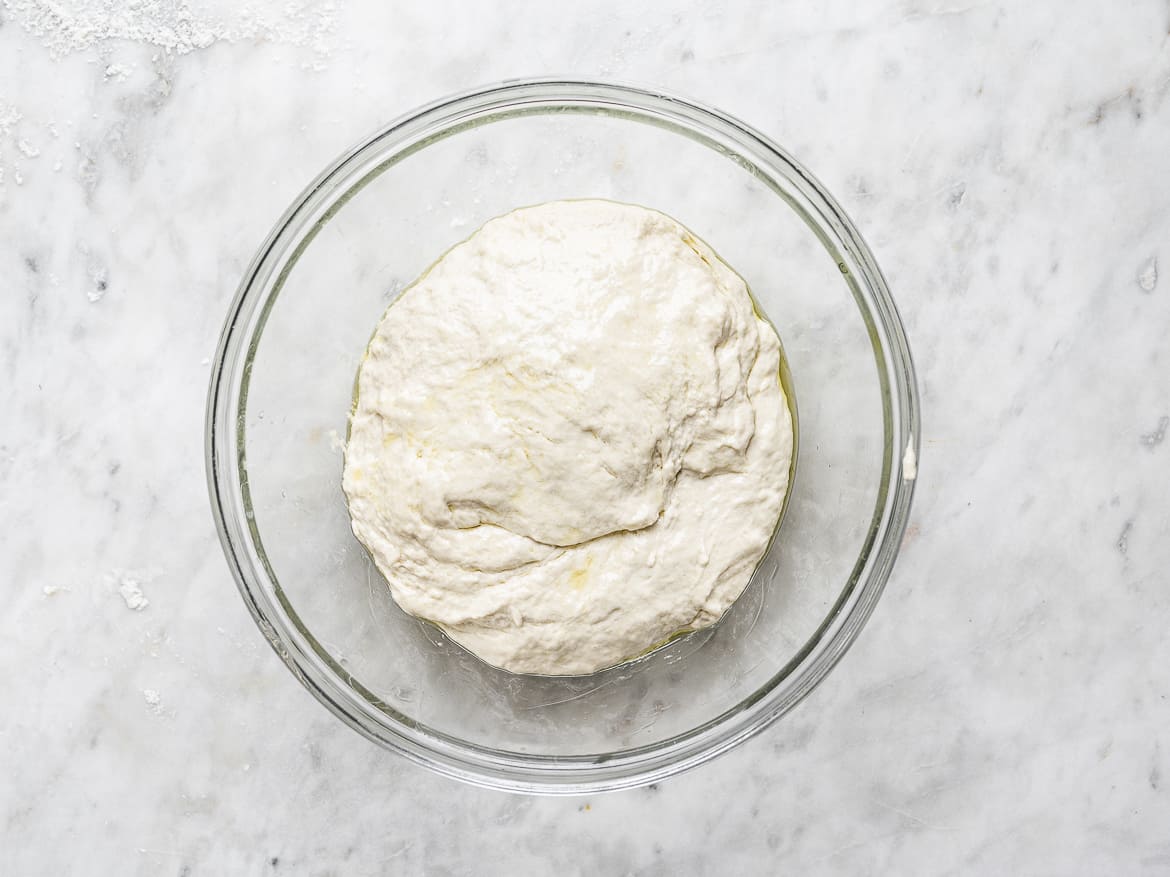
- Add lukewarm water and mix. Once you add the water, mix until well combined and no flour streaks remain. The dough will look quite wet and shaggy and will be very sticky. Transfer to a well-oiled bowl (use the largest one you have).
- Let the dough rise. Cover the bowl tightly with plastic wrap and transfer to the fridge. Leave it there undisturbed to rise for 12-18 hours. You can leave it as long as 48 hours. More than that and the dough may weaken.
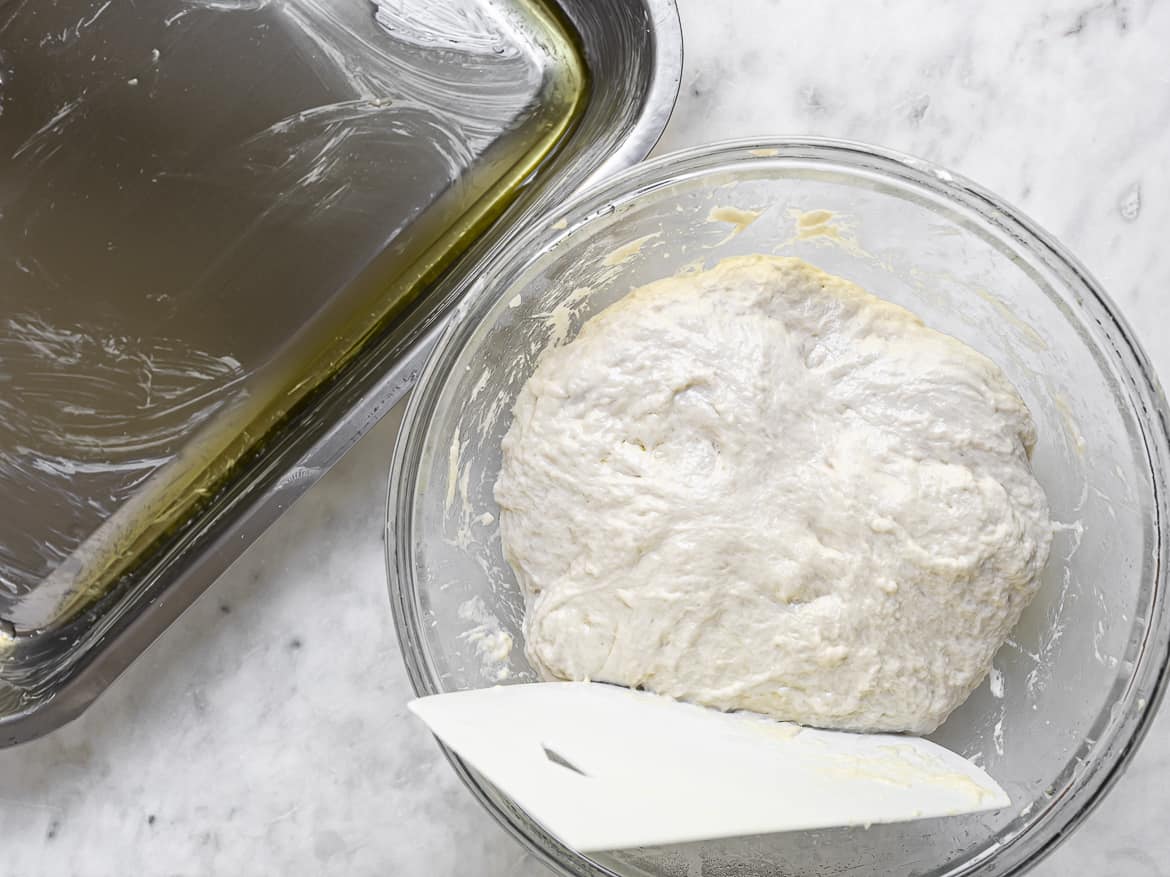
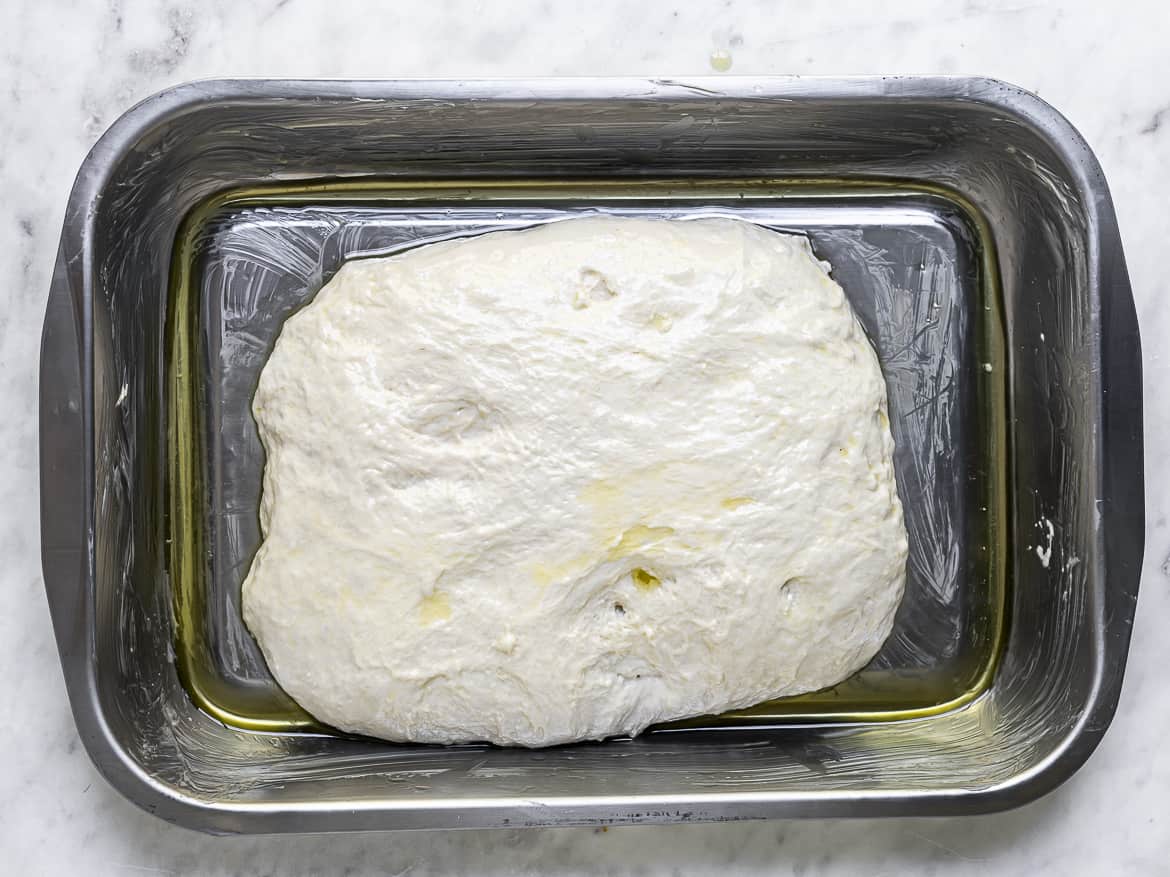
- Prepare pan. Line a large baking pan 13 x 9, or baking sheet, with parchment paper. Note: if you generously butter the pan, like I did in the pan shown below, you don’t need to line it with parchment. Pour in 1 tablespoon olive oil in the bottom of the pan. Place the dough in the oil, folding it gently over itself a few times to create a rough rectangular shape. Make sure the top of the dough is lightly oiled but don’t handle it too much, a few folds is all it takes.
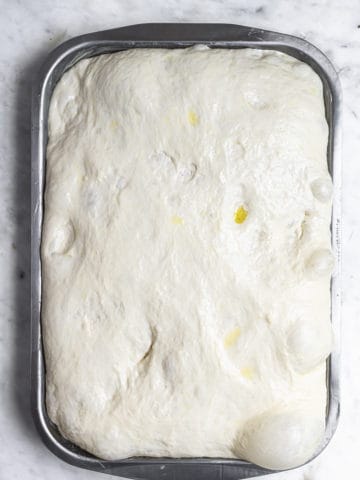
- Leave the dough, uncovered, in the warmest spot of your kitchen to double in size, about 2-4 hours. After 2-4 hours the dough should have risen and spread enough to reach all the corners of the pan as shown in the photo below.
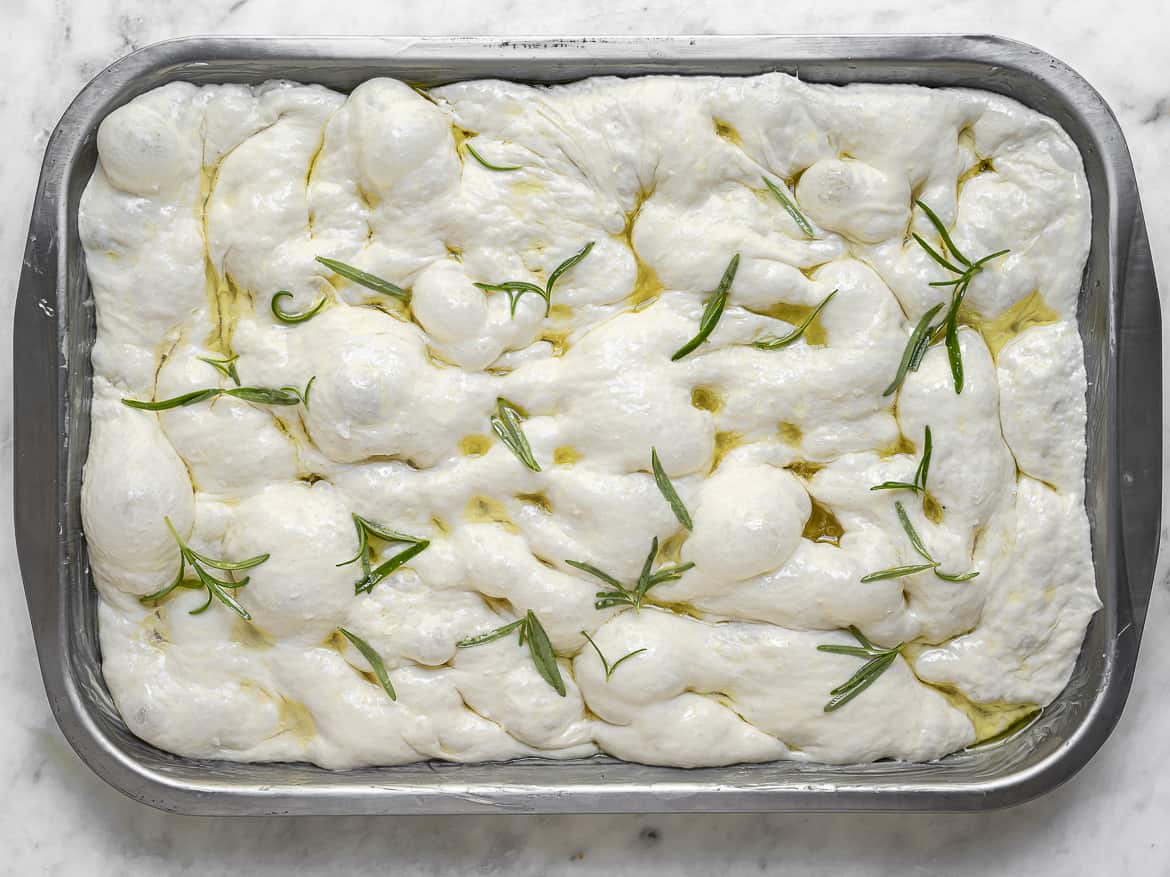
- Preheat the oven and bake. Preheat the oven to 450ºF. Once the oven is preheated, oil your hands, then use yours fingers to make dimples by pressing down into the dough. Don’t be shy here, you want to create lovely crevices all over the dough. Drizzle the top of the dough with another bit of olive oil then sprinkle with rosemary leaves and flaky sea salt, such as Maldon.
- Bake. Immediately transfer the pan to the oven and bake for about 25 minutes or until the focaccia looks a deep-golden colour all around.
- Serve. Let the focaccia rest in the pan about 5 minutes, then remove and cool on a rack for at least 15 minutes. Slice, and enjoy!
Tips to Make The Best Focaccia
- The rise in this dough is big. Proof in your largest mixing bowl!
- Use parchment paper – this is a very wet and sticky dough. If you aren’t using a non-stick pan, you will need to either generously butter AND oil the pan, or line it with parchment paper
- Make sure the yeast is not old – There is nothing worse than wasting a huge amount of flour because the dough didn’t rise. It has happened to me and it’s incredibly disappointing. If you at all suspect your instant yeast might be past its prime, test it before adding it to the flour. Simply place it in a bowl with lukewarm water and a pinch of sugar and wait to see if any action (bubbling) occurs. If nothing happens, you need to buy new yeast.
- Use a digital scale to measure the flour. This is very helpful for flawless baking.
- Use a large pan. This recipe makes a good-sized focaccia so you will need a large baking pan to bake it. I like to use a 9×13 baking pan that is 2-inches deep which makes a thicker focaccia that is excellent for slab sandwiches. A 13×18-inch rimmed baking sheet also works and and makes a thinner focaccia great for slicing and serving. If your pans are not large enough, you could use two 9-inch cake pans. Just be sure to line those also with parchment paper.
- Use the oven for the second rise. If like me, you have a cold kitchen during the winter months, place the pan in the oven with the light on for its second rise. The dough will still need 2-4 hours to rise but I find on my cold counter it doesn’t ever rise quite as much no matter how long I leave it. Just make sure you have taken the pan out of the oven before you preheat it!!
Variations
If you’re new to bread making, stick to simple toppings or add-ins when making focaccia. Once you’re comfortable with the recipe, and the baking time, feel free to add any toppings you like. I love adding sliced red onions, other herbs, minced garlic, thinly sliced potato, olives, etc.
Likewise, if you want to experiment with other flours, introduce smaller amounts at a time.
Make A Slab Sandwich
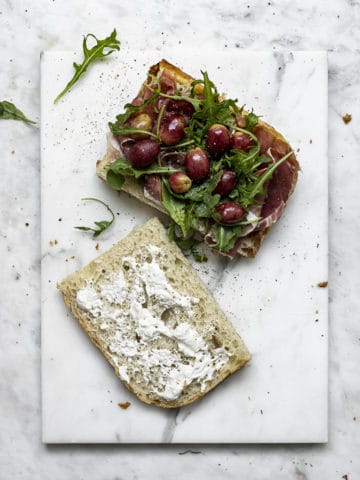
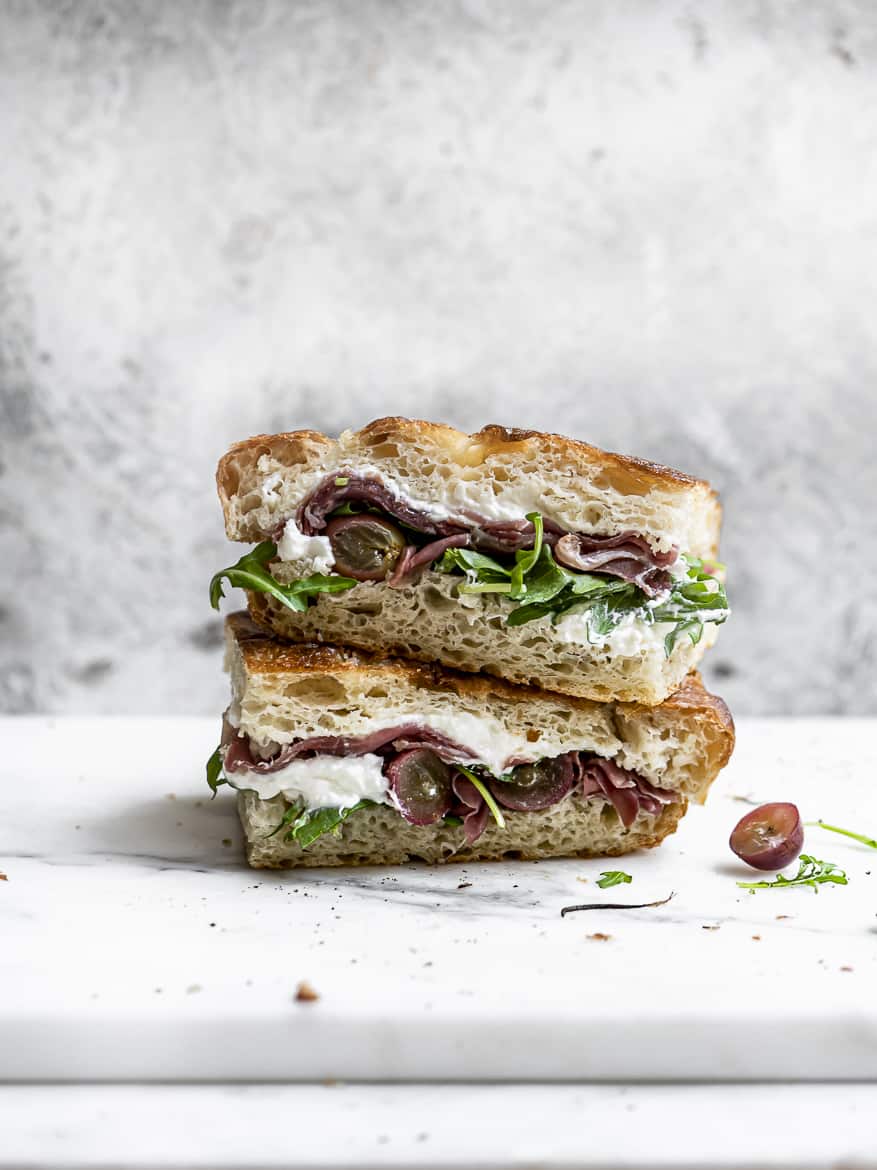
This focaccia recipe is excellent for making slab sandwiches. The combination shown in the photos below is one of our favourites.
Here is the quick how to: Place 1-2 cups red grapes on a small baking sheet lined with parchment. Drizzle and rub with a little olive oi. Sprinkle with a pinch of salt and pepper and broil, turning a few times, until grapes have started to slightly char, about 5 minutes. Spread focaccia slices with burrata cheese and top with arugula, prosciutto slices, and broiled grapes. Heaven.
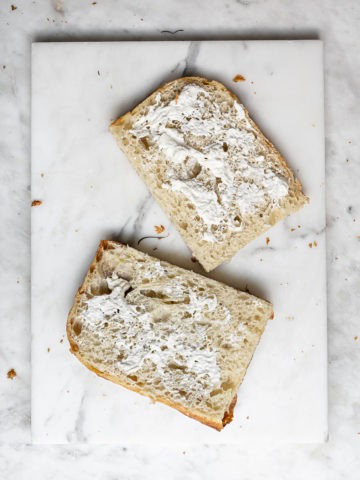
For a holiday meal, this focaccia is excellent to prepare a few days ahead. It is less hands-on than rolling buns, and bonus, the quick bake time will not hog the oven when you need it most. Keep this recipe in your back pocket, it’s a good one.
If you make this Overnight No Knead Focaccia recipe, please let us know by leaving a review and rating below. We love and appreciate all your feedback!
Easy No Knead Focaccia Recipe
Ingredients
- 5 cups (625 g) all-purpose flour
- 2 1/4 teaspoons kosher salt
- 2 1/4 teaspoons instant yeast (or one 8 gram envelope)
- 2 1/2 cups lukewarm water
- 3-4 tablespoons extra-virgin olive oil divided
- butter for greasing the pan
- 2 tablespoons fresh rosemary leaves optional
- flaky sea salt such as Maldon
Instructions
- Whisk together the flour, yeast and salt in a large mixing bowl.
- Add the water and mix vigorously to combine until no dry straks of flour remain. The dough will be very sticky and shaggy. Drizzle 1 tablespoon olive oil into another large mixing bowl (here use the largest one you own). Scrape the dough into the bowl, then turn gently to coat with the oil. Cover tightly and place in the refrigerator for 12 - 24 hours. The dough should have doubled in size and look very bubbly when you take it out of the fridge.
- Lightly grease the bottom and sides of a 9x13, 2-inch deep baking pan with a little butter and line it with parchment paper. If your pan is non-stick, you don't need the parchment paper but grease it a litle more generously. You can also use a 13x18 greased, and parchemnet lined, rimmed baking sheet. Pour in 1 tablespoons olive oil, spreading it evenly over the base of the pan. Use 2 tasblespoons oil if not using parchment paper.
- Working from the outer edges, scrape the dough with your hands, or a bench scraper, upwards and over towards the centre. Turn the bowl slightly, then repeat the lift and folding action a few more times. The idea here is to deflate the dough while roughly shaping it into a ball. Dump the dough into your prapred pan then fold it over a few times to coat with oil and to form a rough rectangular shape. Place uncovered in a dry, warm spot to rise for 2-4 hours. My kitchen is not very warm and takes about 3 hours to double in size and fill the pan.
- Set a rack in the middle of the oven and preheat to 450ºF.
- Rub your hands with olive oil and dimple the dough with your fingertips by pressing down and creating deep crevices all around. If using a large baking sheet, you may have to stretch the dough gently towards the corners in order to fill the pan. Pour 1 tablespoon olive oil over the entire surface and scatter with rosemary leaves and flaky salt. Bake for 25-30 minutes. If the top darkens too quickly, cover with foil for the last 5-10 minutes of the cooking time.
- Transfer to a wire rack to cool slightly before slicing and serving.
Notes
- The rise in this dough is big. Proof in your largest mixing bowl!
- Use parchment paper - this is a very wet and sticky dough. If you aren't using a non-stick pan, you will need to either generously butter AND oil the pan, or line it with parchment paper
- Make sure the yeast is not old - There is nothing worse than wasting a huge amount of flour because the dough didn't rise. It has happened to me and it's incredibly disappointing. If you at all suspect your instant yeast might be past its prime, test it before adding it to the flour. Simply place it in a bowl with lukewarm water and a pinch of sugar and wait to see if any action (bubbling) occurs. If nothing happens, you need to buy new yeast.
- Use a digital scale to measure the flour. This is very helpful for flawless baking.
- Use a large pan. This recipe makes a good-sized focaccia so you will need a large baking pan to bake it. I like to use a 9x13 baking pan that is 2-inches deep which makes a thicker focaccia that is excellent for slab sandwiches. A 13x18-inch rimmed baking sheet also works and and makes a thinner focaccia great for slicing and serving. If your pans are not large enough, you could use two 9-inch cake pans. Just be sure to line those also with parchment paper.
- Use the oven for the second rise. If like me, you have a cold kitchen during the winter months, place the pan in the oven with the light on for its second rise. The dough will still need 2-4 hours to rise but I find on my cold counter it doesn't ever rise quite as much no matter how long I leave it. Just make sure you have taken the pan out of the oven before you preheat it!!



Irene
Hi, thank you so much for the recipe, this looks incredible and insanely easy to make, so much that I already made the dough and placed it in the fridge. I have an important question though: I would like to make focaccia art and I will only have time to decorate it the day before I plan to bake it. If it’s possible to do so, would it be better to take the dough out of the fridge, transfer it to the baking tray and decorate it straight away with the toppings without letting it rise to then transfer it back to the fridge for another day or so and go ahead ith the 3-4 hours proofing on the following day, before baking? Or would it be better to let it rise like in the recipe before decorating it to then put it back in the fridge and maybe simply let it come at room temp or 1 hour or so before baking, if not baking straight away? Thank you so so much for your time, it would be so appreciated if you could help! And keep up the amazing work of course. 🙂
Sandra Valvassori
Hi Irene, sorry I didn’t get back to you sooner. Unfortunately I haven’t tried decorating the focaccia a day before baking it so I can’t advise accurately. My sense is that the focaccia cannot be decorated until it has risen and spread out properly in the tray. Once the dough has risen, I believe it should be baked right away as it will likely deflate if you put it back in the fridge. I hope you can still make it work for you. Let us know how it went!
Sienna
First time making focaccia and it was nearly all gone the day I baked it! I added olives and rosemary, and made it according to 8, not 10 servings. Thanks for the great recipe!
Sandra Valvassori
So happy to hear you enjoyed the focaccia! I love the idea of adding olives and will have to try it soon. Thank you for writing and sharing – really appreciate it 🙂
Pama Deolalikar
No sugar, no honey in this recipe? I am surprised. All other No knead focaccia recipes have sugar. Is it left out by mistake
Sandra Valvassori
Hi Pama, thank you so much for your question. No, there is no sugar or honey in this focaccia recipe. The sugar is usually there to activate the dry yeast but because we are using instant yeast, there is no need for sugar. Furthermore, a sweetener is often added to speed up the fermentation process but because this dough is going through a long, slow rise, we don’t need it. Lastly, during the long, cold fermentation the yeast has more time to break down the complex carbohydrates in the dough. This results in a more complex flavour and also contributes to browning, without the need for sugar. I hope this helps and that you give this focaccia a try — I think you’ll be pleasantly surprised at how delicious and easy it is.
Pama Deolalikar
Can I bake this focaccia in a cast iron pan? Or is the water content too high , for a cast iron pan? Thank you in advance
Sandra Valvassori
Sorry, Pama, I have never tried baking this focaccia in a cast iron skillet so I can’t say for sure if it will work. That said, I know many people have used a cast iron skillet successfully when making focaccia. If you give it a try, I recommend using a deep 12-inch skillet as this dough will rise a lot. Hope this helps and I’d love to hear out it turns out!