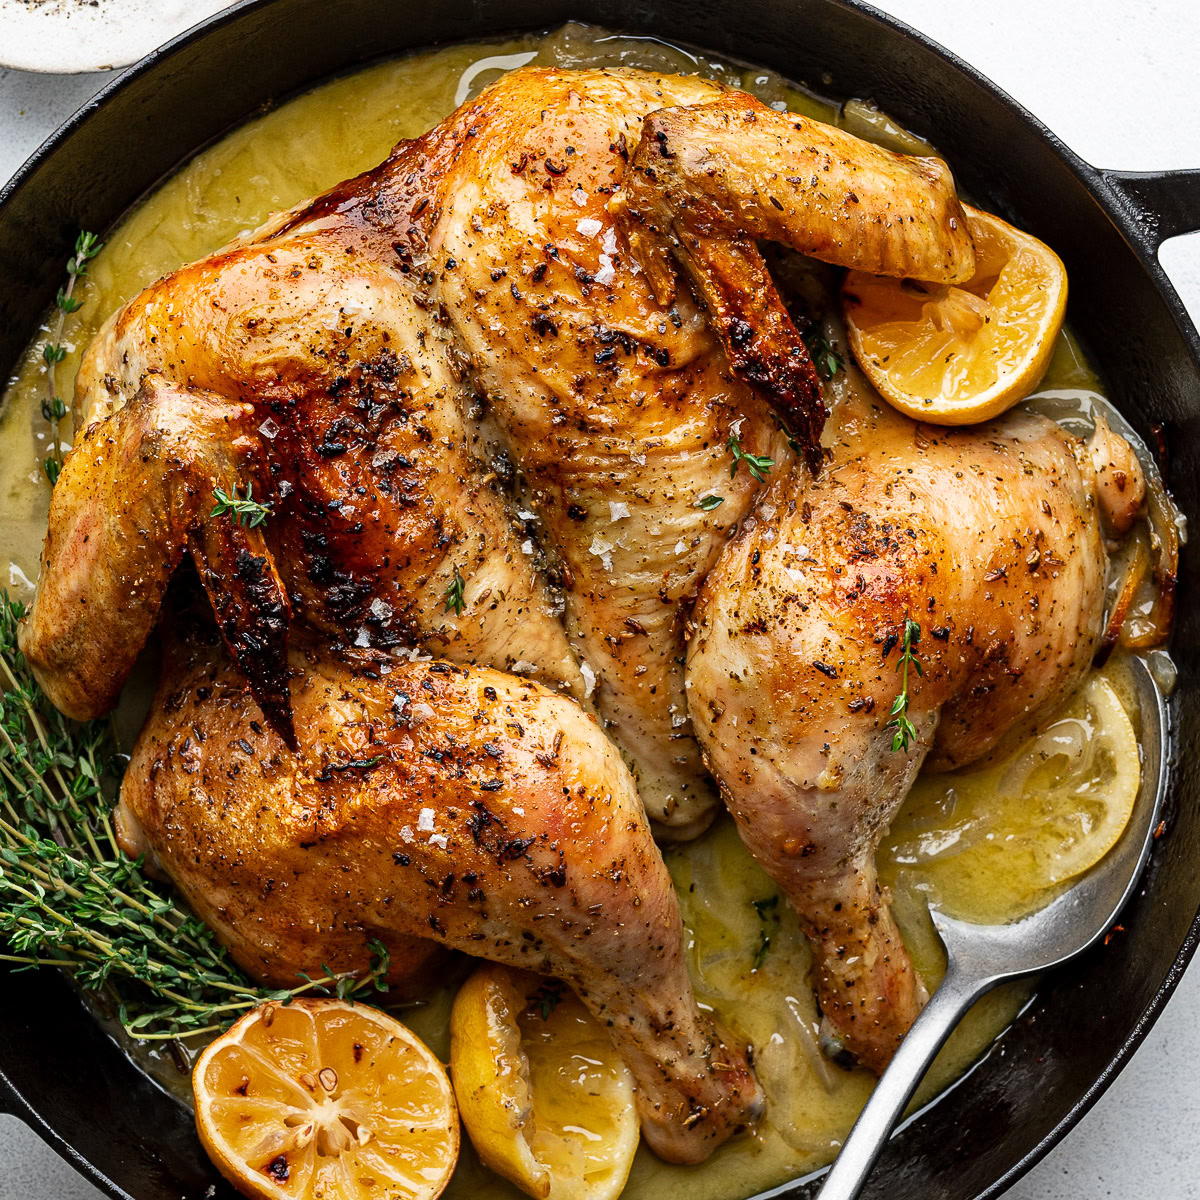
Ina Garten’s Skillet-Roasted Lemon Chicken is made with a minimal amount of prep and yields a succulent bird that is crisp-skinned and exceptionally tender. Roasted on a bed of aromatics and lemon slices, the chicken is infused with flavor while simultaneously creating a mouthwatering lemony sauce. Few of her dishes as beloved as this one.
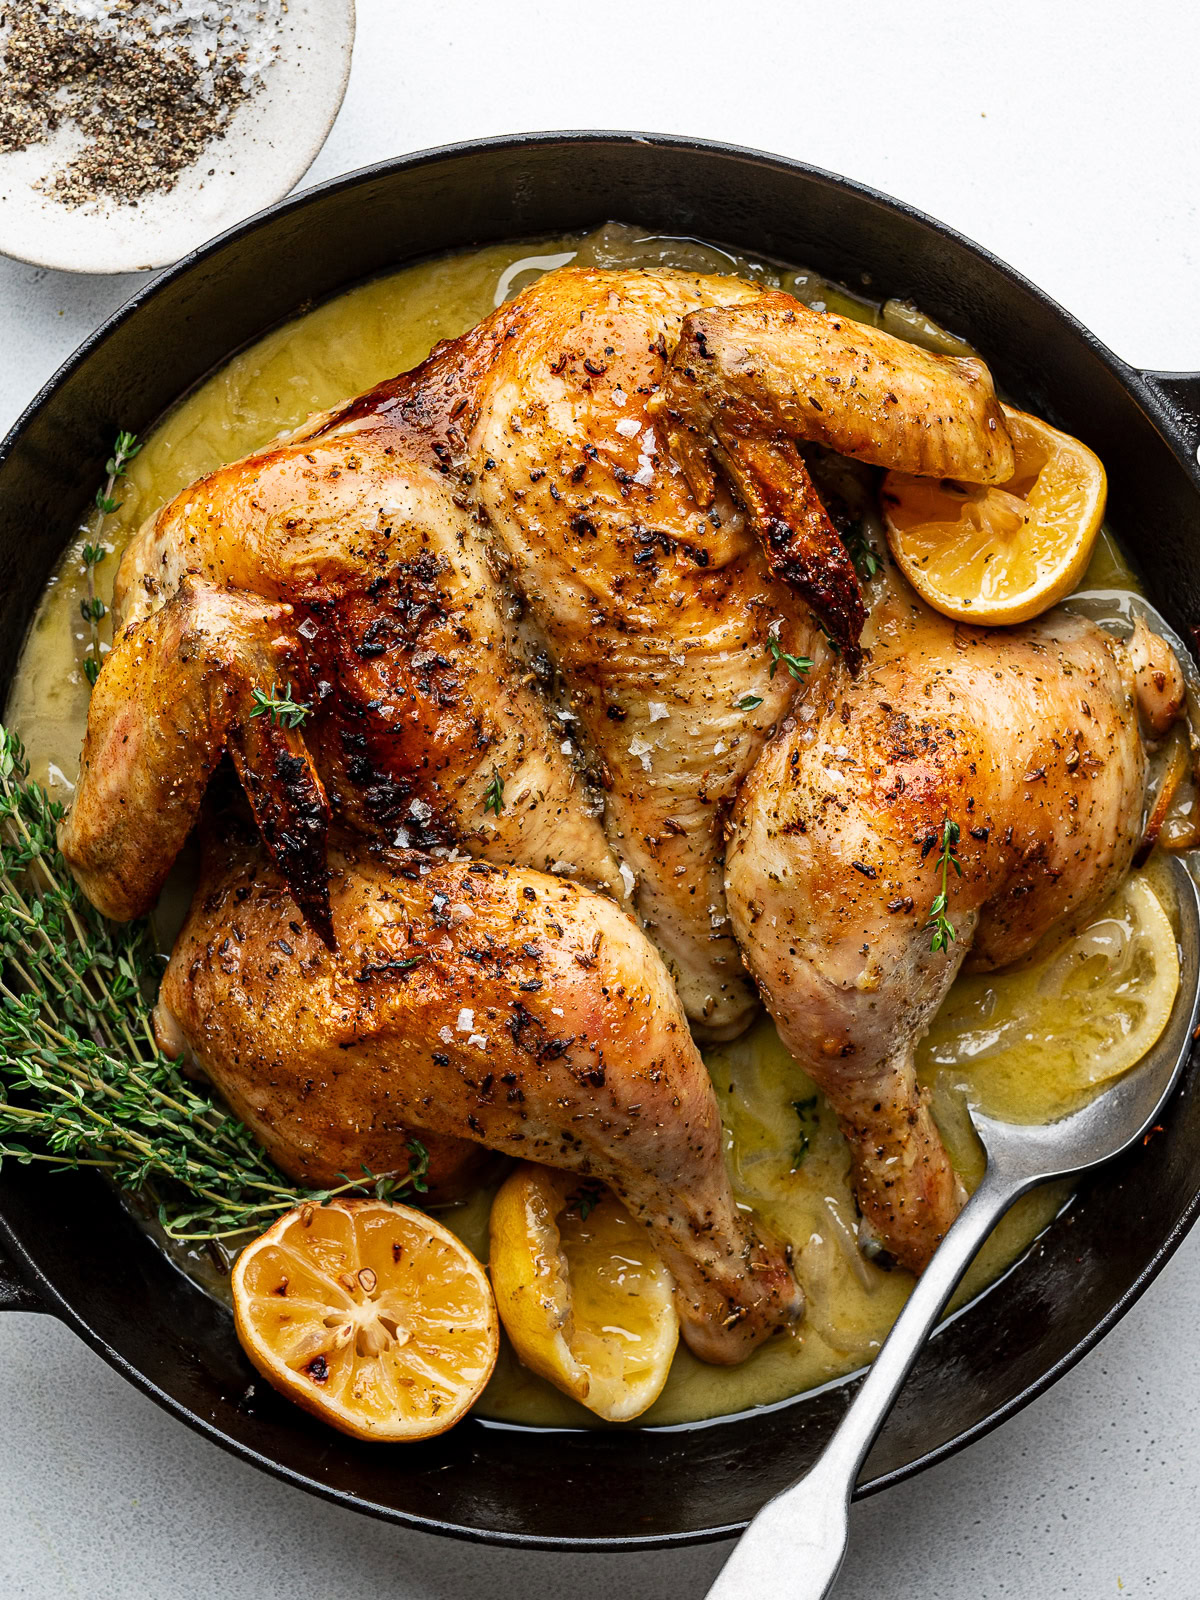
Like thousands of others, I fell in love with Ina Garten’s lemon skillet roasted chicken when I first made it years ago. It is infamous now, and there’s a good reason why: with simple, staple ingredients and a mere 15-ish minutes of prep you get an incredibly well-seasoned, juicy and fragrant chicken that literally melts in your mouth.
But let’s not forget the marvelous sauce. Onion, garlic, lemon juice and a splash of white wine combine with the chicken juices to create a pool of shmalzty-lemony sauce that is nothing short of a small miracle. It is plentiful, too, so you will definitely want to serve it with something that will soak up all the deliciousness.
- Why Spatchcock A Chicken?
- Key Ingredients And Notes
- Variations And Substitutions
- How To Spatchcock a Chicken
- How To Make Ina Garten’s Skillet Roasted Lemon Chicken
- To Cover Or Not To Cover The Chicken As It Rests
- How To Prevent A Bitter Sauce
- Sandra’s Tips
- Frequently Asked Questions
- Best Side Dishes To Serve With A Skillet Roast Chicken
- Make-Ahead, Leftovers, & Storage
- More Delicious Chicken Recipes To Try
- Ina Garten’s Skillet-Roasted Lemon Chicken
- Sandra’s Tips
If you haven’t made it before, now is the time to give this timeless recipe a try. It makes a fabulous dinner to serve to guests but is also doable on a weeknight.
Why Spatchcock A Chicken?
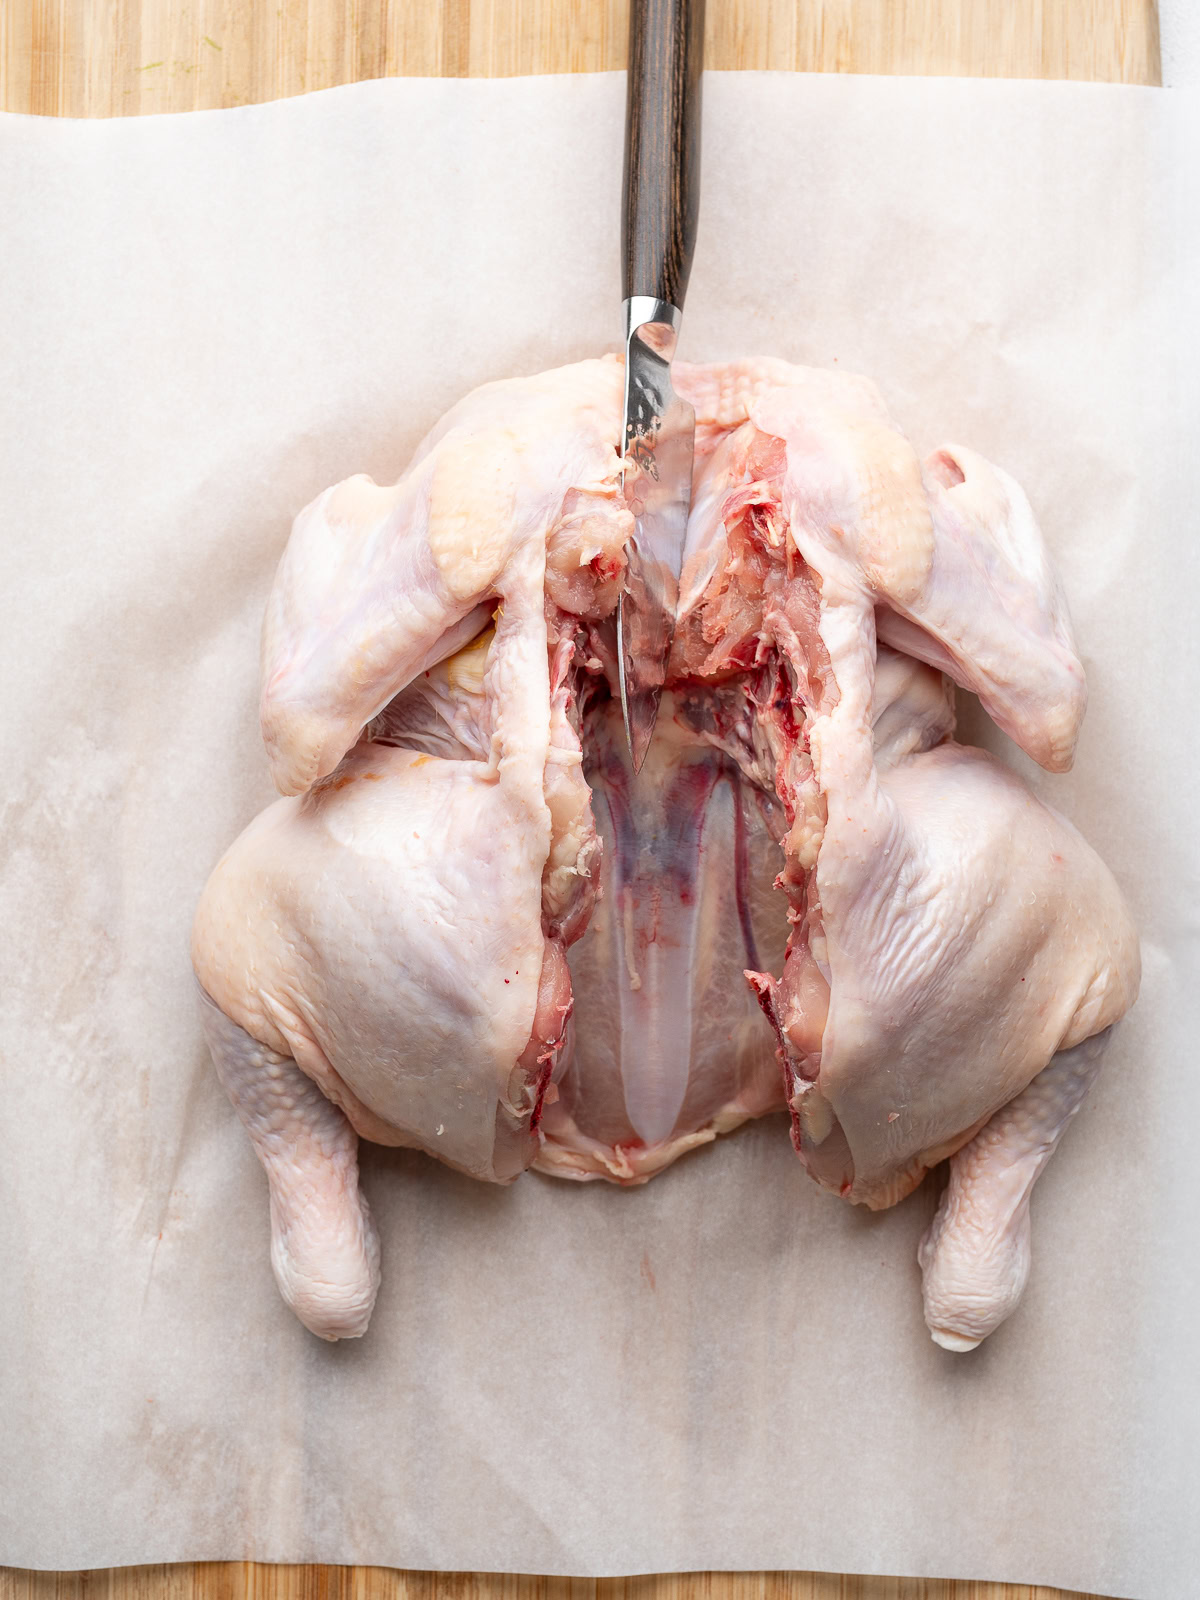
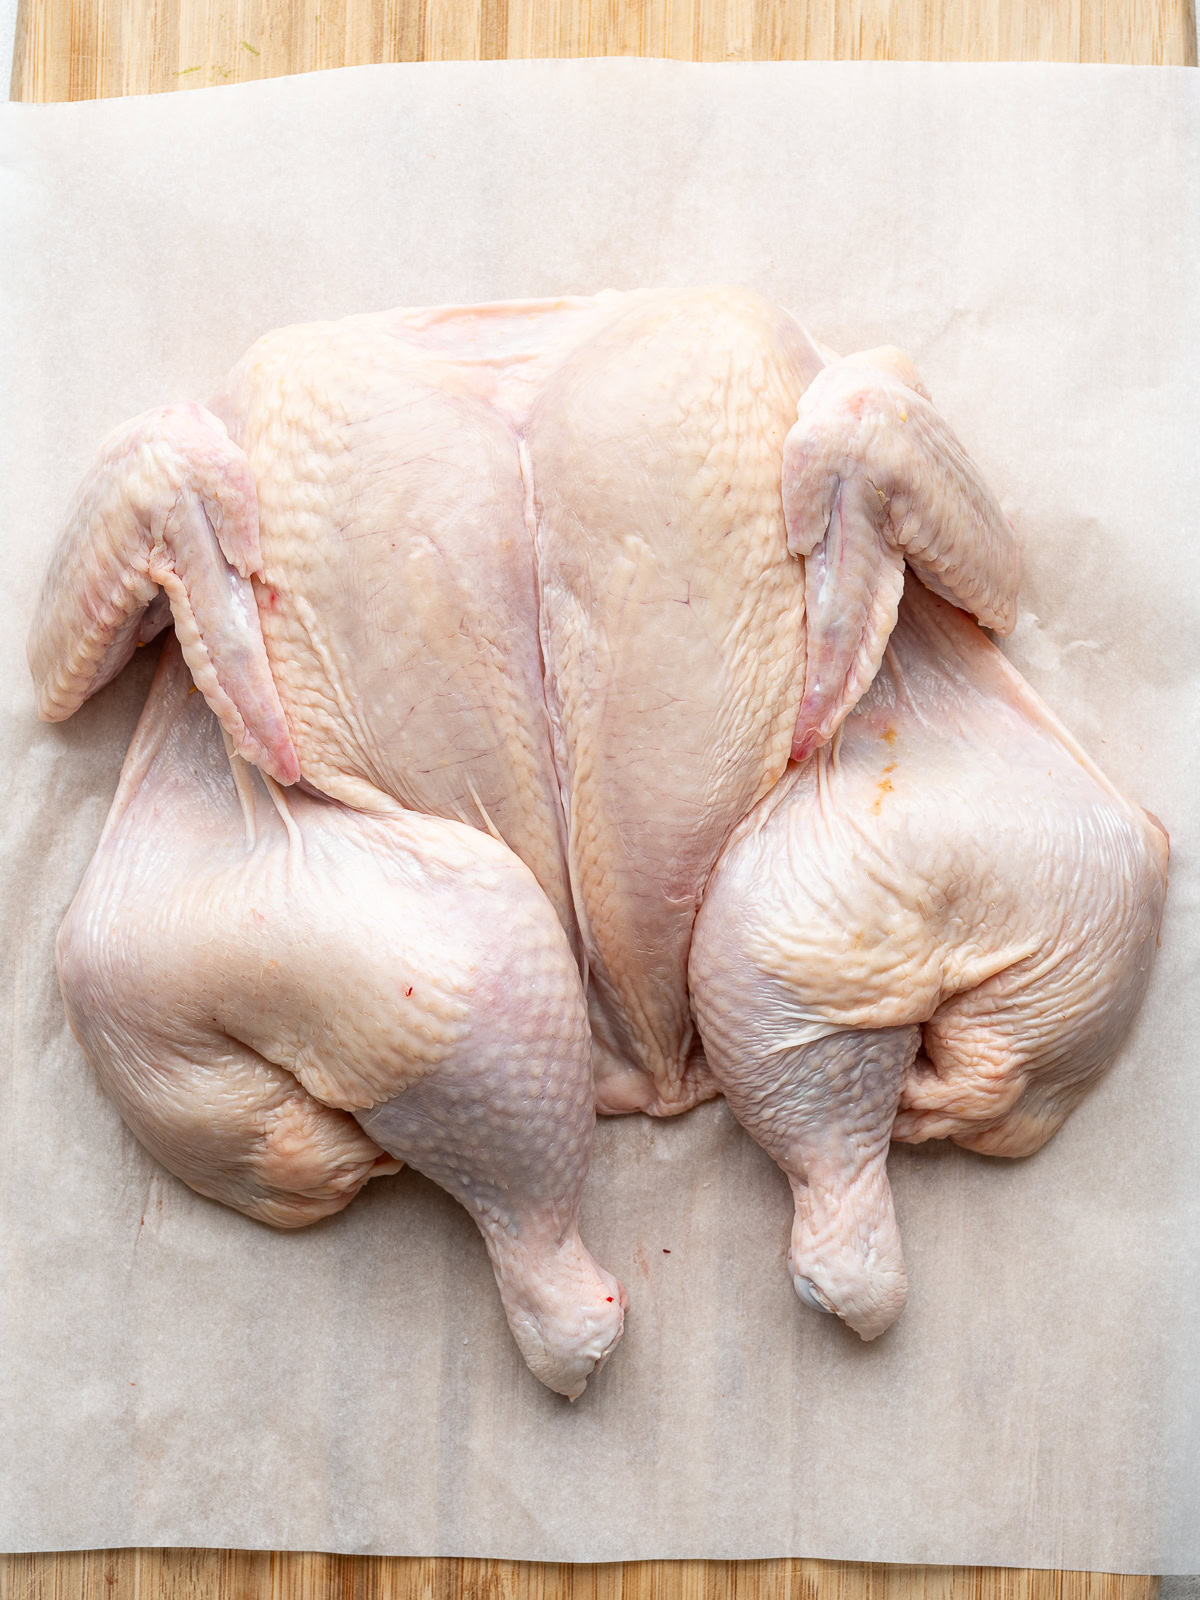
For this recipe, you will need a spatchcocked chicken. To spatchcock a chicken, or turkey, is to remove the backbone, which allows it to be completely flattened. This will reduce the cooking time significantly and makes cooking a whole bird a lot easier.
Many grocery stores now sell chickens that have been spatchcocked, or if you are buying your chicken from a butcher, you can ask them to do it for you. However, it takes about 2 minutes to do it yourself and you will likely save some money. See section below on how to spatchcock a chicken.
Key Ingredients And Notes
This marvelous chicken recipe uses simple ingredients, yet looks elegant and tastes very luxurious. Note: The complete list of ingredients and measurements can be found in the recipe card below.
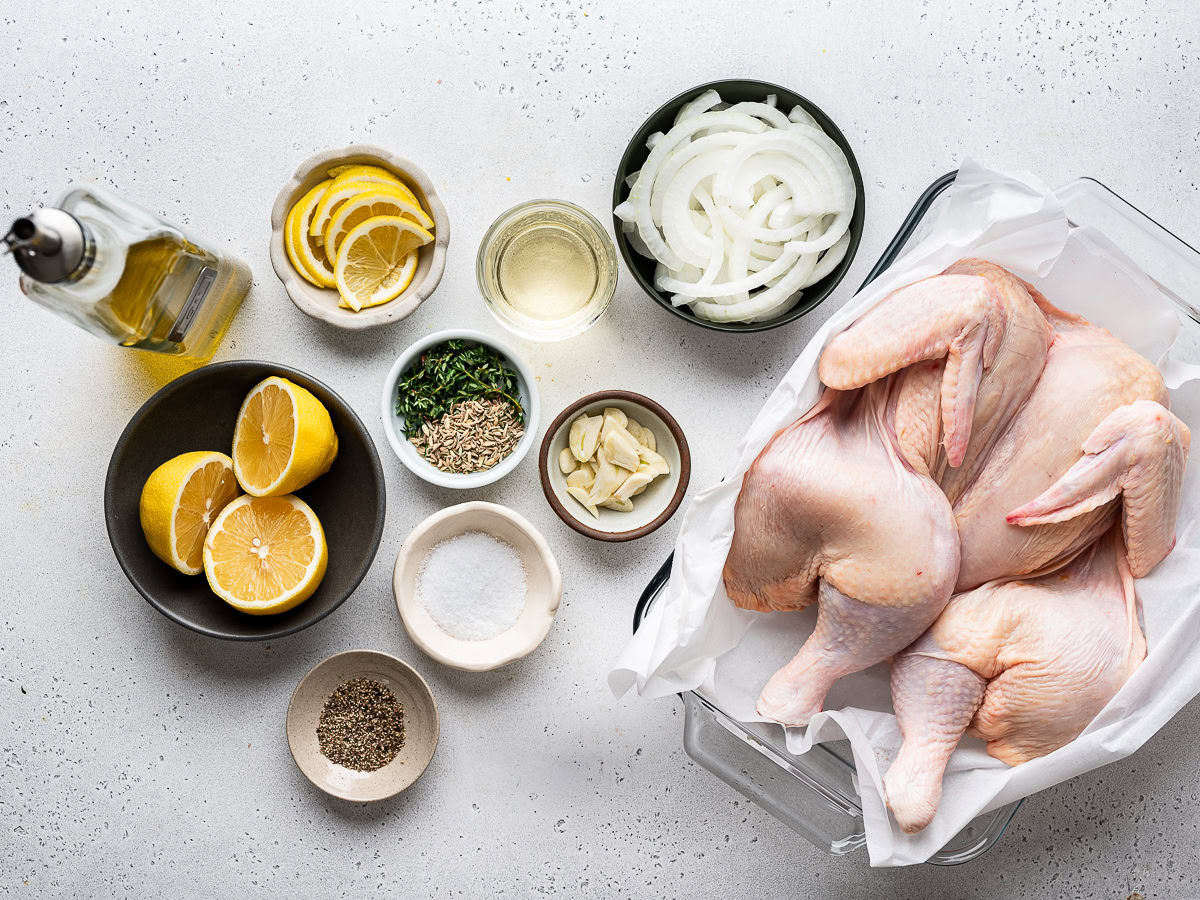
- Whole spatchcocked chicken: You will need a spatchcocked chicken for this recipe. When spatchcocked, the whole chicken cooks much quicker and evenly.
- Onion and garlic: These two aromatics contribute a lot of flavor to the sauce. All they need is a quick slice which makes things easier than dicing and mincing.
- Lemons: You will need two lemons for this recipe. I place 3 halves to cook alongside the chicken, and slice the remaining half thinly to place under the chicken. See ingredient photo for a visual of the lemons used.
- White wine: Adding white wine to the sauce adds so much flavor. Use a dry white wine such as Pinot Grigio.
- Spices and seasoning: Ina’s original recipe calls for fennel seeds and strongly urge you not to leave them out. Their sweet, licorice-like flavor takes this chicken dish to the next level. You will also need fresh thyme leaves and a generous amount of salt and pepper to season.
Variations And Substitutions
Thyme – Feel free to use 1 teaspoon of dried thyme instead of fresh if that’s easier for you.
Chicken – If you wish, you can make this recipe using bone in, skin on chicken thighs. Reduce the cooking time accordingly.
Add fresh rosemary – If you’d like, sprinkle the cooked chicken with some fresh chopped rosemary.
How To Spatchcock a Chicken
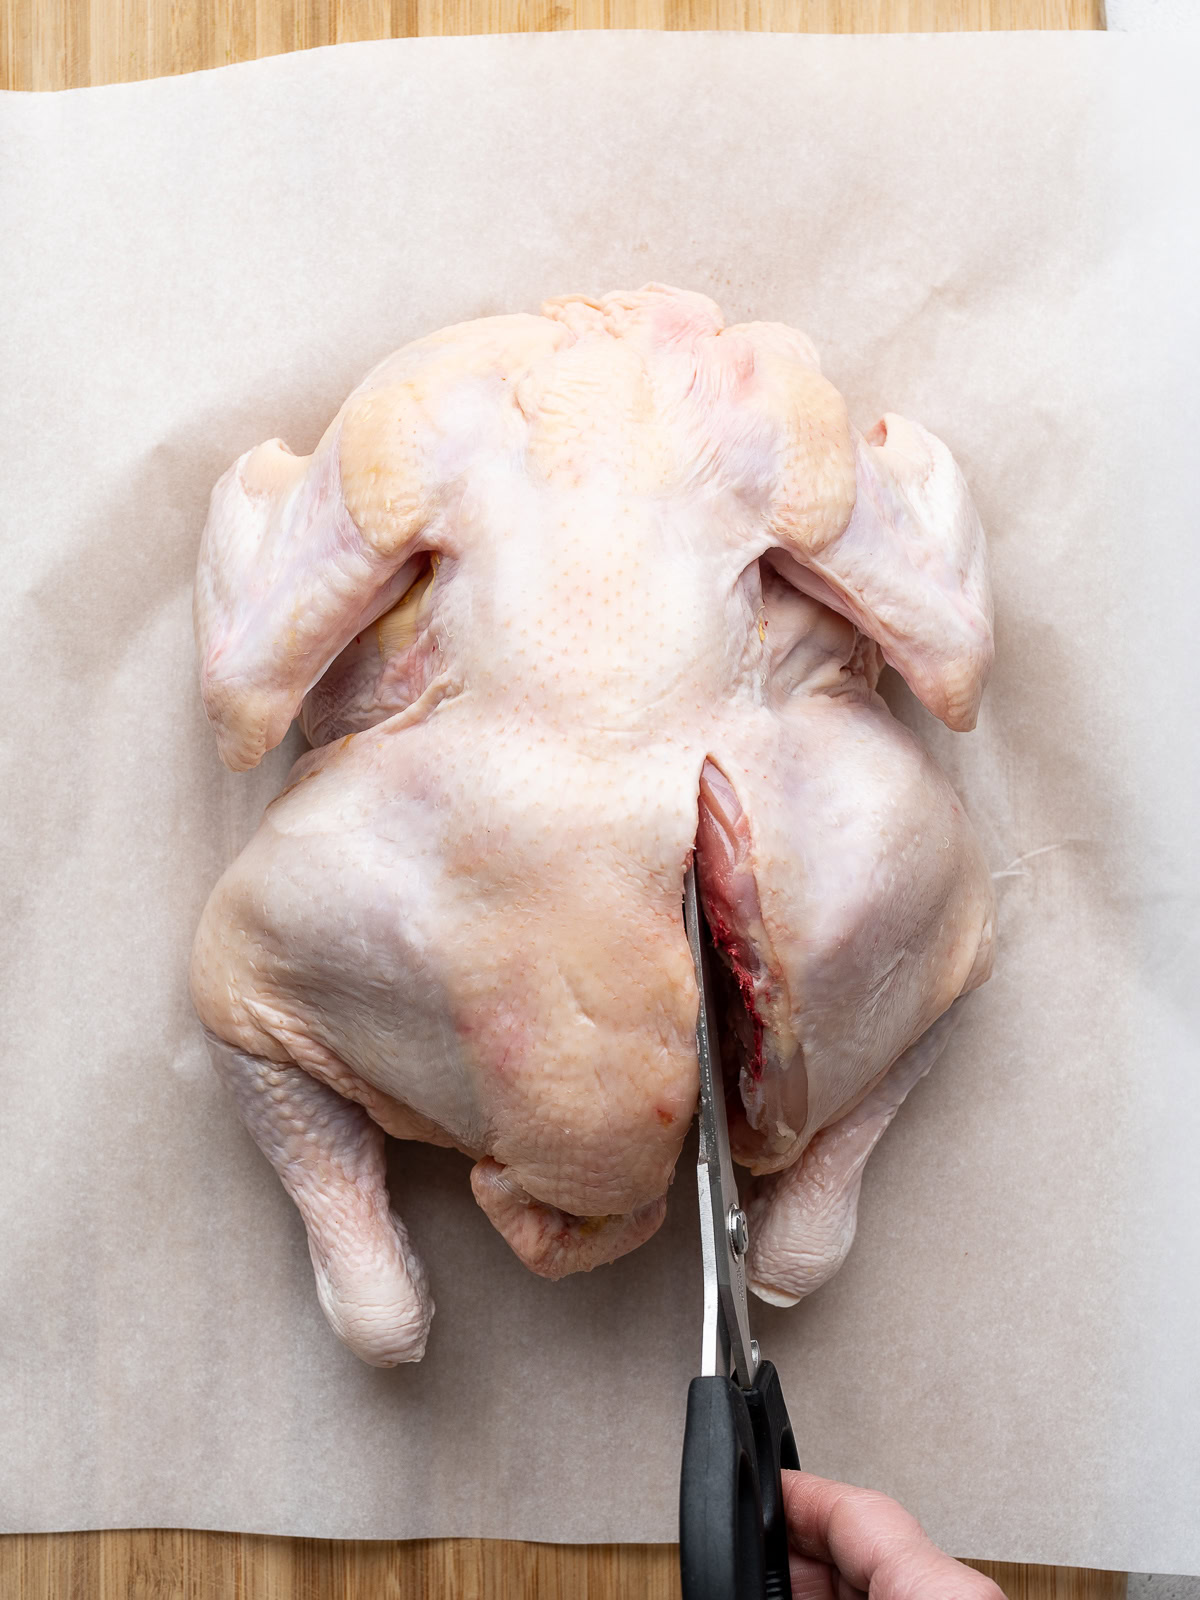
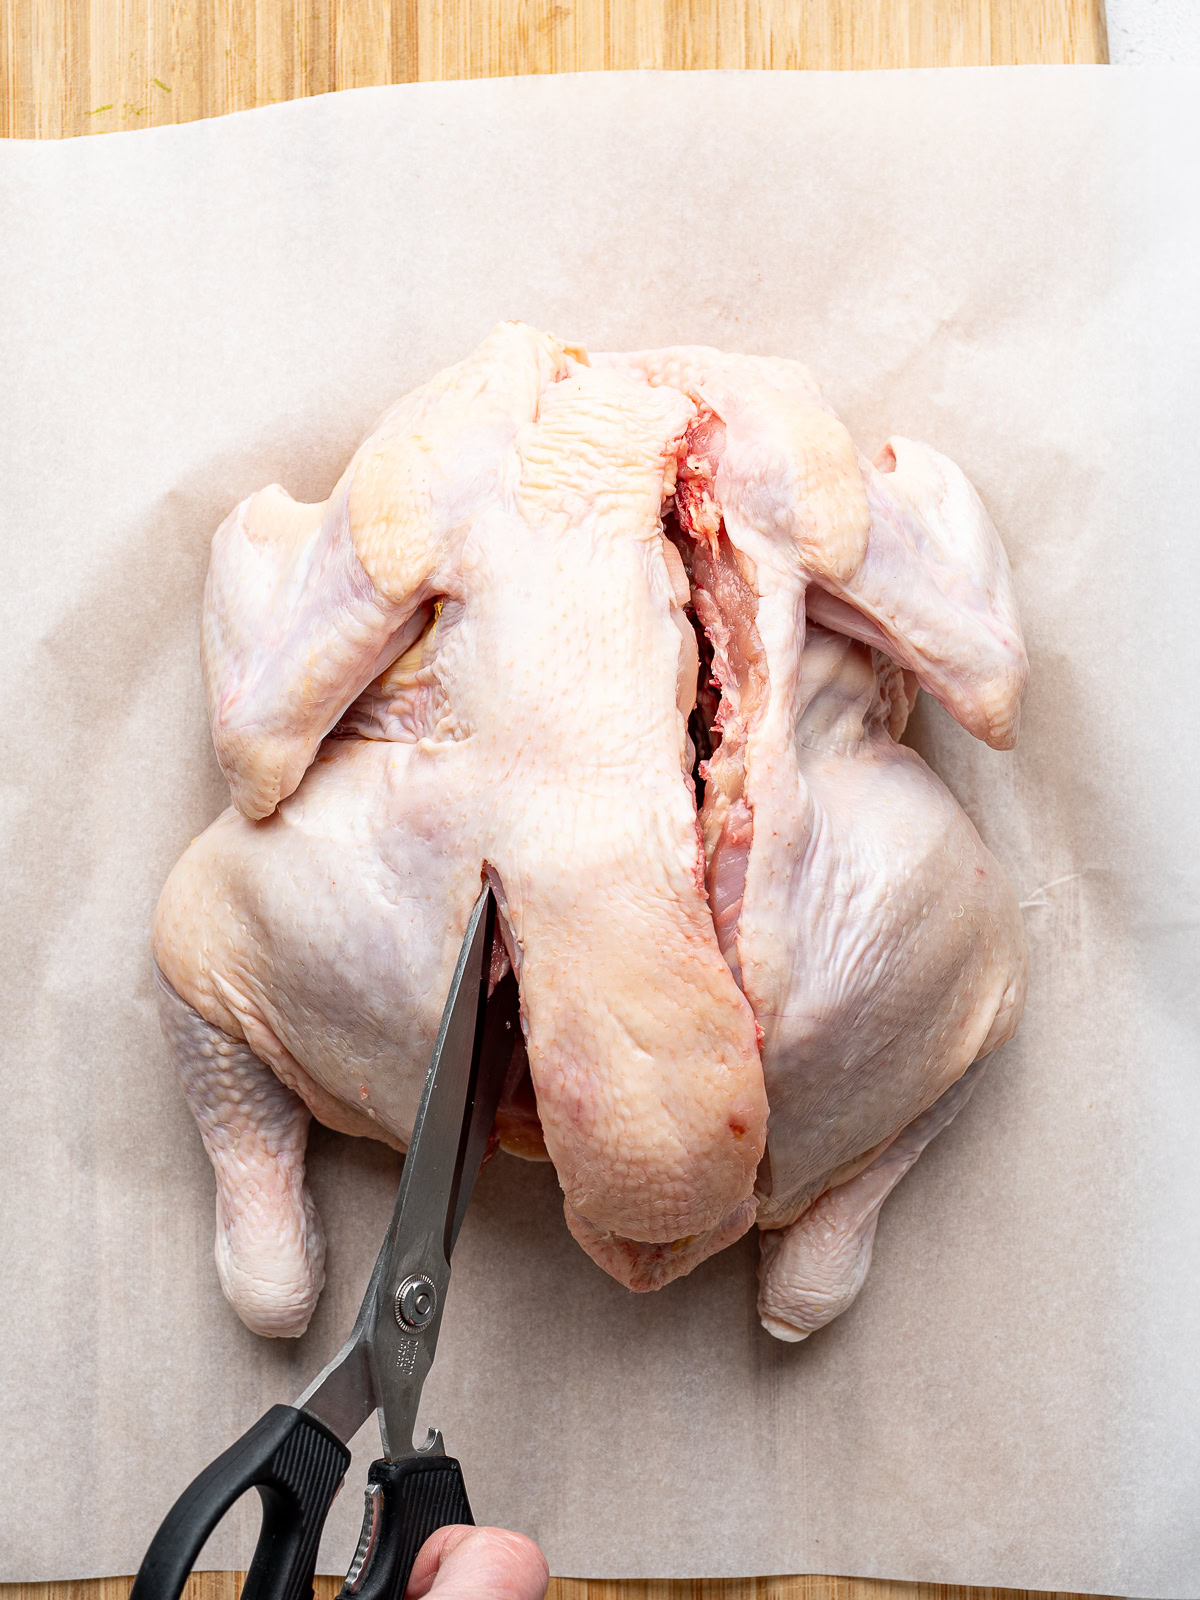
Spatchcocking a chicken is incredibly easy but you will need a good pair of kitchen shears to do it. If you don’t have sharp kitchen shears, you may not want to attempt this. Instead, get your chicken from a butcher and ask them to do it for you.
Here’s how to do it:
- Place chicken breast-side down on a cutting board. I like to place a piece of parchment paper on the cutting board for easier clean-up. Using a pair of sharp kitchen sheers, and starting at the thigh end, cut along one side of the backbone.
- Cut along the other side of the backbone to remove it completely. Save the backbone for stock.
- Use a sharp knife to score the sternum, then open up the rib cage. Scoring the sternum is optional but it helps make the chicken even flatter.
- Flip the chicken over and press firmly on the breastbone to flatten the chicken further.

How To Make Ina Garten’s Skillet Roasted Lemon Chicken
This chicken dish and will hit all your comfort food cravings. Best of all, once your chicken is spatchcocked, the rest of the prep is a breeze. Note: The complete instructions can be found in the recipe card below.
Step 1: If your chicken isn’t spatchcocked, follow the instructions above to do this. You can spatchcock the chicken ahead of time and refrigerate until ready to use.
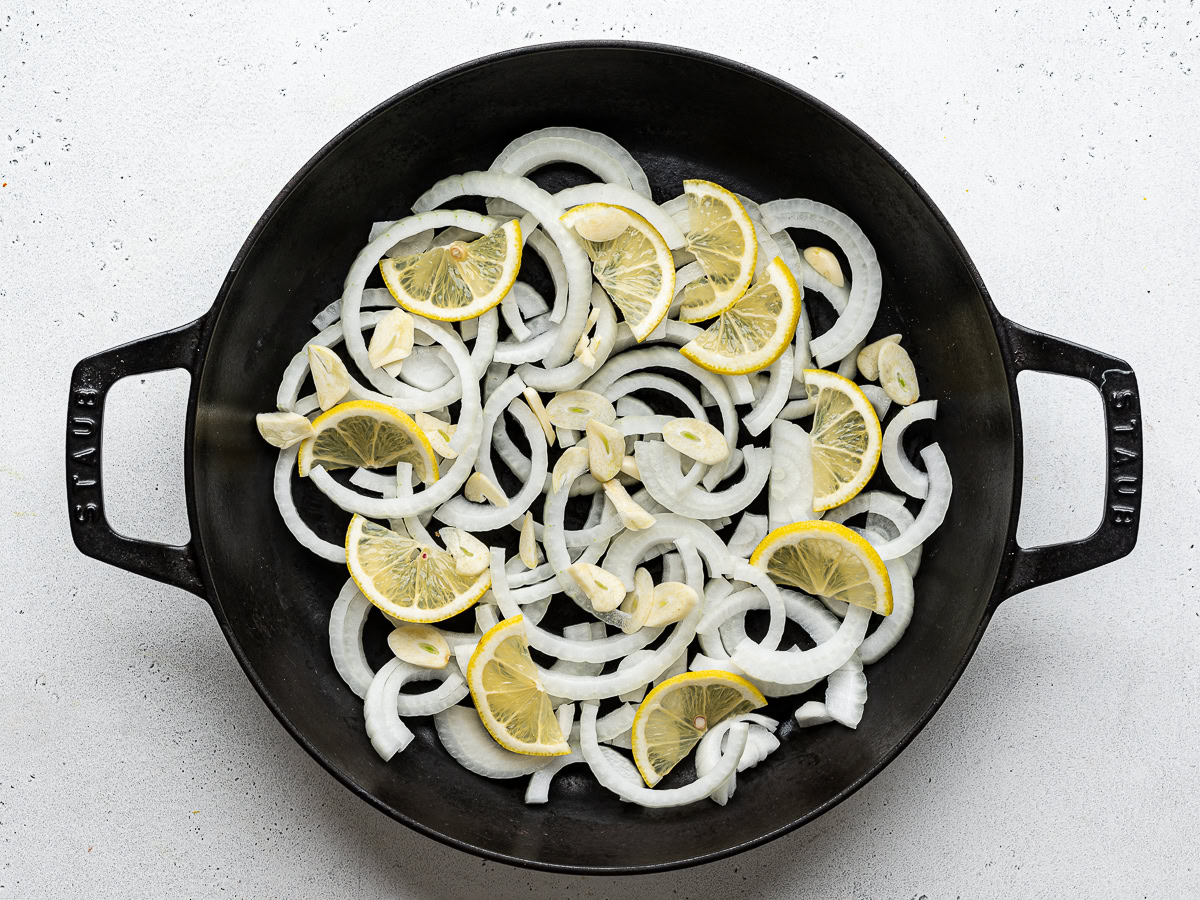
Step 2: Place the sliced onion, lemon slices and garlic in a large, cast-iron skillet and spread them out evenly.
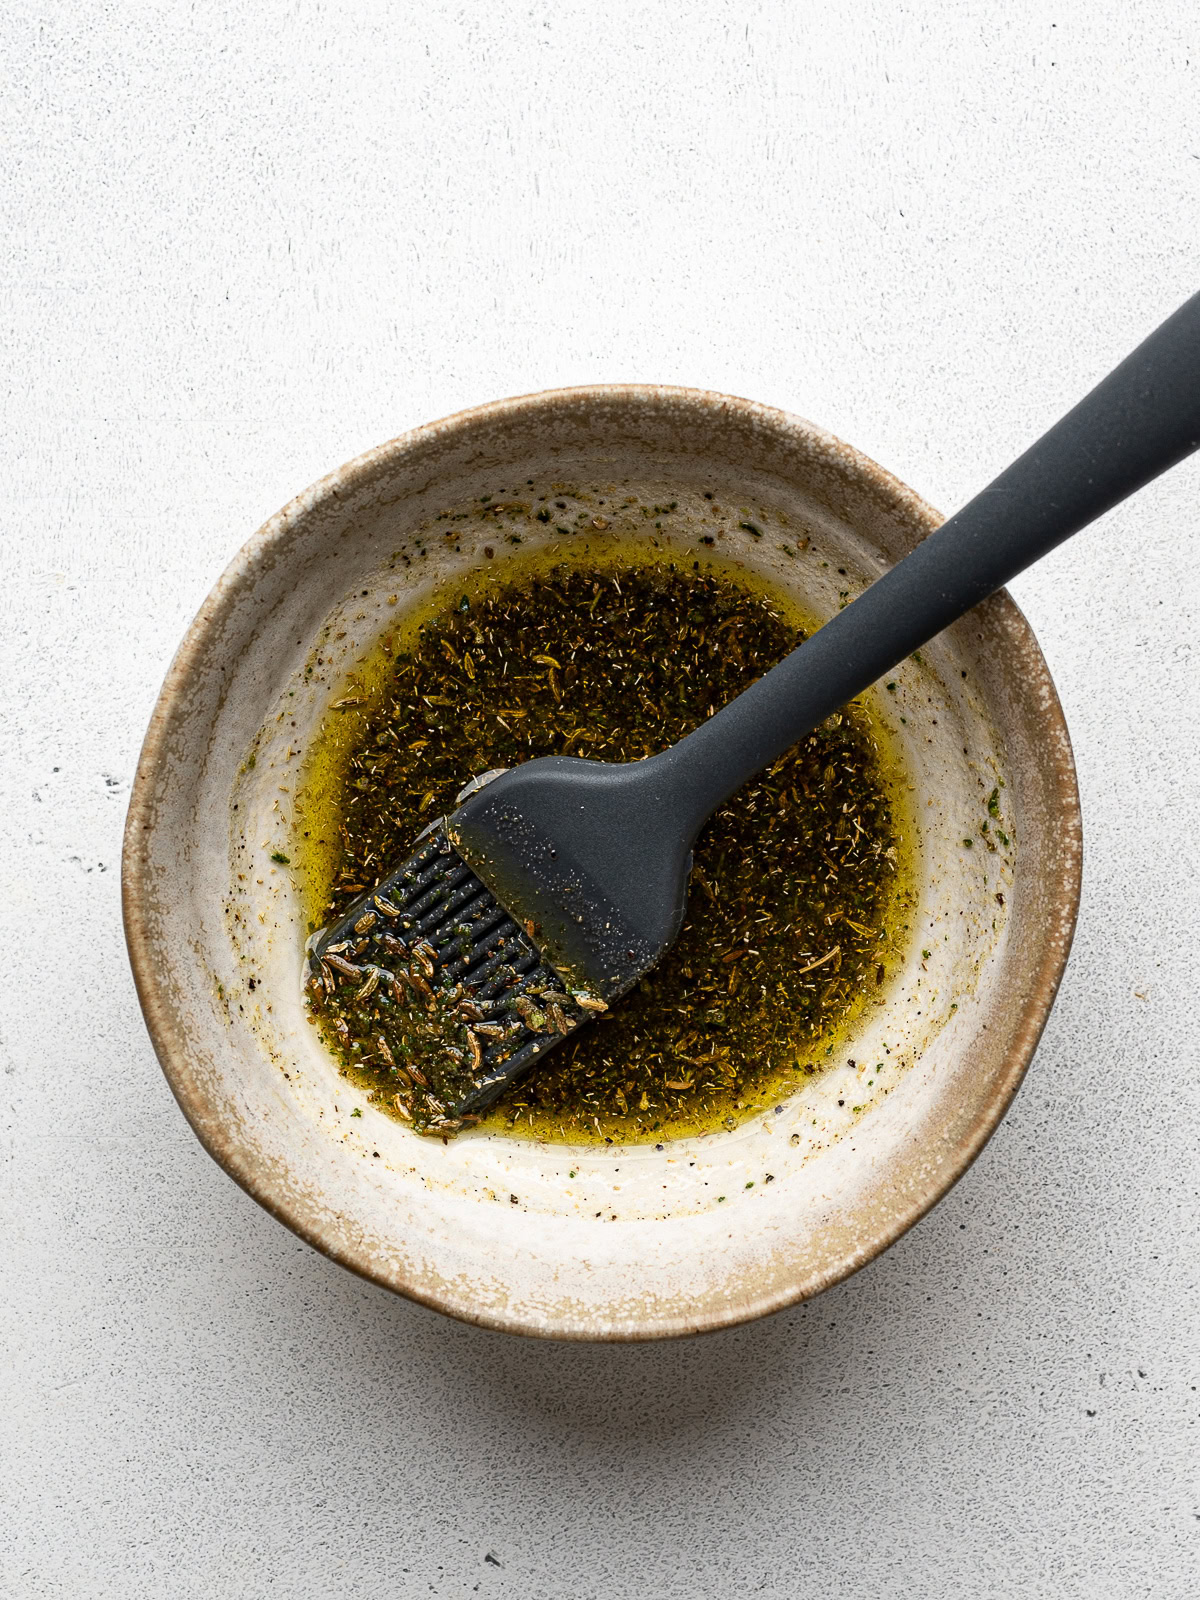
Step 3: In a mini chopper, blender, or mini food processor, combine thyme leaves, fennel seeds, salt and pepper. Process until ground and place in a small glass measuring cup or bowl. Pour in the olive oil and whisk to combine.
Step 4: Brush the underside of the chicken with about 1/3 of the oil and herb mixture then place it breast side up over top of the onion mixture. Once again, pat the top dry with paper towels, then brush with all of the remaining oil and herb mixture. Make sure to brush all the nooks and crannies of the chicken. Nestle lemon halves around the chicken.
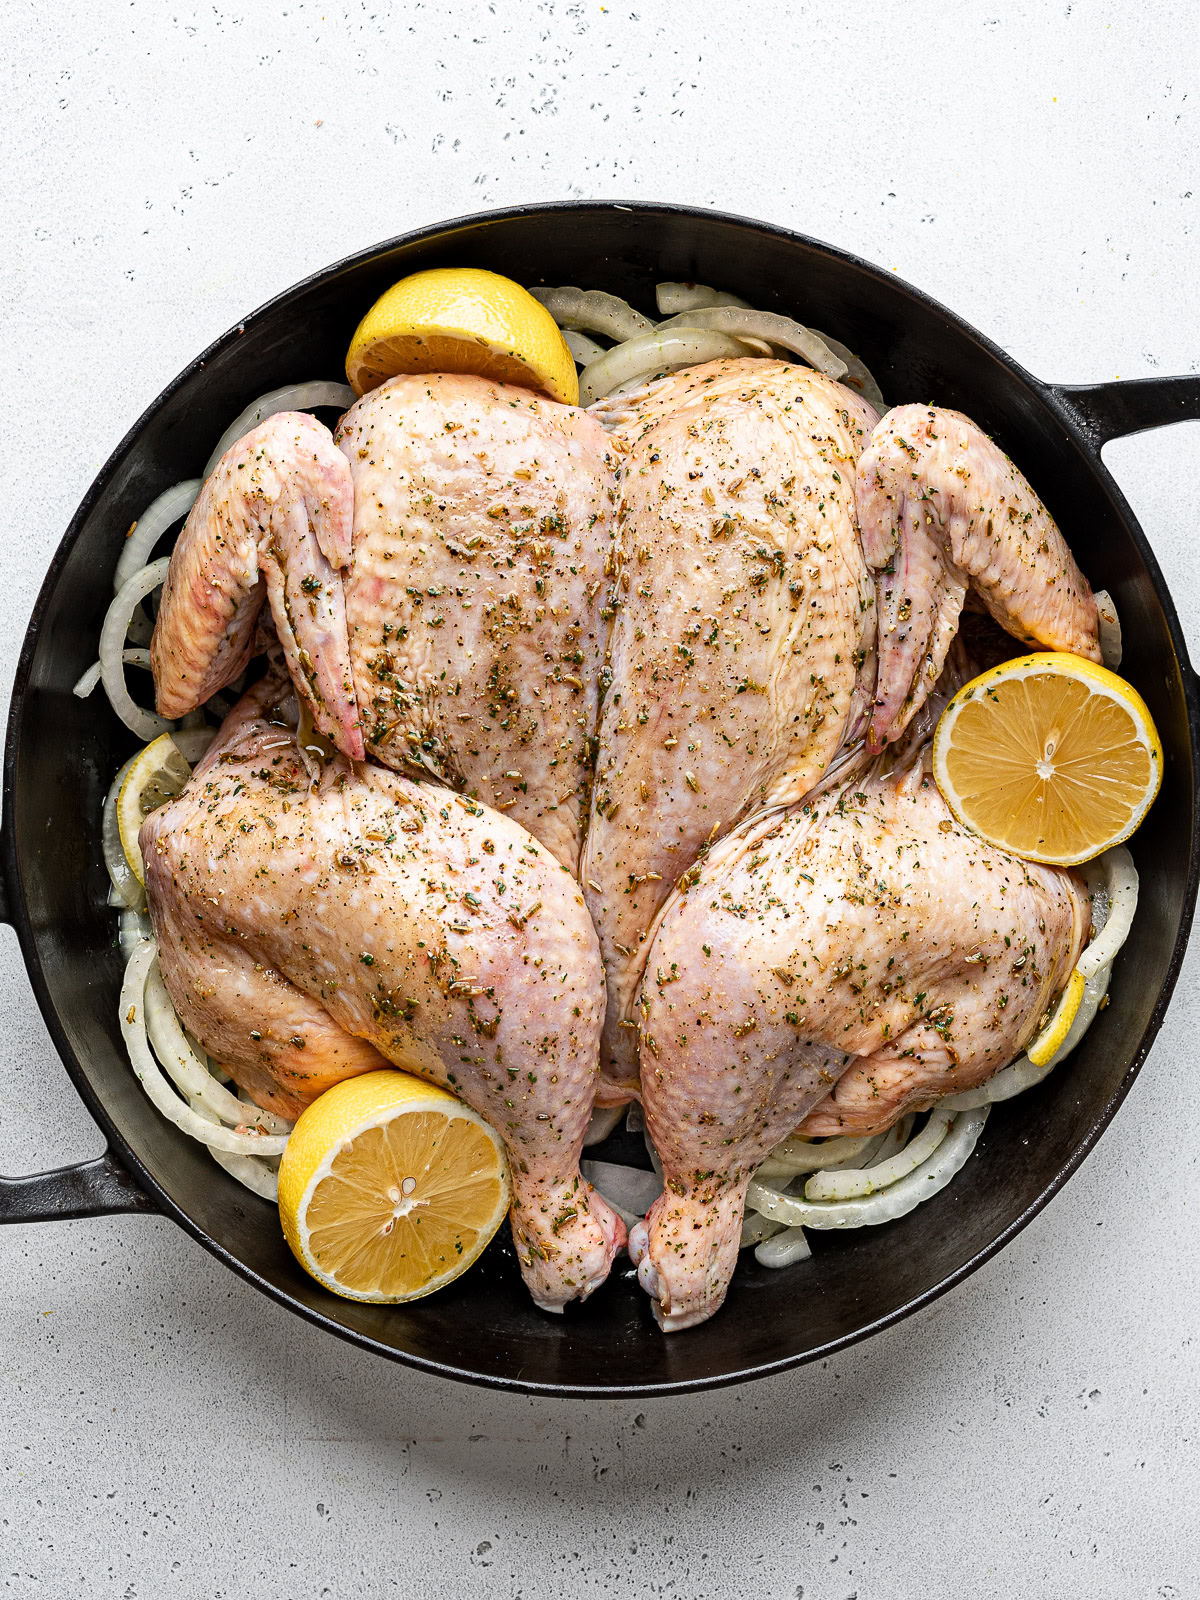
Step 5: Roast for 30 minutes (or 40 minutes if it’s more than 4 1/2 pounds). Remove the skillet from the oven and pour the wine around the chicken (not on the chicken!) Place back in the oven and roast for another 15 to 20 minutes, or until a meat thermometer inserted into the thickest part of the breast registers 155 to 160°F.
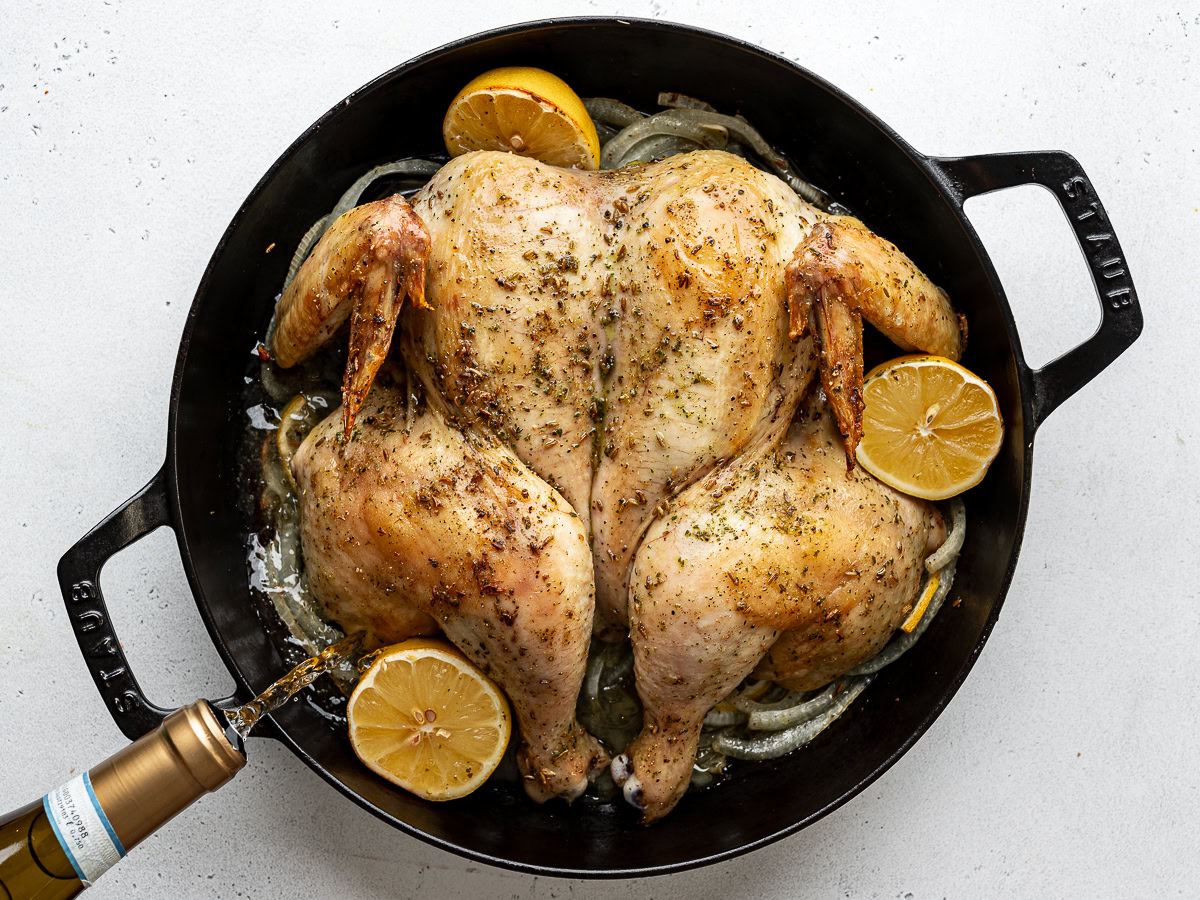
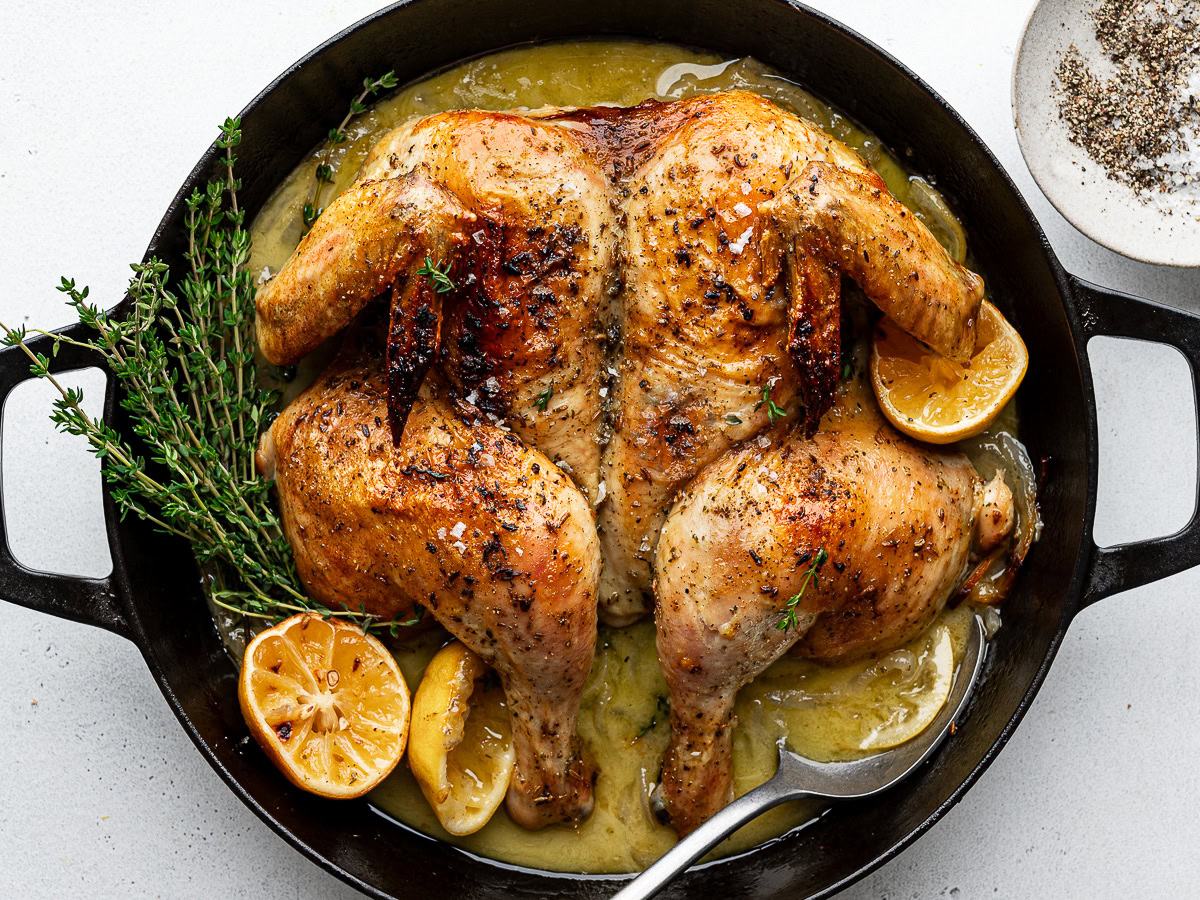
Step 6: Remove the chicken from the oven and immediately squeeze the juice from the roasted lemon halves all over the chicken and sauce. Allow to rest for 10-15 minutes (see section below on whether to cover or not to cover the chicken as it rests).
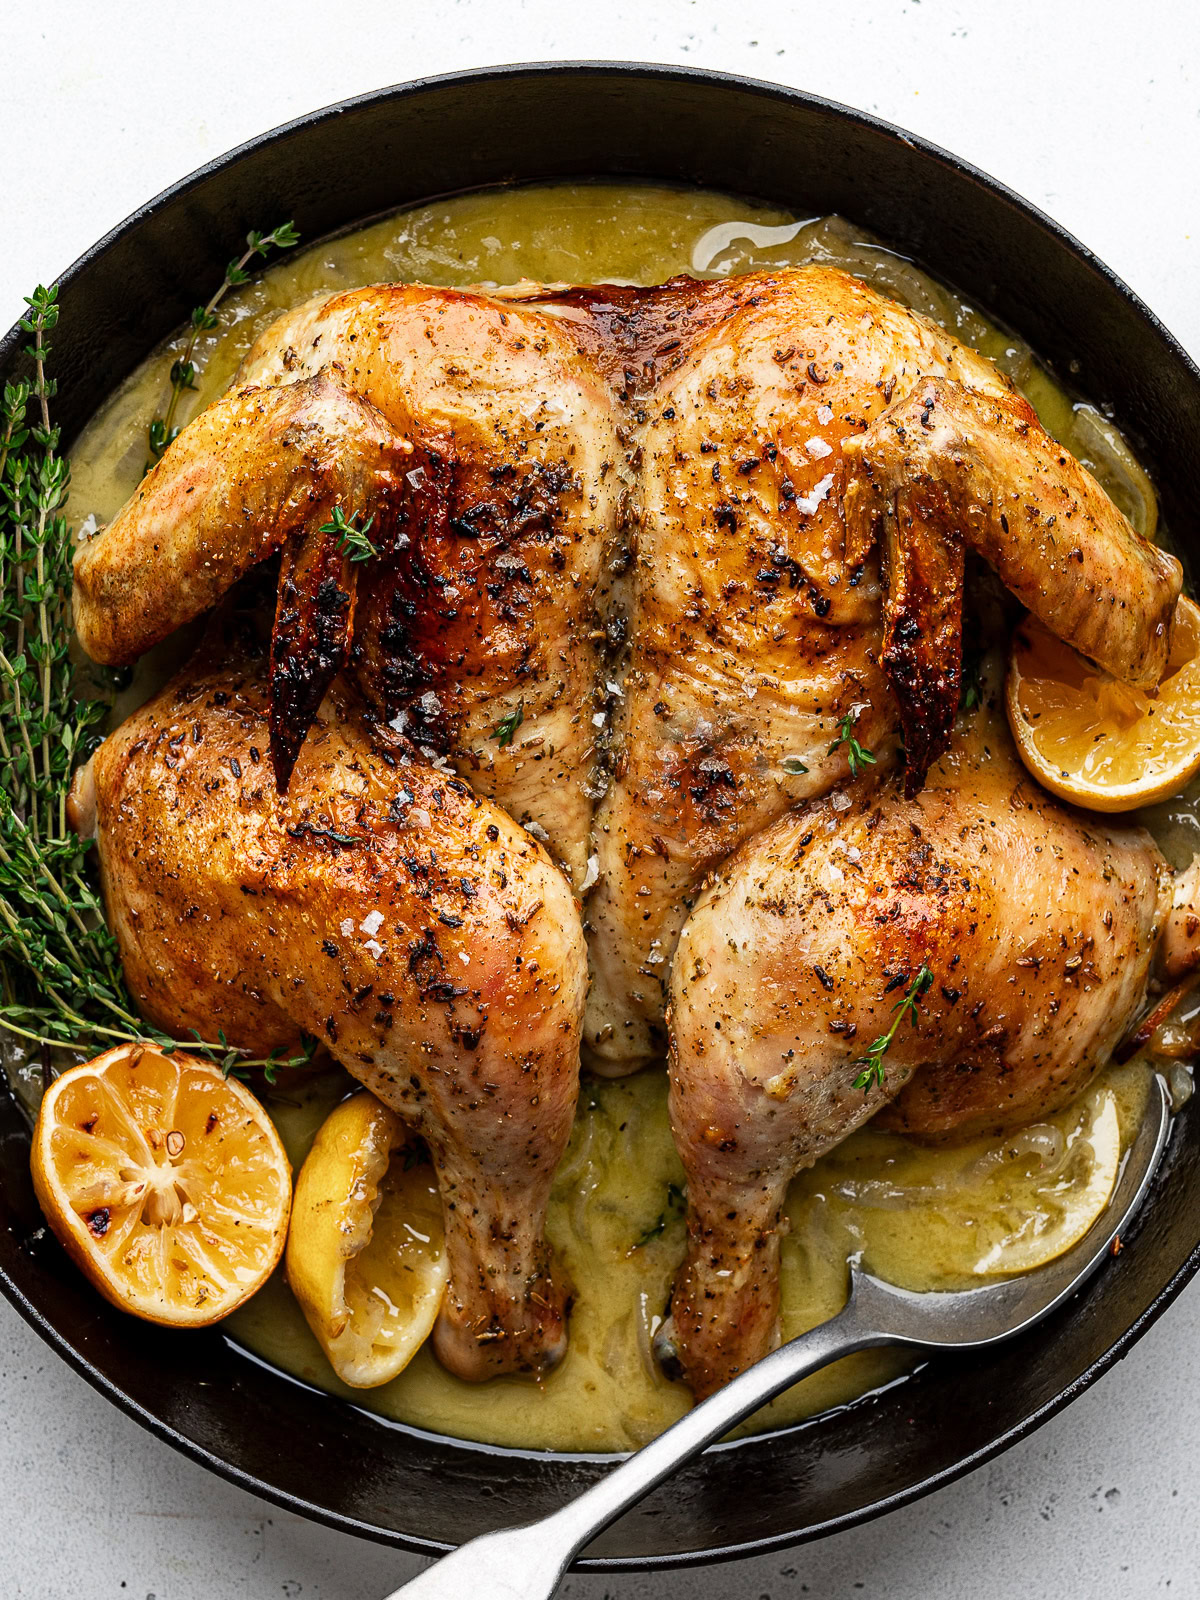
Step 7: Cut the chicken into desired pieces, it will be a breeze to carve because the backbone has been cut out. Sprinkle with a few pinches of flakey salt, drizzle with more lemon juice, and serve hot with the pan juices.
To Cover Or Not To Cover The Chicken As It Rests
Ina Garten’s recipe calls for covering the chicken tightly with aluminum foil once you take it out of the oven. You have no idea how controversial this is. As I already mentioned, this recipe has been made by thousands of people that love it but this step has elicited many irate comments suggesting that covering the chicken ruined it becasue they lost the crispy skin.
It is true, if you cover the chicken with foil, the skin will steam and no longer be crispy. Personally, I am on the fence about this one. Most of the time, I cover it. I like the chicken to stay warm and moist and I don’t eat much of the skin anyway.
If crispy skin is important to you, by all means leave it uncovered. The chicken will still be nice and warm because it will be resting in the hot skillet.
How To Prevent A Bitter Sauce
Ina’s recipes are always reliable and foolproof so I typically follow them to the letter. However, there is one issue I have read that some experience with this recipe and that is that the sauce can taste a bit bitter from the lemons. This is because there’s a lot of lemon slices and the pith from the lemon can certainly add bitterness to the sauce.
To prevent this, I use less lemon slices than the original recipe calls for and I also slice them really, really thin. The sauce is still deliciously lemony because I cook lemon halves alongside the chicken, then squeeze all the warm lemony juices over the chicken when it’s done cooking. Do this, and your sauce will never be bitter.
Sandra’s Tips
- For crispy skin, pat the chicken dry. It is super important you pat the chicken with paper towels until it is very dry. You do not want to skip this step or your chicken will not get crispy, golden skin.
- Remove the chicken from the fridge 30 minutes prior to cooking it. Fridge-cold chicken will not cook as quickly or evenly.
- Use a meat thermometer. The cooking time will vary depending on the size of your chicken, the pan you use, and how hot your oven runs. Use a reliable meat thermometer to ensure you don’t over cook or under cook the chicken. An instant read thermometer such as this one, works great. When inserting the thermometer into the meat, make sure it is not touching the bone to get an accurate reading.
- Season generously. Don’t skimp on the salt and pepper. Chicken needs to be seasoned generously or it will be bland.
- Use sharp kitchen shears to spatchcock the chicken. Sharp kitchen shears will make cutting the backbone out of the chicken really easy. They are a great tool to have in the kitchen and they don’t have to be super expensive. I have, and love this one.
Frequently Asked Questions
The success of this recipe relies on using a spatchcocked chicken so that it cooks up tender and moist in a hot oven and skillet. That said, the recipe will work fine with a chicken that isn’t spatchcocked. Just cook it at 425ºF for about 75 minutes, or until a meat thermometer inserted into the thickest part of the breast registers 155 to 160°F.
The chicken and vegetables will brown and caramelize a little better in a cast-iron skillet but any large, oven-proof skillet will work.
No, this spatchcocked skillet chicken is perfectly juicy and tender without needing to baste it.
Use 1/3 cup of chicken broth.
Best Side Dishes To Serve With A Skillet Roast Chicken
The beauty of this roasted chicken is that the flavors go well with just about any side. I like to serve it with a side that will soak up all the lovely sauce. Here’s a few suggestions:
Roasted vegetables. We love this chicken with a side of roasted vegetables. You can throw a tray of vegetables in the oven so they cook at the same time the chicken is cooking. Try it with broccoli, broccolini, carrots, butternut squash, Brussels sprouts or cauliflower.
Potatoes. You will never go wrong with a roast chicken served with baby roasted potatoes. Sweet potatoes, mashed potatoes, or cheesy scalloped potatoes would all be fabulous as well!
Rice. Spooning the lemony sauce over fluffy white rice is my idea of heaven. You can also use cauliflower rice, brown rice, or any other grain of your choice.
Salad. For a low-carb meal with tons of flavor, serve this delicious skillet chicken with an easy seasonal salad. Try it with this winter radicchio salad or this Kale Caesar salad.
Bread. Crusty bread and a simple salad would make a fabulous complete meal in my book!
Make-Ahead, Leftovers, & Storage
- To make-ahead: If you want to get a head start on dinner, you can have fully assemble everything in the pan and refrigerate, uncovered, for a few hours before roasting.
- Leftovers and storage: Store any leftover chicken and sauce in an airtight container. Refrigerate for up to 3 days.
- Reheating: If reheating a small amount of chicken, use a toaster oven or a skillet on the stovetop. To reheat a large amount of this, preheat the oven to 400ºF. Place chicken in a rimmed baking dish and add 1/2 cup chicken broth or water. Cover with foil and bake for 15 minutes. Remove foil and bake for 5 to 10 minutes or until skin is crispy and chicken is heated through.
More Delicious Chicken Recipes To Try
🌟🌟🌟🌟🌟
I hope you love Ina Garten’s Skillet-Roasted Lemon Chicken recipe. If you make it, please leave a comment and star rating at the bottom of the page so I know how you liked it. Thank you!
Ina Garten’s Skillet-Roasted Lemon Chicken
Ingredients
- 1 medium yellow onion halved and sliced ¼ inch thick
- 2 large garlic cloves, thinly sliced
- 1/2 lemon, halved lengthwise and sliced 1/4-inch thick (see notes)
- 2 teaspoons fresh thyme leaves
- 1 teaspoon whole fennel seeds
- 1 Tablespoon kosher salt, or less to taste (see notes)
- 2 teaspoons freshly ground black pepper, or to taste
- 1/4 cup good olive oil
- 1 4-pound chicken, backbone removed and butterflied
- 1 lemon, halved
- ½ cup dry white wine such as Pinot Grigio
- flaky salt, such as Maldon, to finish (optional)
Instructions
- Place the sliced onion, garlic, and lemon slices in a large, cast-iron skillet and spread them out evenly.
- In a mini chopper, blender, or mini food processor, combine thyme leaves, fennel seeds, salt and pepper. Process until ground and place in a small glass measuring cup or bowl. Pour in the olive oil and whisk to combine.
- Place the chicken on a cutting board and pat it with paper towels all over until very, very dry. *If your chicken isn't spatchcocked, see notes in post for how to do this.
- Brush the underside of the chicken with about 1/3 of the oil and herb mixture then place it in the skillet over top of the onion mixture, breast side up. Once again, pat the top dry with paper towels, then brush the top and sides of the chicken with all of the remaining oil and herb mixture. Make sure to get all the nooks and crannies.
- Nestle the lemon halves around the chicken. Roast for 35 minutes (or 40 minutes if it's more than 4 1/2 pounds).
- Remove the skillet from the oven and pour the wine around the chicken (not on the chicken!). Place back in the oven and roast for another 15 to 20 minutes, or until a meat thermometer inserted into the thickest part of the breast registers 160°F to 165ºF. The temperature will continue to rise as the chicken rests.
- Squeeze the juice from the roasted lemon halves all over the chicken and sauce. Cover tightly with aluminum foil and allow to rest for 10-15 minutes. TIP: Don't cover the chicken if you like crispy skin.
- Cut the chicken into desired pieces, it will be a breeze to carve because the backbone has been cut out. Sprinkle with a few pinches of flaky salt, if using, and serve hot with all the pan juices.
Notes
Sandra’s Tips
-
- For crispy skin, pat the chicken dry. It is super important you pat the chicken with paper towels until it is very dry. You do not want to skip this step or your chicken will not get crispy, golden skin.
- Remove the chicken from the fridge 30 minutes prior to cooking it. Fridge-cold chicken will not cook as quickly or evenly.
- Use a meat thermometer. The cooking time will vary depending on the size of your chicken, the pan you use, and how hot your oven runs. Use a reliable meat thermometer to ensure you don’t over cook or under cook the chicken. An instant read thermometer such as this one, works great. When inserting the thermometer into the meat, make sure it is not touching the bone to get an accurate reading.
- Season generously. Don’t skimp on the salt and pepper. Chicken needs to be seasoned generously or it will be bland.
- This recipe is adapted from Cooking for Jeffrey: A Barefoot Contessa Cookbook




Join the Conversation