

Invisible Apple Cake is a stunning French classic dessert that lets the apples shine. Thinly sliced apples are coated in a light, vanilla-scented batter, then tightly packed into a loaf pan. As the cake bakes, the layers of stacked, shingled apples seem to disappear into the batter, giving this cake its mysterious name. Bursting with apple flavor, this lightly sweetened cake is outrageously good and perfect for fall or the holidays. And for those of us who love make-ahead desserts, it checks that box off, too – hooray!
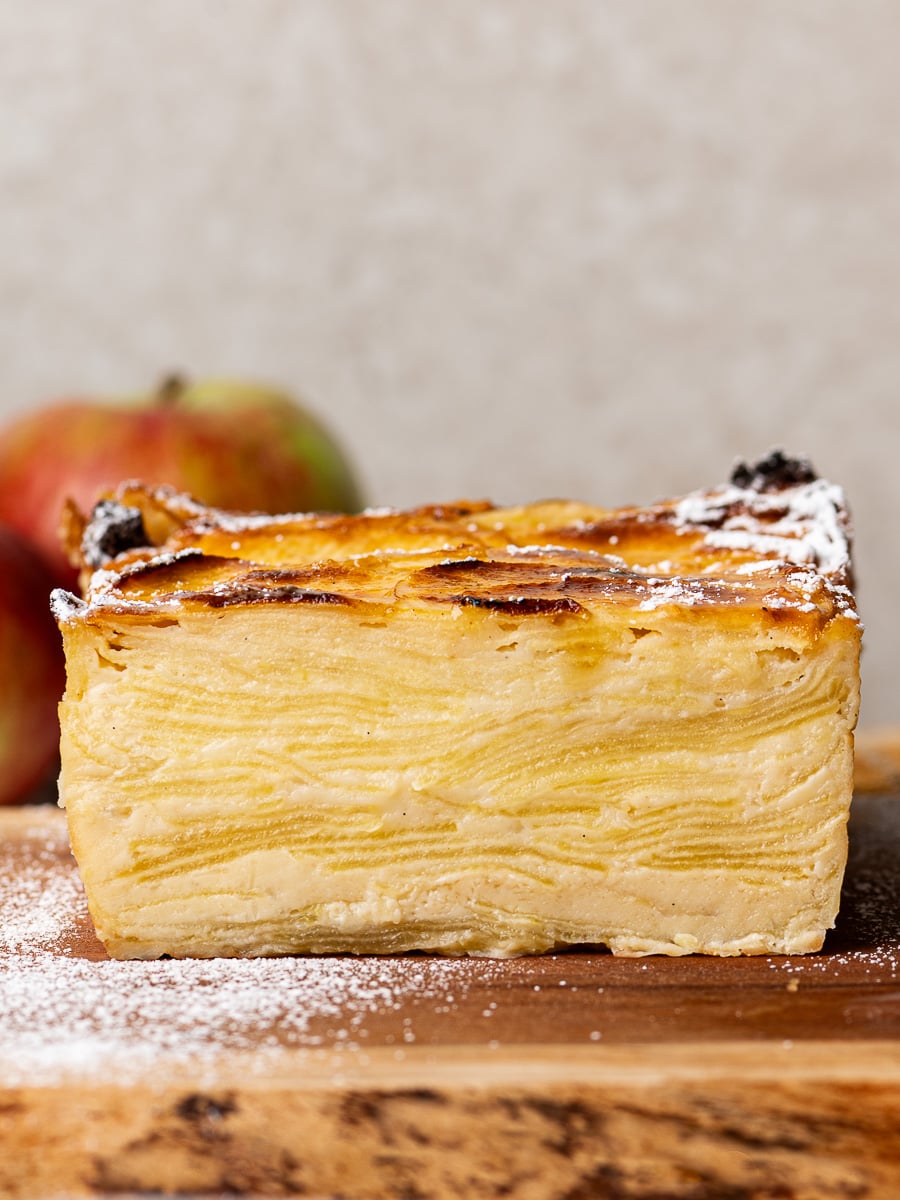
The Magical Invisible Cake
When cooler temperatures arrive, this simple yet stunning apple cake is the perfect dessert to kick off the fall season. But don’t let its wow factor fool you. If you can slice apples, you can easily make this French classic.
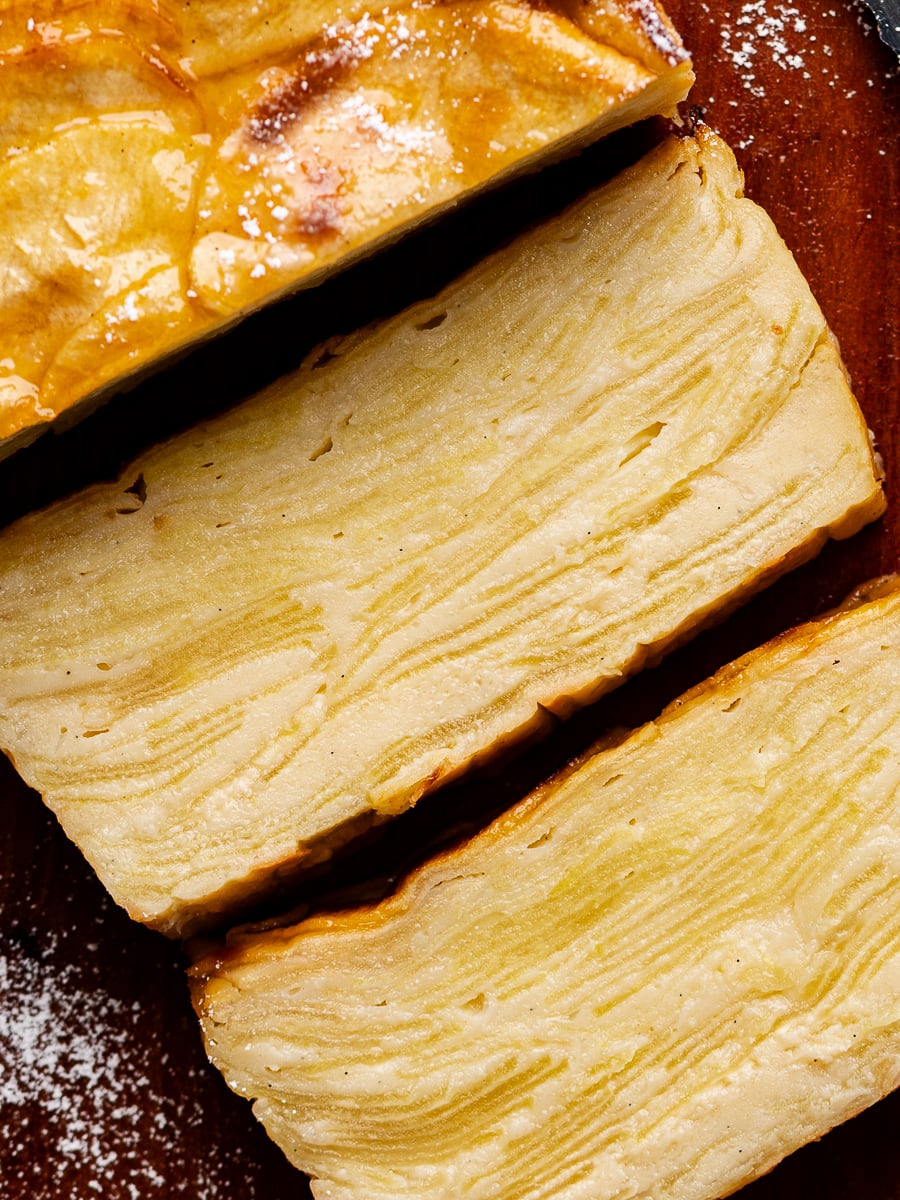
Invisible apple cake is made by tossing a generous amount of thinly sliced apples in a custard-like batter, then packing them tightly into a loaf pan. As the cake bakes, the apples soften and meld into the delicate batter, creating thin, tender layers that almost seem to disappear. And even if the apples look a little messy as you’re layering them in the pan, the finished cake will magically emerge with stunning, distinct layers.
I’ve tested several versions of this cake, and my favorite stays pretty true to the French classic: no cinnamon, no spices, and just a little sugar to let the apples shine. In other words, pure apple heaven. If you have apples waiting to be used, run, don’t walk, to make this one.
Ingredients You’ll Need
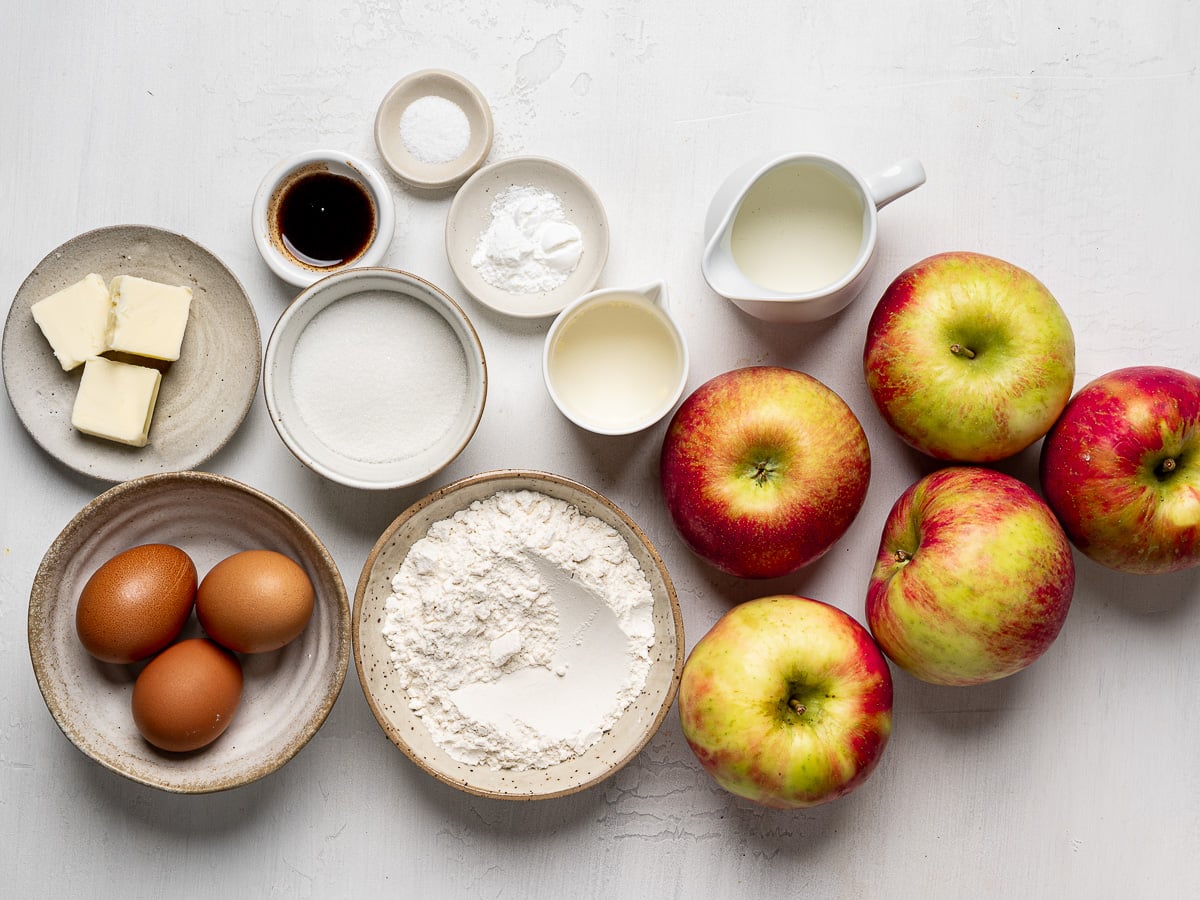
The best apples to use: For my apple crisp, I usually recommend using a mix of sweet and tart apples that soften at slightly different rates. For this French cake, however, the it’s best to use a single variety that holds its shape when baked. Cortland, Honeycrisp, and Empire apples are great choices because they soften slowly and are less prone to browning while you’re slicing. Pink Lady, Fuji or Braeburn apples also work well. Avoid apples which tend to become mushy when baked such as McIntosh Gala.
Milk or heavy cream: I have tested this cake using all whole milk but using half heavy cream helps give a little more structure to the batter, while also adding a richer flavor. However, the difference is not significant enough to make it essential so whatever you have on hand. That said, I highly recommend you stick to whole milk as anything lighter creates a very thin batter.
Why no spices? You may be confused as to why there are no spices added to this apple cake. In France, cinnamon and nutmeg are not typically included in desserts, and rarely in this Gâteau Invisible aux Pommes. Initially, I had my doubts the cake would be flavorful enough, but I now absolutely love how the flavor of the apples shines through without any spices overpowering it. That said, if you can’t imagine your apple cake without cinnamon, cardamom, or nutmeg, go ahead and a pinch or two of your favorite.
Note: The full ingredient list and measurements are provided in the recipe card at the end of the post.
A Few Things To Know Before You Start
Slicing the apples: You’ll need 5 to 6 large apples, so a mandolin makes quick work of slicing them. I use my mandolin (this is the one I like). If mandolins terrify you (rightfully so!), a cut-resistant glove is a worthwhile investment. Alternatively, a sharp knife works just fine. Aim for slices that are about 1/8 inch thick. They should be thin enough to create delicate layers, but sturdy enough to hold together when tossed with the batter. If you’re slicing by hand, you can go a little thicker but try to stay under 1/4 inch.
To peel or not to peel the apples: I once got a little lazy and made this cake without peeling the apples. I didn’t love the result! The peel interrupted the otherwise soft, delicate texture, so I recommend peeling the apples for best results.
Getting the batter just right: Similar to a clafoutis, the batter for this elegant dessert uses just a handful of everyday ingredients: flour, eggs, milk, melted butter, baking powder, vanilla, and a little sugar. Unlike a clafoutis, however, this cake has a much higher fruit-to-batter ratio, and is baked in a loaf pan, so getting the batter consistency right is especially important. I tested several variations, including versions with less flour, less sugar, and one less egg. The batter ended up too thin to hold the apple slices together properly, so the proportions used in this recipe avoids this pitfall. I also prefer to beat the eggs and sugar with a hand mixer until light and fluffy. A whisk works, too, but I find the mixer helps create a fluffier mixture that gives the batter a little more structure.
Troubleshooting the baking time: One common challenge with invisible apple cake is getting the baking time right. Some versions seem to require considerably longer in the oven than expected, and I suspect several factors can contribute to this, including an oven temperature that is a little off, batter consistency, and pan size. I’ve tested this recipe extensively to get the timing as reliable as possible. I use slightly more flour than some versions, a 9 x 5-inch loaf pan, and a baking temperature of 375°F rather than 350°F. Start checking around the 60-minute mark, keeping in mind that your oven may need a little more or less time.
Best loaf pan to use for a successful result: A 9 x 5-inch loaf pan is important for this recipe. Measure the inside of your pan rather than relying on the dimensions listed by the manufacturer, as some pans sold as loaf pans are actually 8 x 4. If you only have an 8 x 4-inch pan, use one fewer apple and remove 1/3 cup of the batter to avoid overfilling.
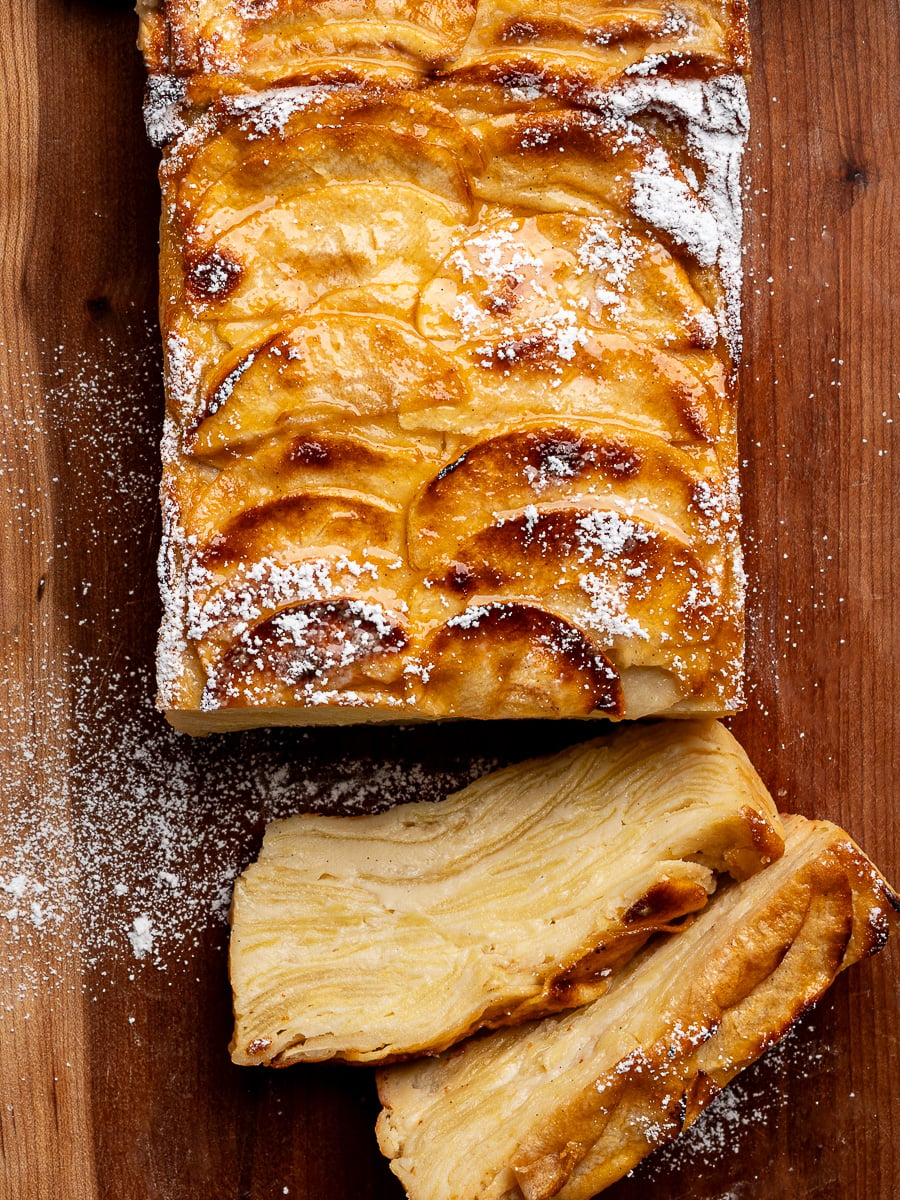
How To Make Invisible Apple Cake
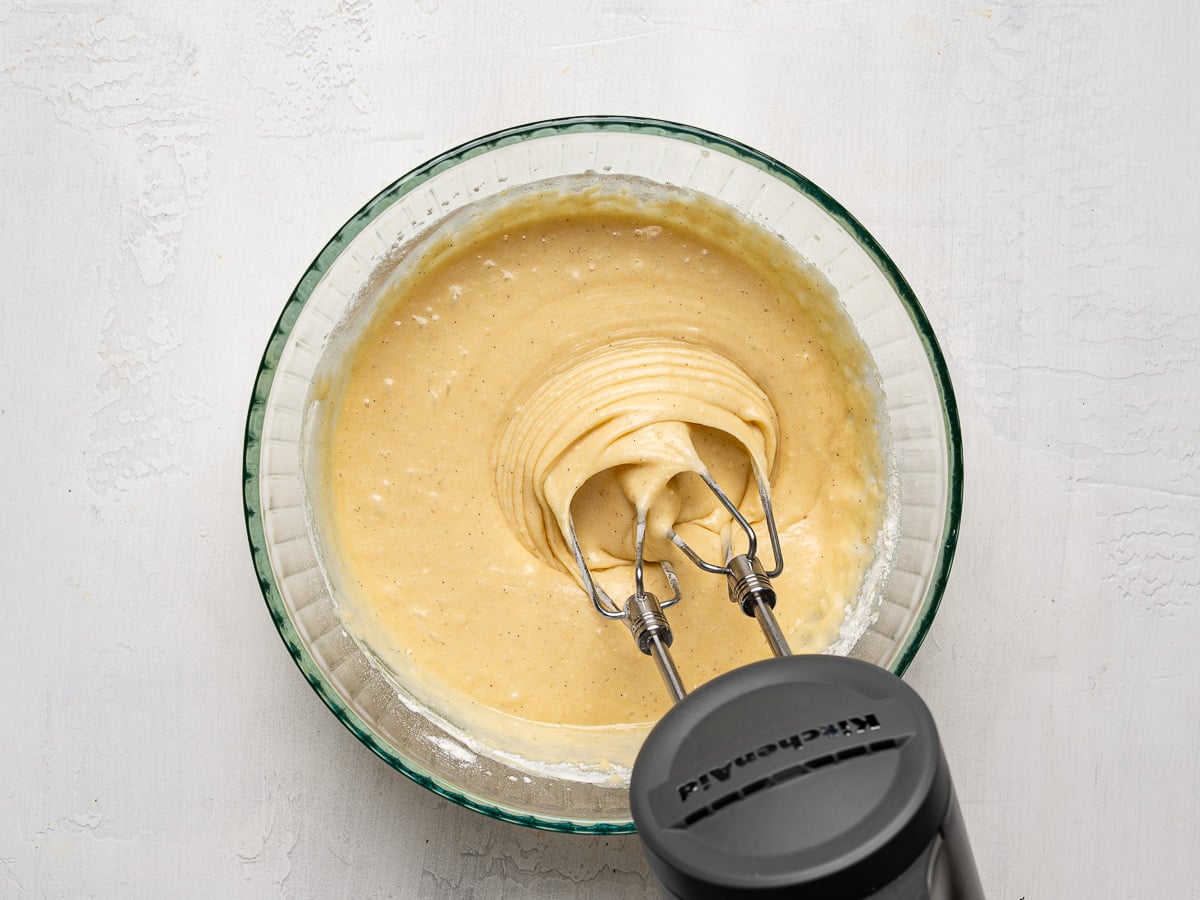
Prepare the Batter: In a medium bowl, whisk together the dry ingredients and set aside. In a large mixing bowl, beat the eggs, sugar, and vanilla bean paste with a hand mixer (or a whisk) until slightly pale and fluffy. Add the melted butter, milk, heavy cream and vanilla paste and mix just until combined. Set aside.
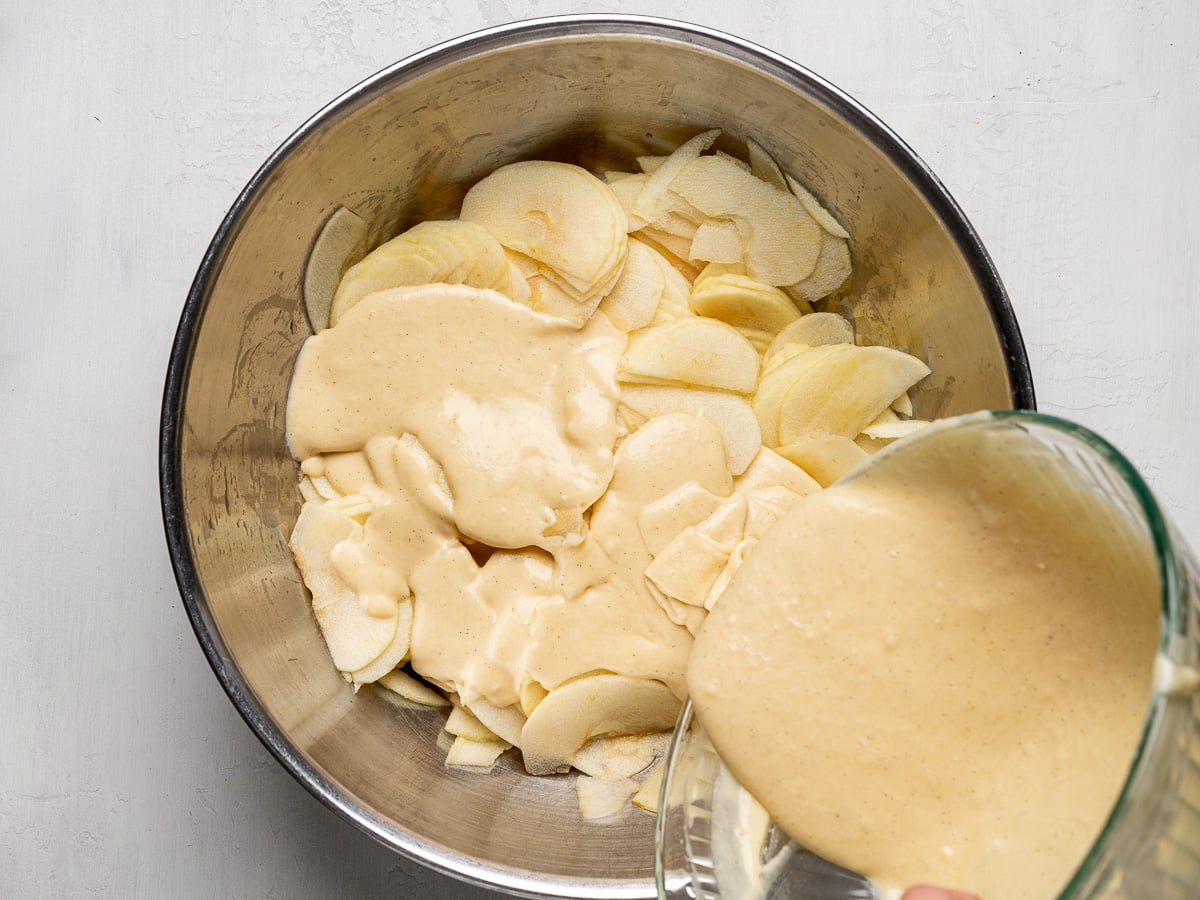
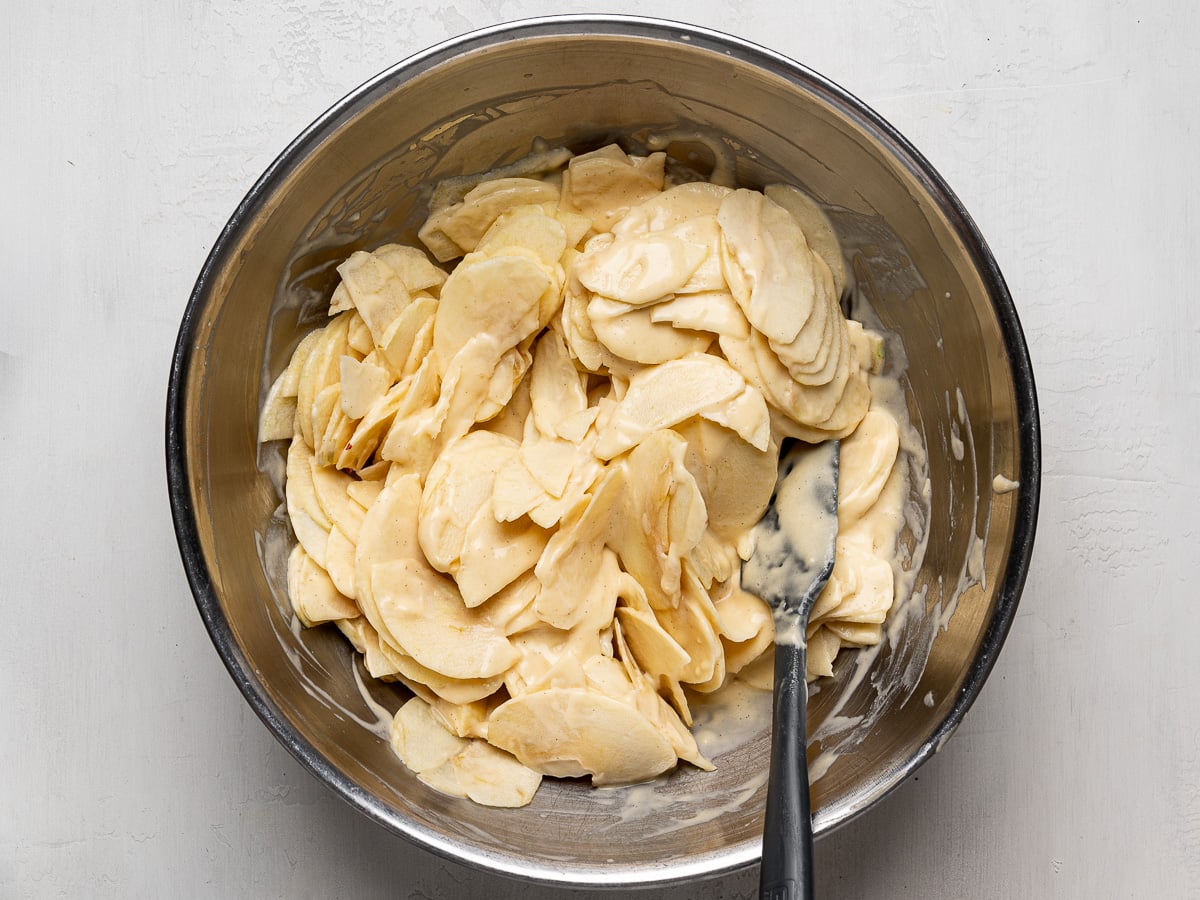
Prepare the apples and finish the batter: Peel and core the apples, then use a mandoline to slice them into approximately ⅛-inch thick slices. Add the flour mixture to the egg mixture and mix on low until batter is smooth. Using a spatula, gently fold the apple slices into the batter until evenly coated. I sometimes use my hands to separate any large clumps of apple slices that have stuck together.
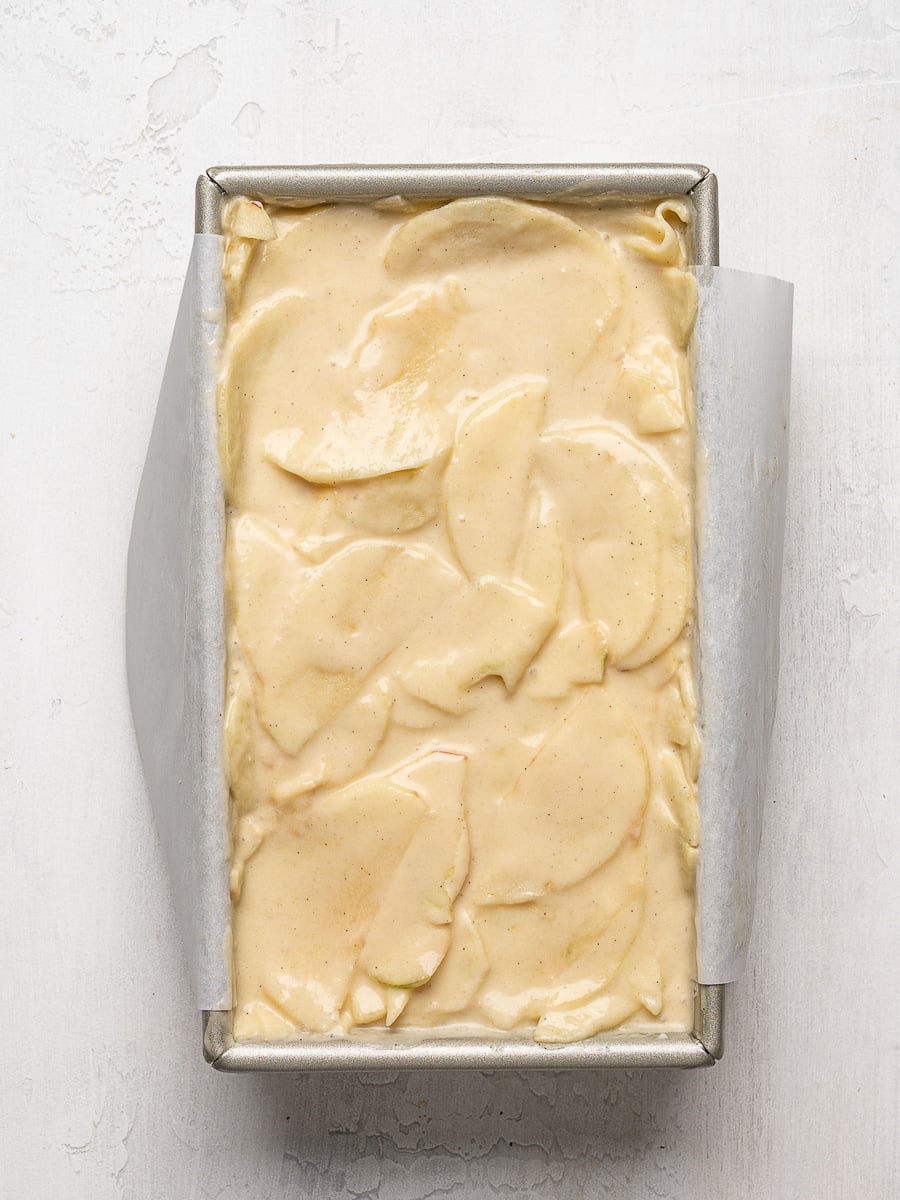
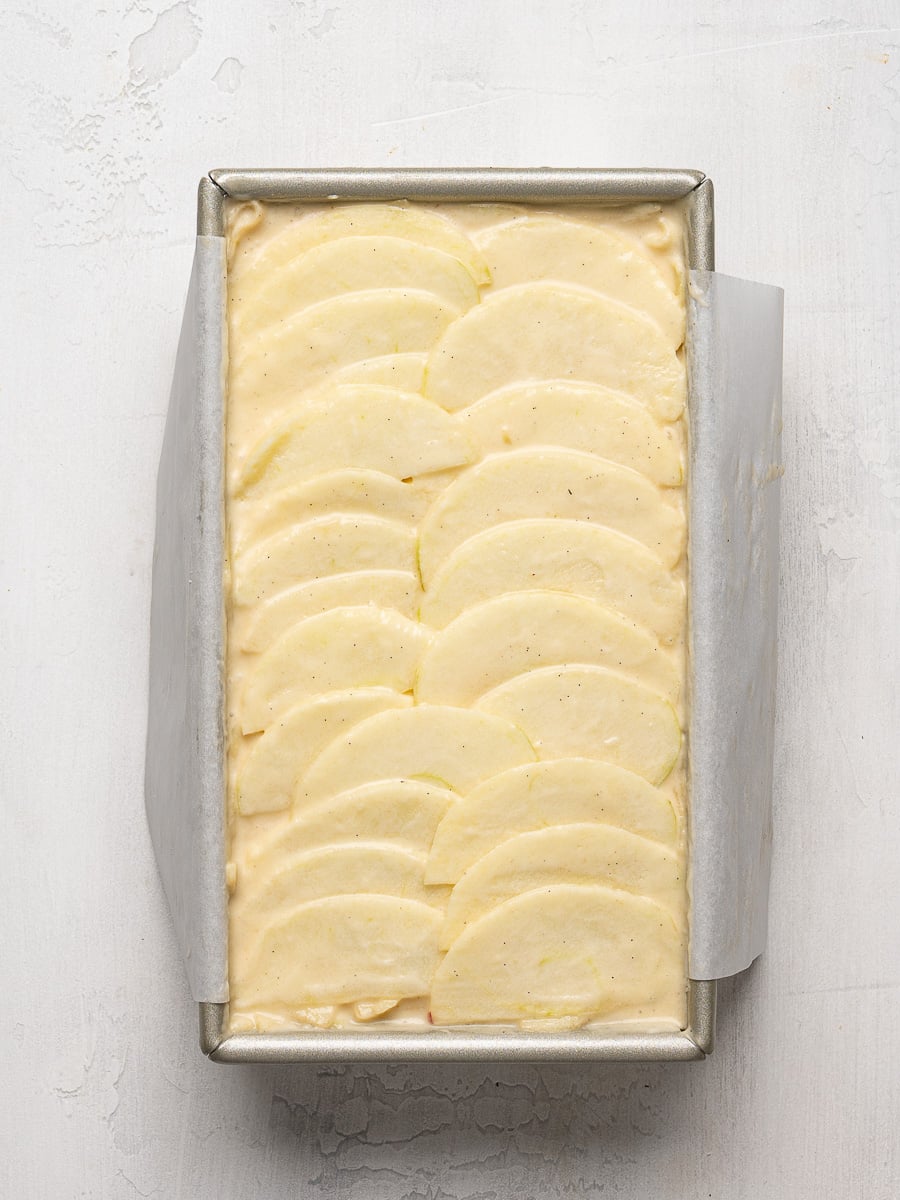
Layer the apple slices in pan: Using a large spoon, transfer a few spoonfuls of the batter-coated apples into the prepared loaf pan. Press and flatten the slices gently to create an even layer. Repeat until all the slices are used. If you wish, reserve a few apple slices for decorating the top.
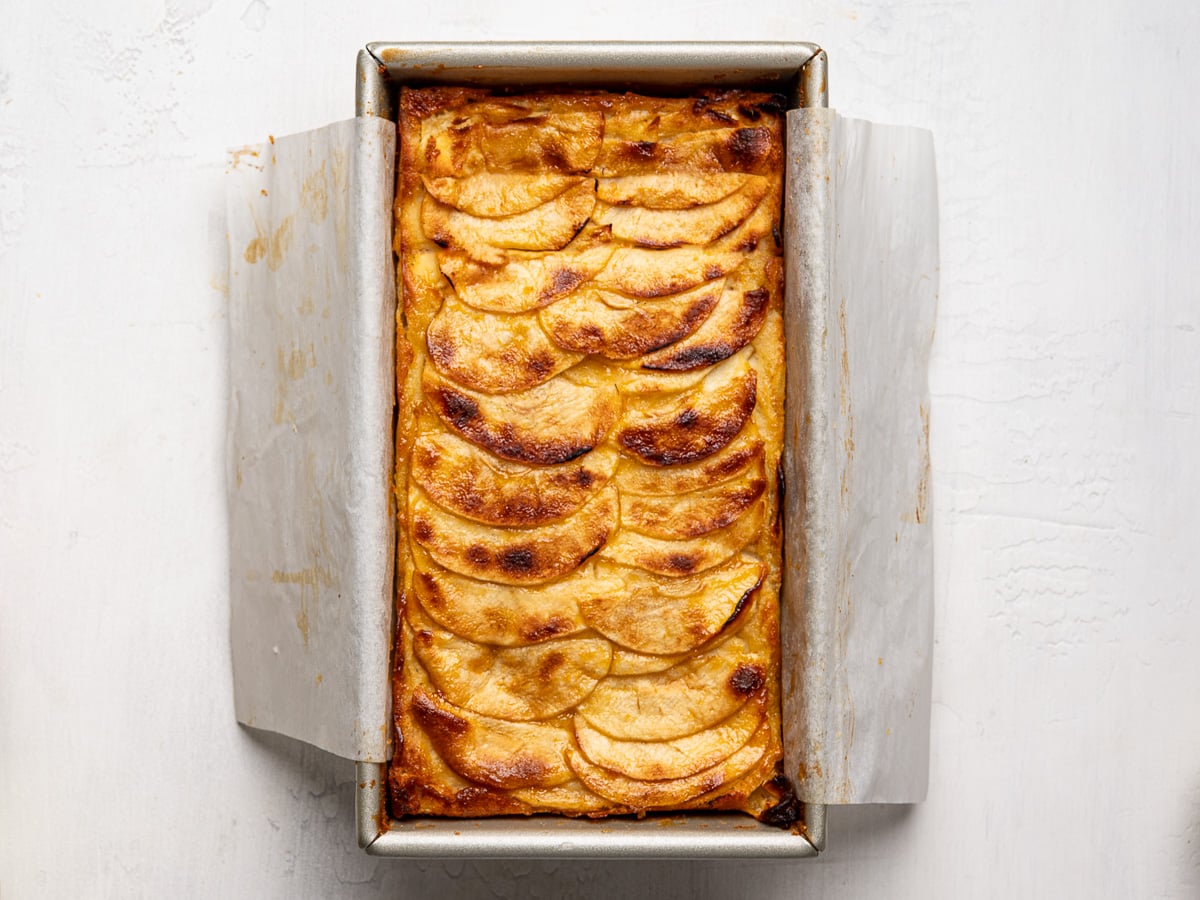
Bake the cake: Here is where it gets a little tricky because some ovens run hotter than others. For me, this cake is always ready between 60 – 70 minutes. I like the slightly darker, caramelized edges that develop toward the end of baking, so I usually leave mine in for the full 70 minutes. But you shouldn’t need to bake it for much longer than that. If the top is browning too quickly, loosely tent the pan with foil. When cake is ready, let it cool in the pan for 1 hour, then carefully lift it out using the parchment sling. Allow it to cool completely before slicing (about 1 more hour).
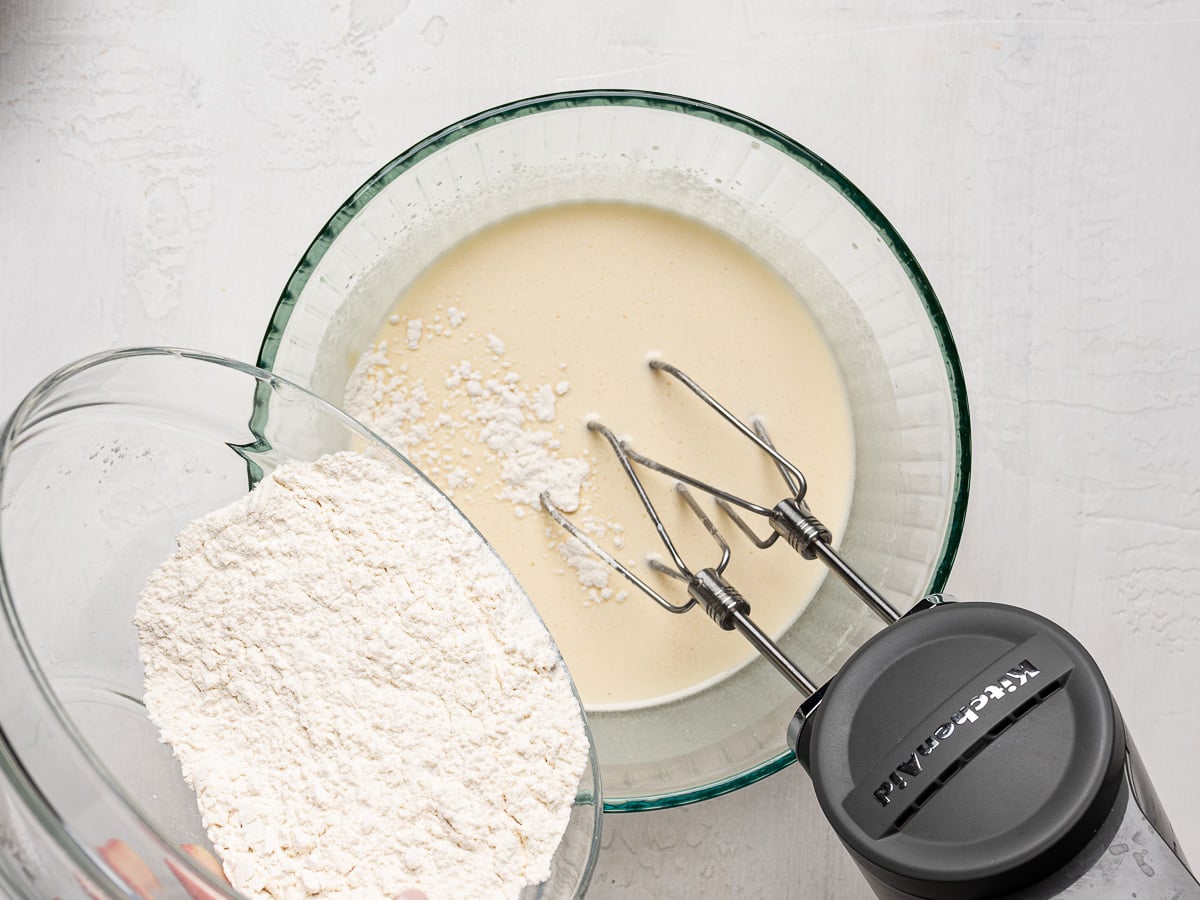
Helpful Recipe Tips
- Decorate the top. For a pretty finishing touch, reserve a few apple slices and arrange them in a pattern on the top layer before baking. This is entirely optional, but it makes the cake look a little extra special when served.
- Cover with foil if browning too quickly. Check the cake around the 30-minute mark. If the top is already getting a bit too brown on top, loosely tent it with foil for the remainder of the bake time. I rarely need to do this because I like the cake a little darker than golden, but every oven is different, so keep an eye on it to prevent burning.
- Allow the cake to cool before slicing. This step is essential! Let the cake to cool in the pan for at least 1 hour, then allow it cool completely for another hour or so before slicing. This gives the layers time to set so you can cut clean slices without the cake falling apart. For even neater slices, I like to chill the cake in the refrigerator for about 20 minutes just before cutting.
- Making it ahead improves the flavor and texture: Unlike apple pies that are unquestionably best freshly baked, this apple cake actually benefits from being made ahead. I rarely have the patience to wait a whole day to serve it, but when I do, I’m rewarded by a more intense apple flavor, and a cake that slices much more neatly as the layers have had time to set.
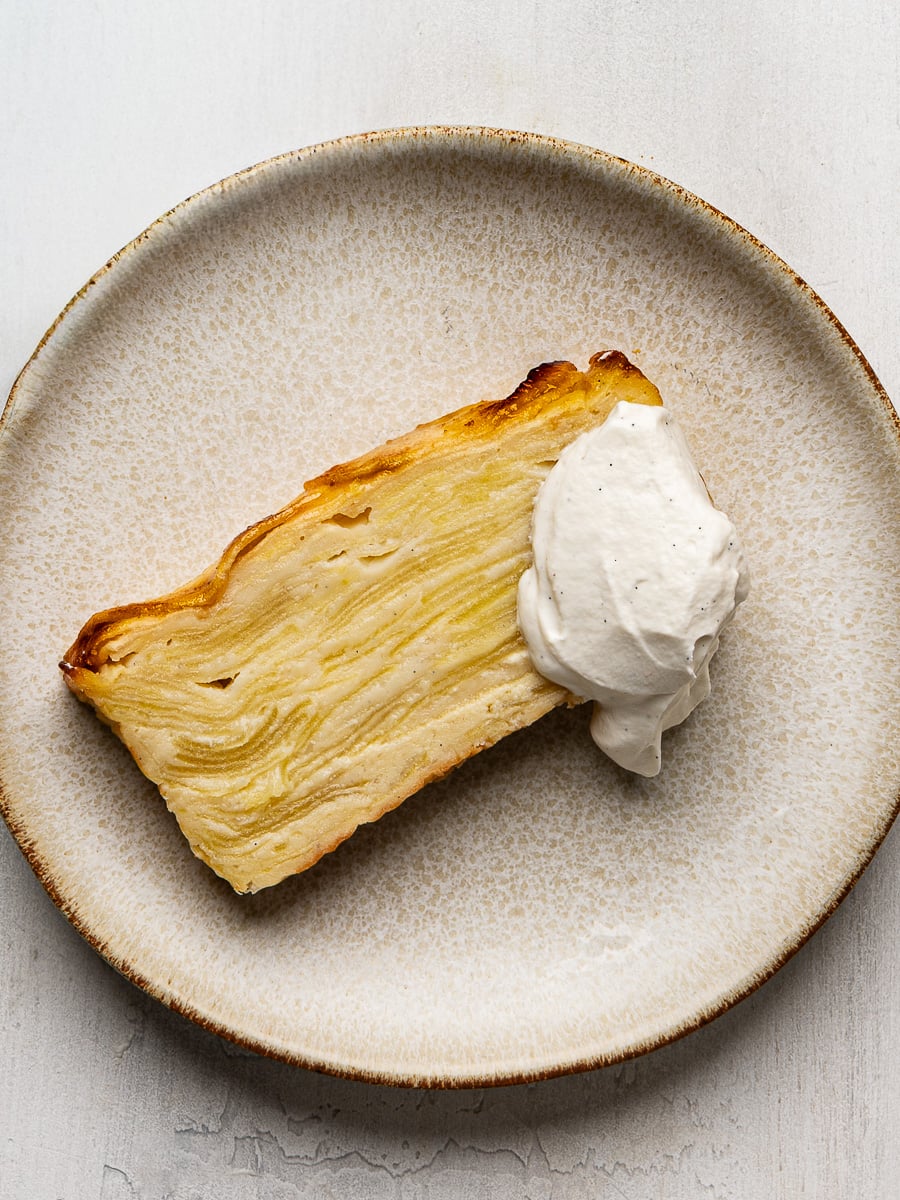
- How we enjoy serving this cake: While this cake is glorious just as is, we love it with just a fine sprinkle of powdered sugar. When we’re in the mood for something a little more decadent, we drizzle the cake slices with caramel sauce, or serve it with dollops of vanilla-scented whipped cream—yum!
Let Me Know Your Thoughts
If you gave this Invisible Apple Cake recipe a try, I would love to hear how it worked out for you. Share your thoughts in the comment section below or feel free to ask me anything — I always enjoy chatting with you.
Don’t forget to leave a star rating, too!~Sandra x
Invisible Apple Cake (Gâteau Invisible aux Pommes)
Ingredients
- 3 tablespoons (45 grams) unsalted butter, plus more for greasing
- 2 1/4 – 2 1/2 pounds apples, such as Honeycrisp, Courtland, Pink Lady or Fuji, (see note below)
- 3 large eggs, at room temperature
- 1/2 cup (100 grams) sugar
- 2 teaspoons vanilla paste, or vanilla extract
- 1 cup (126 grams) all-purpose flour
- 1 1/2 teaspoons baking powder
- 1/4 tsp kosher salt
- 1/4 cup (60 grams) whole milk
- 1/4 cup (60 grams) heavy cream (or use all whole milk)
- icing sugar for sprinkling, optional
Instructions
- Preheat oven to 375°F. Using butter or cooking spray, grease a 9 x 5-inch loaf pan. Line the pan with a parchment paper sling, leaving enough overhang on the long sides to lift out the cake later.
- In a small saucepan, gently melt the butter, then remove from heat and set aside to cool to room temperature. Alternatively, you can melt the butter in the microwave.
- Peel the apples then set them aside while you prepare the batter. (Don't slice them yet or they will brown.)
- In a large mixing bowl, beat the eggs, sugar, and vanilla with a hand mixer (or a whisk) until slightly pale and fluffy, about 2 minutes. Add the (cooled) melted butter, milk, and heavy cream and mix again until smooth.
- In a medium bowl, whisk together the flour, baking powder and salt, then sprinkle over the egg mixture. Mix just until combined.
- Quarter and core the peeled apples, then use a mandoline to slice each apple quarter into approximately ⅛-inch thick slices. (If the sliced apples are starting to brown before you've finished slicing the rest of the apples, add them to the batter and toss to coat.)
- Using a spatula, gently fold all the apple slices into the batter until evenly coated. I sometimes use my clean hands to separate any large clumps of apple slices that have stuck together.
- Using a large spoon, transfer a few spoonfuls of the batter-coated apples into the prepared loaf pan. Press and flatten the slices gently to create an even, flat layer. Repeat until all the slices are used. If you wish, reserve a few apple slices for decorating the top.
- Pour any remaining batter over the apples, tapping the pan gently on the counter to help it settle between the layers and to release any air bubbles. If you reserved any apple slices, arrange them in a scaled pattern on top.
- Bake for 60 – 70 minutes, or until the top is deep golden brown and the cake is set. I like the slightly darker, caramelized edges that develop toward the end of baking, so I usually leave mine in for the full 70 minutes. TIP: Check the cake around the 40-minute mark and if the top is browning too quickly, loosely tent the pan with foil. Let the cake cool in the pan for 1 hour.
- Run a knife around the edges of the pan, then carefully lift it out using the parchment sling. Allow it to cool completely before slicing, about one more hour.
- When ready to serve, sprinkle with icing sugar, if desired, then use a serrated knife to slice the cake.
Notes
- Apples: It’s best to use a single variety that holds its shape when baked. Cortland, Empire and Honeycrisp apples are great choices because they soften slowly and are less prone to browning while you’re slicing. Pink Lady, Fuji or Braeburn apples also work well. Avoid apples which tend to become mushy when baked such as McIntosh or Gala.
- Cover with foil if browning too quickly. Check the cake around the 30-minute mark. If the top is already getting a bit too brown on top, loosely tent it with foil for the remainder of the bake time. I rarely need to do this because I like the cake a little darker than golden, but every oven is different, so keep an eye on it to prevent burning.
- Allow the cake to cool before slicing. This step is essential! Let the cake to cool in the pan for at least 1 hour, then allow it cool completely for another hour or so before slicing. This gives the layers time to set so you can cut clean slices without the cake falling apart. For even neater slices, I like to chill the cake in the refrigerator for about 20 minutes just before cutting.
- To store: Store the baked cake in an airtight container at room temperature for up to 1 day, or refrigerate for up to 3 days.


Join the Conversation