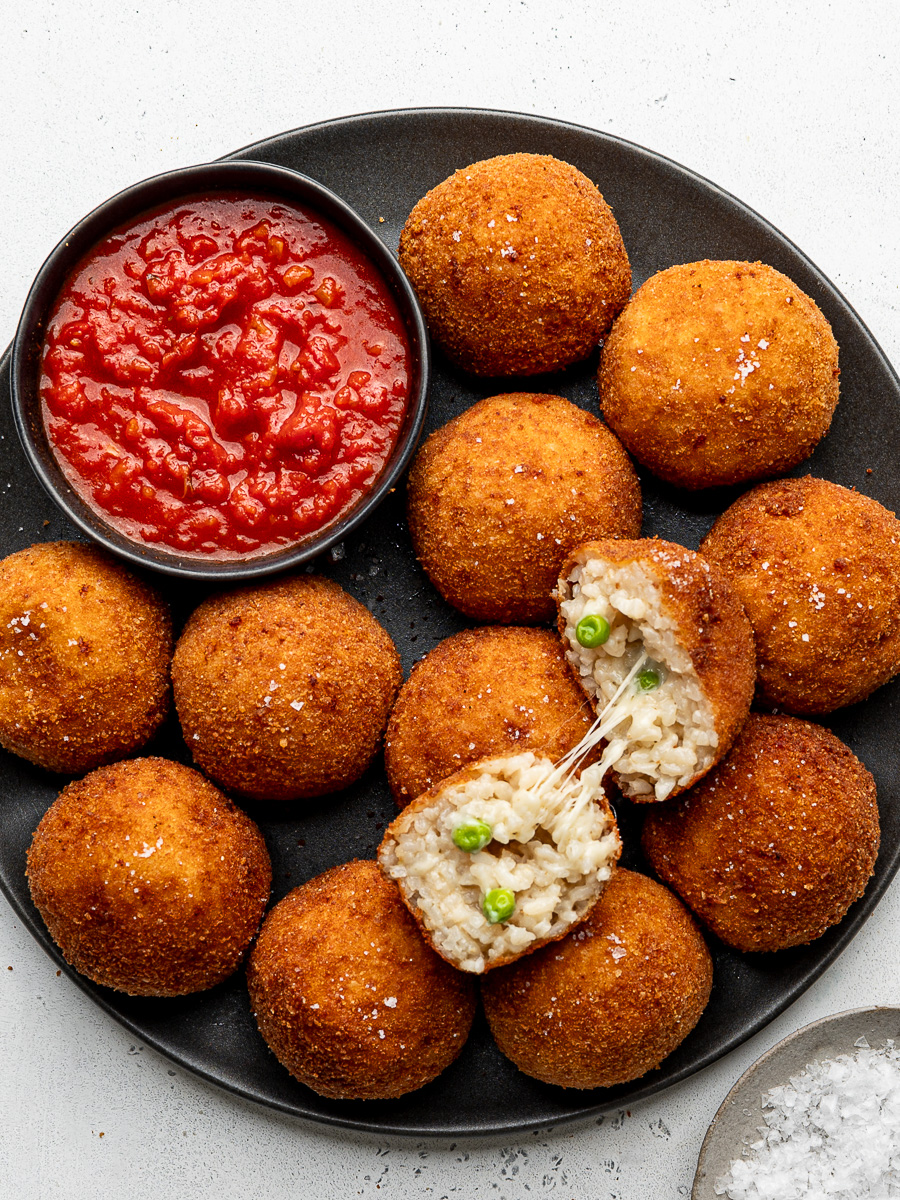
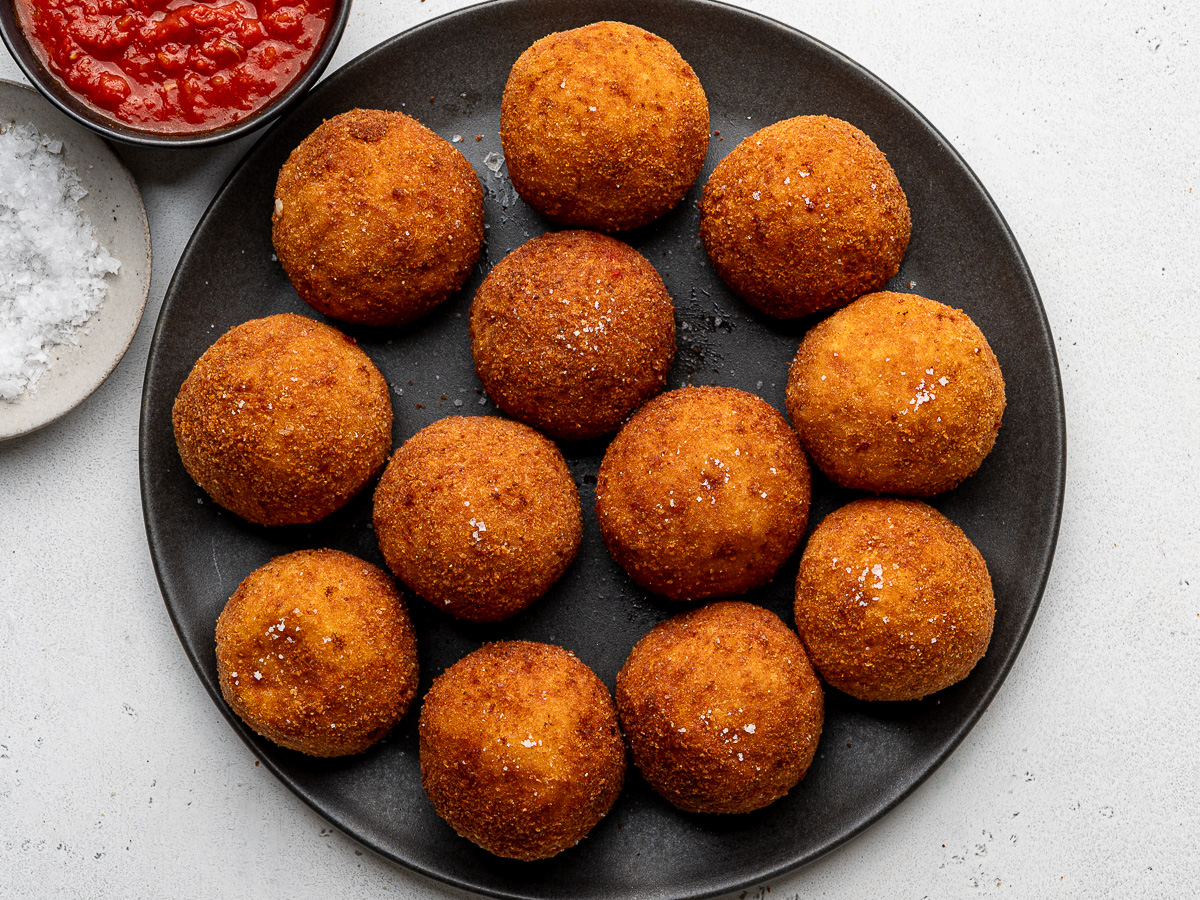
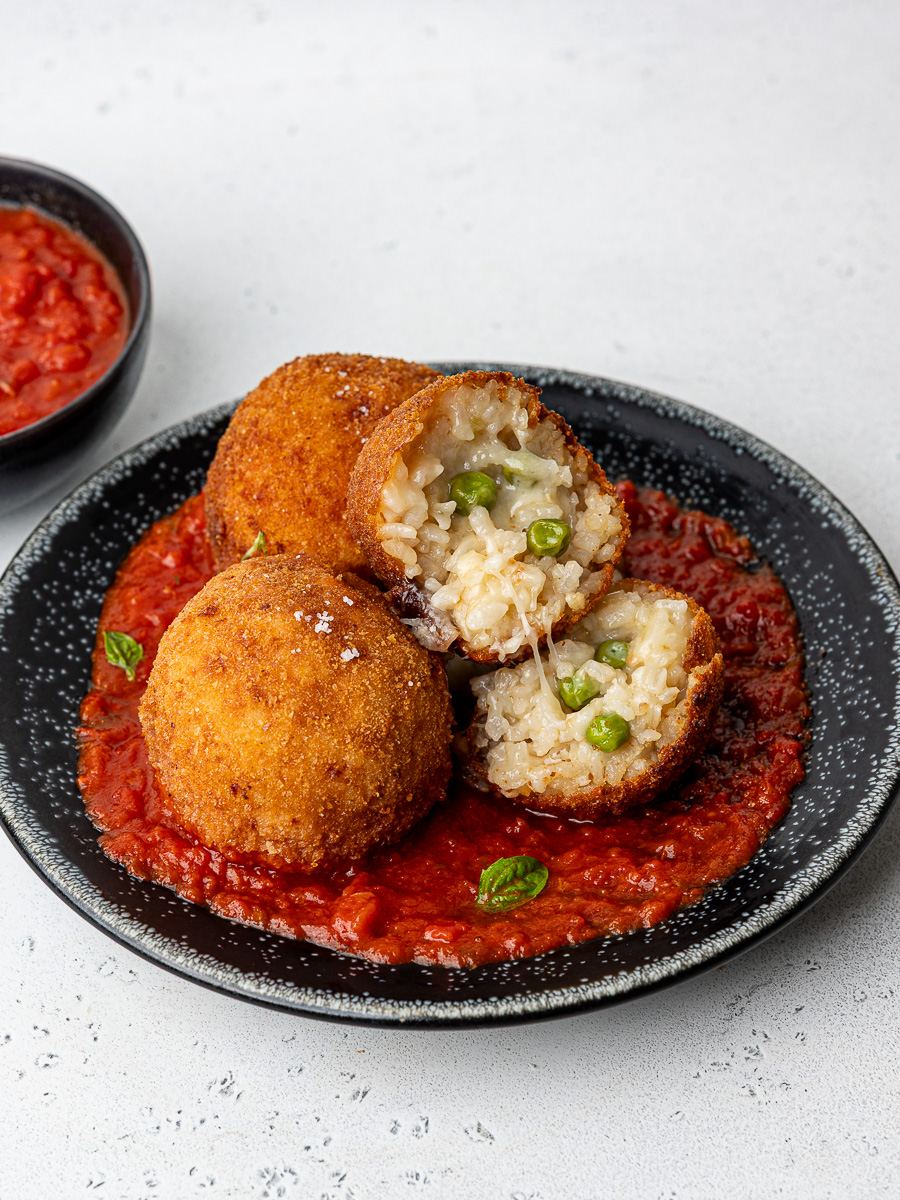
Crispy on the outside and creamy on the inside, these homemade arancini are stuffed with sweet peas and melty mozzarella for the ultimate Italian appetizer. Made with a risotto-style rice that requires no stirring, these crowd-pleasing appetizers are perfect for entertaining or snacking, especially during the holdiay season. Serve them warm with your favorite dipping sauce and watch them disappear.
Rejoice, You Do Not Need Traditional Risotto To Make Arancini
These fried little spheres of crisp-meets-creamy bliss are my take on classic Italian arancini. Made from cold risotto-style rice, stuffed and rolled into balls and fried until irresistibly golden, they are shatter-crisp on the outside, with a warm, velvety, ooey-gooey interior. Truly the best of all worlds.
And while arancini are often described as “leftover risotto balls,” Italians rarely make them that way. Instead, the rice is cooked specifically for arancini—simmered in broth, covered, with no stirring required (yay!). This absorption method makes the grains naturally sticky, helping the balls hold together beautifully and keeping them from bursting open in the oil.
I’m not going to sugar coat it—making arancini is a labor of love, but please believe me when I say it is 100% worth it. They are crowd-pleasing bites of deep-fried joy and the holiday season is the perfect time to serve these as appetizers, or as a starter for a dinner party. But there’s honestly no wrong time to welcome a batch of these delectable arancini.
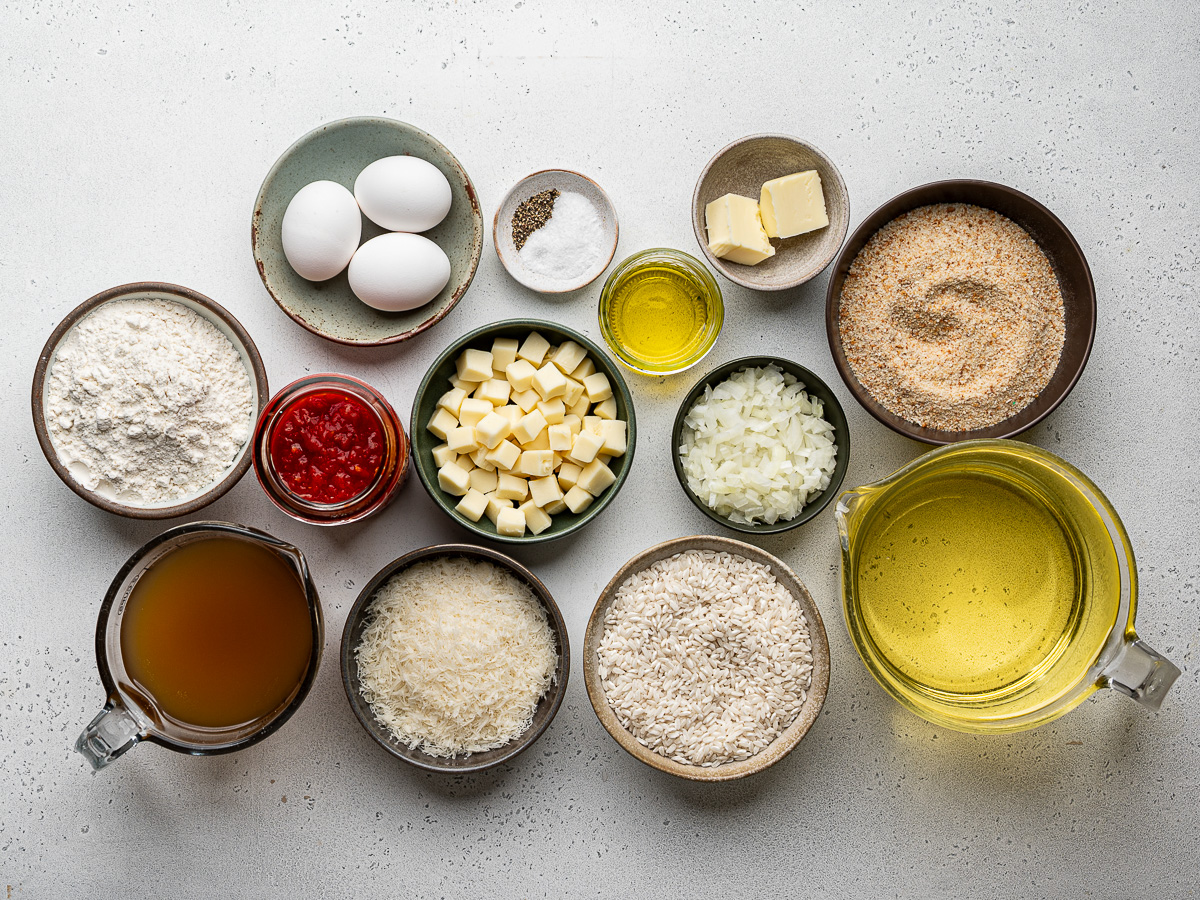
Key Ingredient Notes
You have a lot of options for stuffing arancini. A Sicilian-style filling uses a thick meat ragu, green peas, and a little mozzarella. Saffron is often added to the rice to give it a beautiful hue but unless I am using leftover risotto Milanese, I skip this. This recipe keeps it simple with just mozzarella and a few tender peas. You could also use diced ham and cheese for a kid-friendly, melty “croquette” vibe.
- Rice: For perfect arancini, short-grain rice is non-negotiable. Its natural starchiness is what makes the rice sticky enough to hold together when fried. Classic risotto varieties like Arborio, Carnaroli, or Vialone Nano are all great options. If you happen to find rice labeled specifically for arancini (my local store carries this brand and it is excellent), even better. Japanese short-grain rice also works beautifully.
- Low-Sodium Chicken Broth: I’m a bit of a purist when it comes to risotto and usually stick to homemade broth. But because the rice here is cooked differently—using the absorption method—good-quality store-bought broth works perfectly. To keep the arancini vegetarian, use a mild vegetable broth.
- Cheese: Two cheeses make these arancini extra irresistible. Freshly grated Parmigiano Reggiano gets stirred into the warm rice for depth and savoriness, while small cubes of low-moisture mozzarella melt into a gooey center as the arancini fry. For a more traditional Sicilian touch, swap the parmesan for grated Caciocavallo. It can be harder to find, but the flavor payoff is incredible.
- Coating: That signature crunchy shell comes from a classic flour-egg-breadcrumb coating. I prefer fine, dry breadcrumbs for the most even, delicate crust, but panko—or a mix of both—will also give you great results.
- Marinara sauce: These Italian rice balls can be served on their own but we love to dip them in marinara sauce. You can use a good quality store-bought marinara sauce but my quick homemade tomato sauce takes very little time to make and is super delicious.
While arancini are not difficult to make, they do require a fair amount of steps. My best advice is to cook the rice and shape the balls a day ahead, then coat and fry them the next day. This is also recommended because chilling the shaped balls ensures they won’t pop open.
Step-by-Step Visual Guide
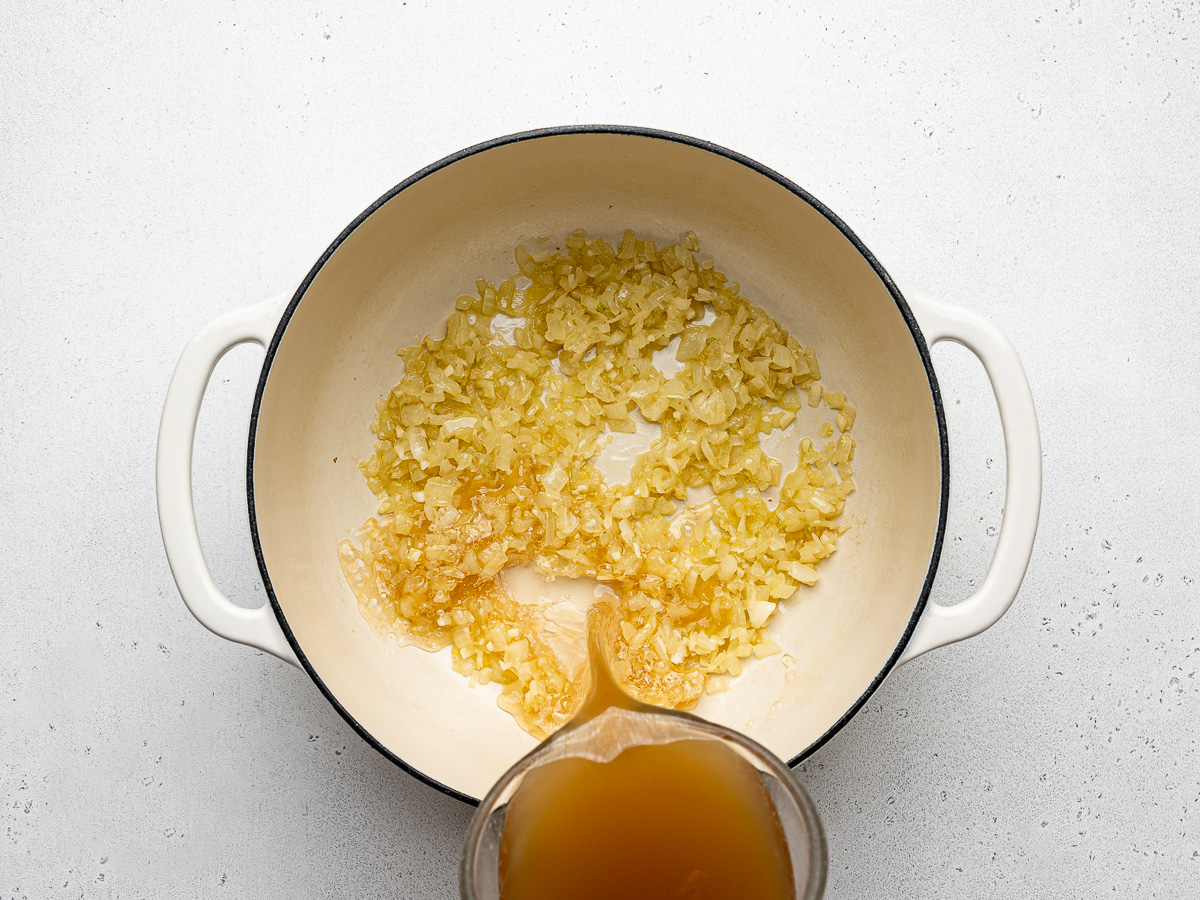
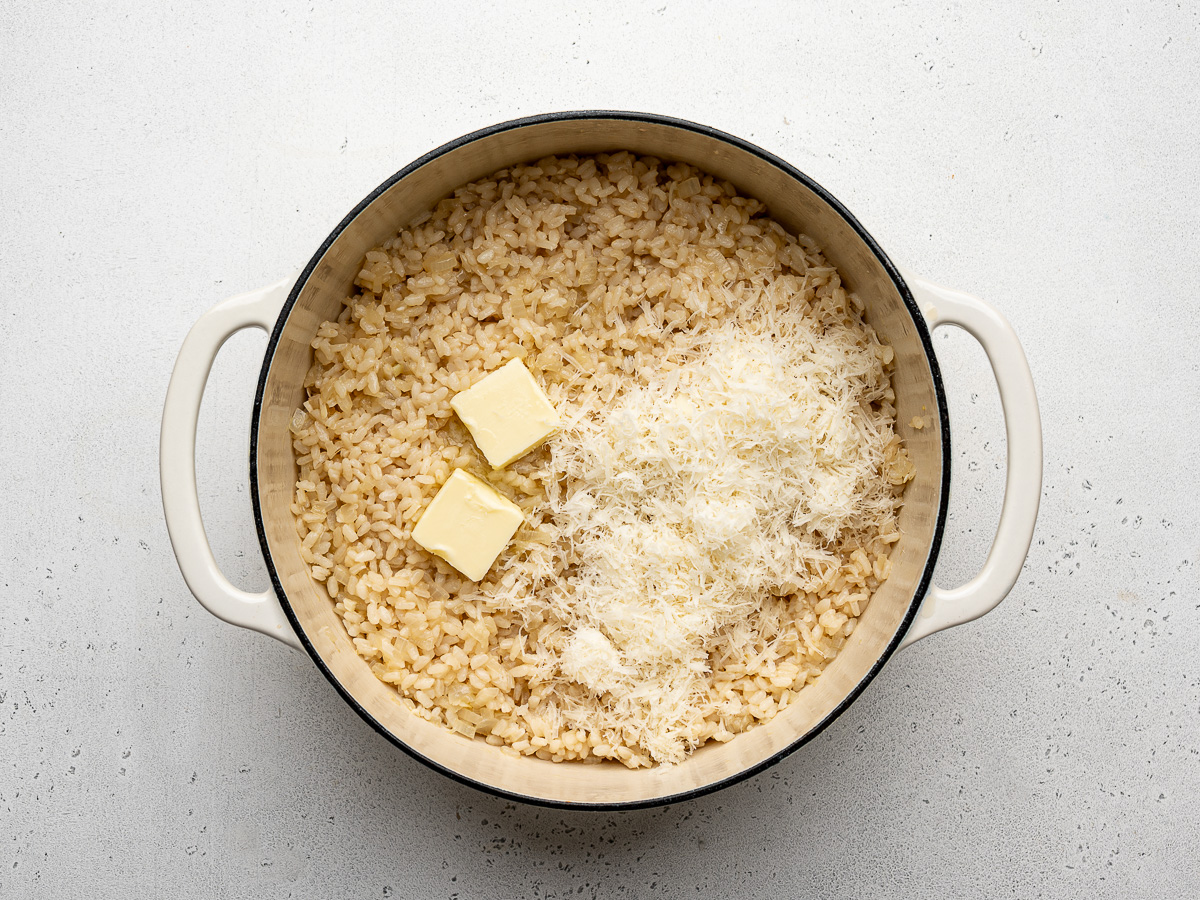
Cook the rice: In a large pot, sauté the onions and garlic in a little oil with a pinch of salt until softened and fragrant. Pour in the broth and bring to a boil. Add the rice, reduce the heat to very low, cover, and cook until the liquid is fully absorbed and the rice is tender and creamy, about 20 minutes. Stir in the butter and parmesan.
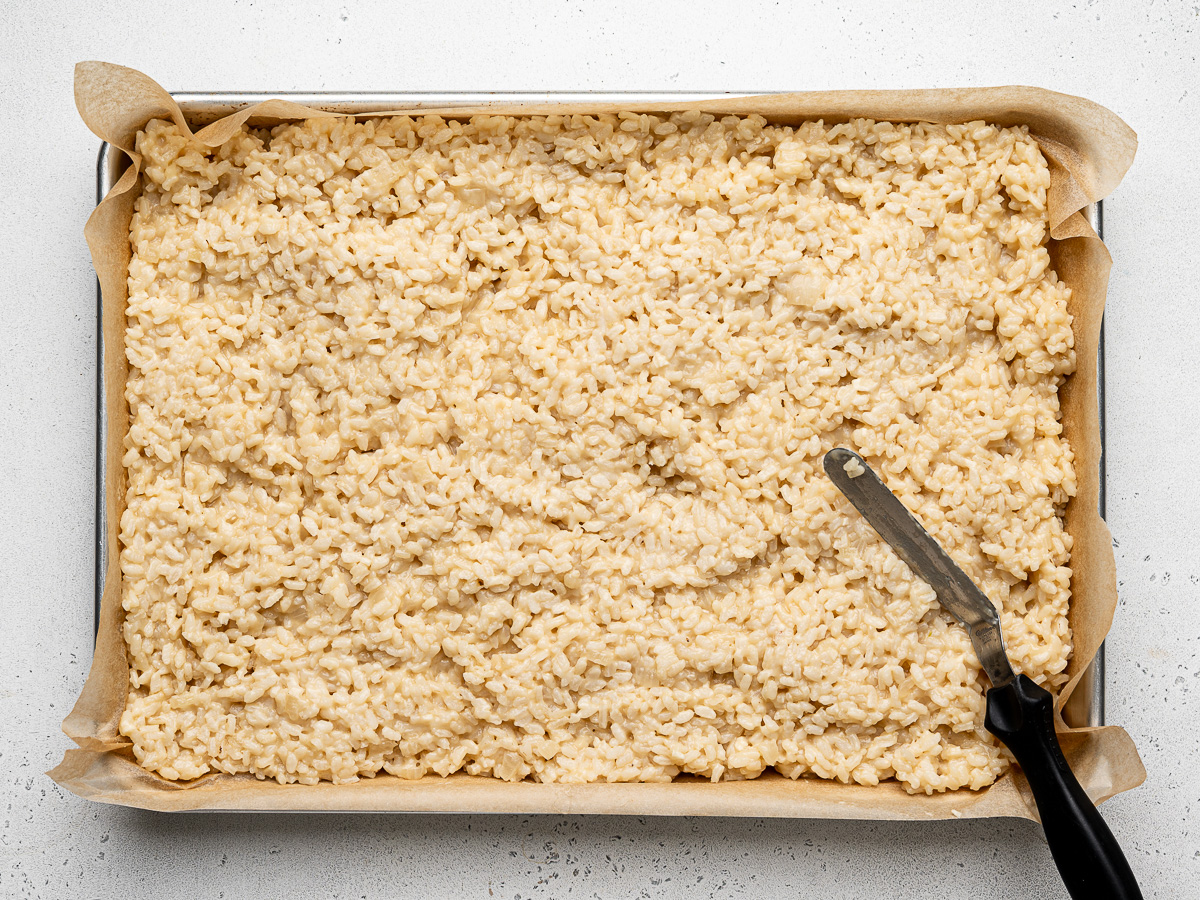
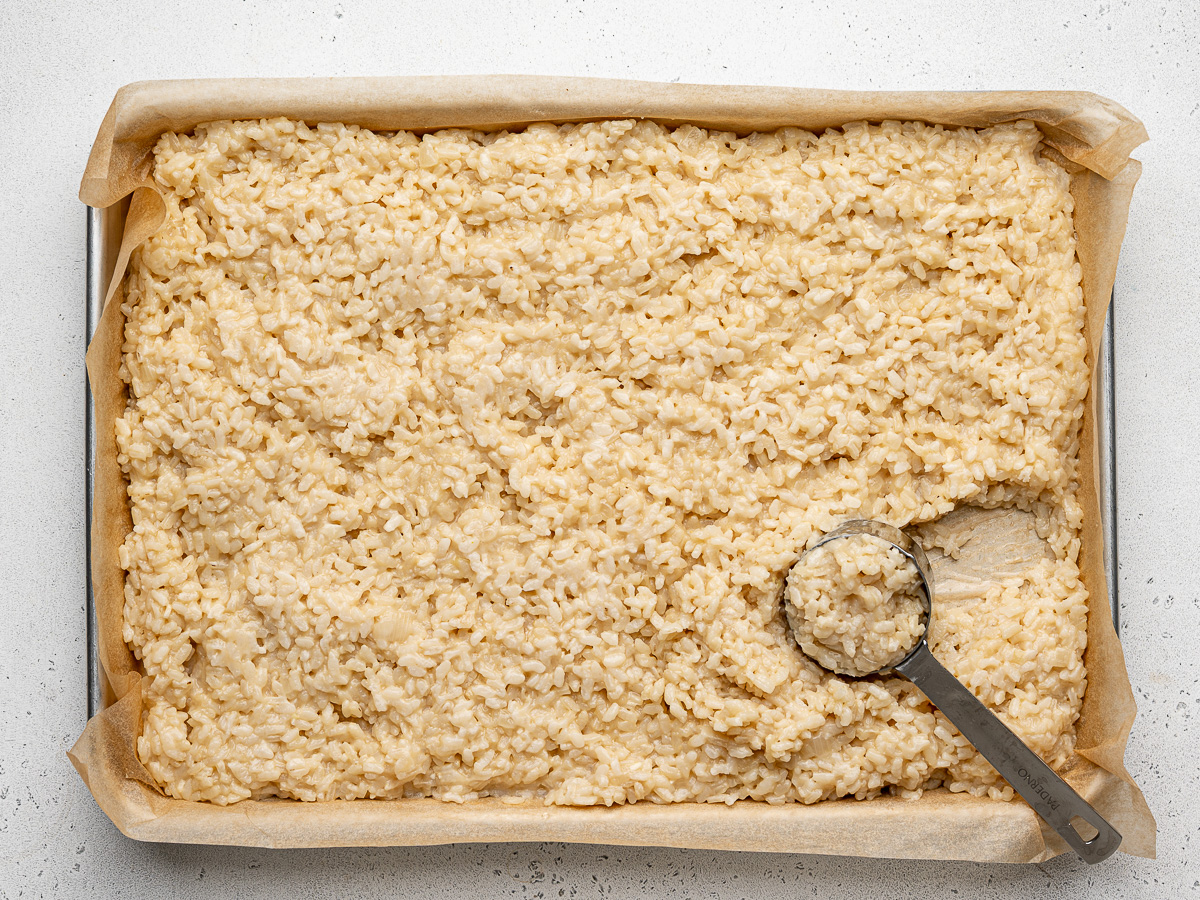
Cool the rice: Transfer the warm rice to a parchment-lined baking sheet and spread it out in an even layer. Let it cool for about 20 minutes (this makes it much easier to shape).
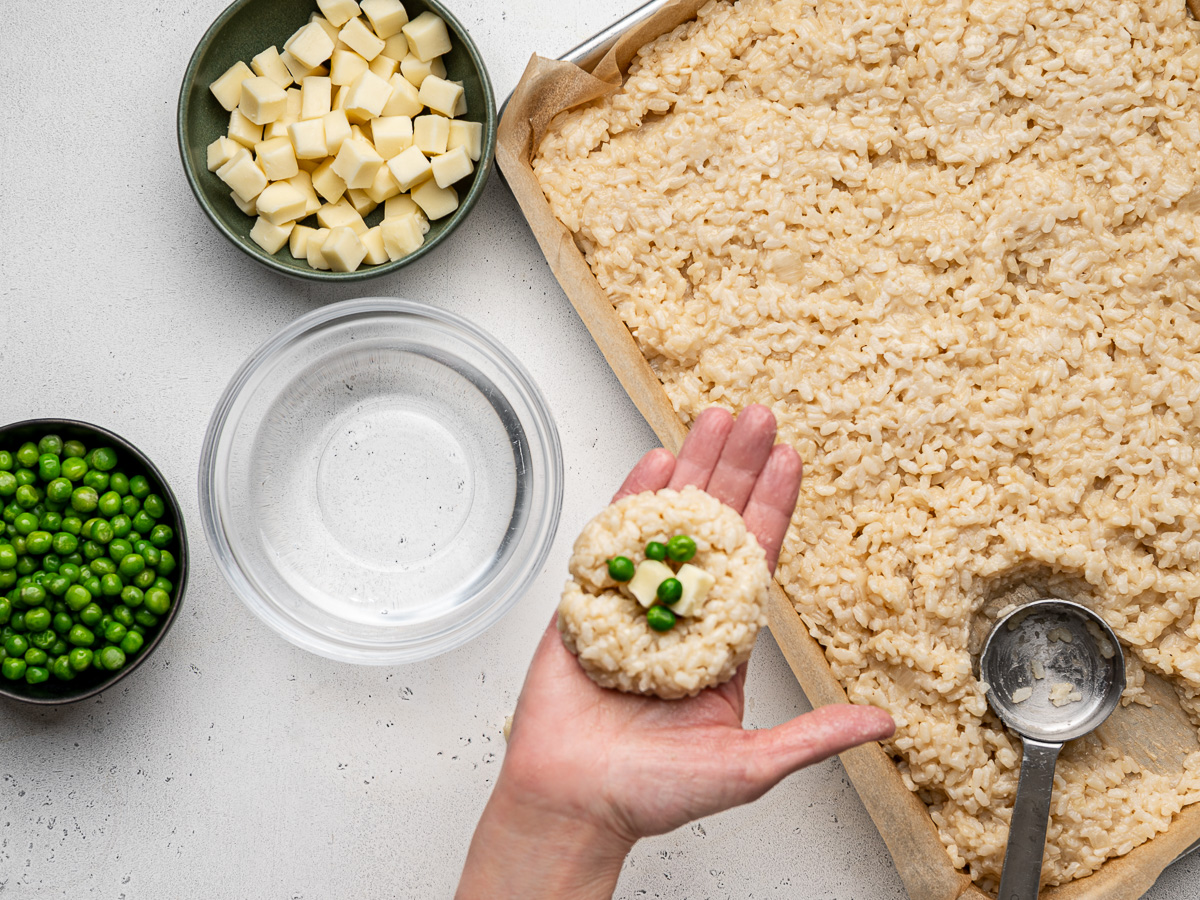
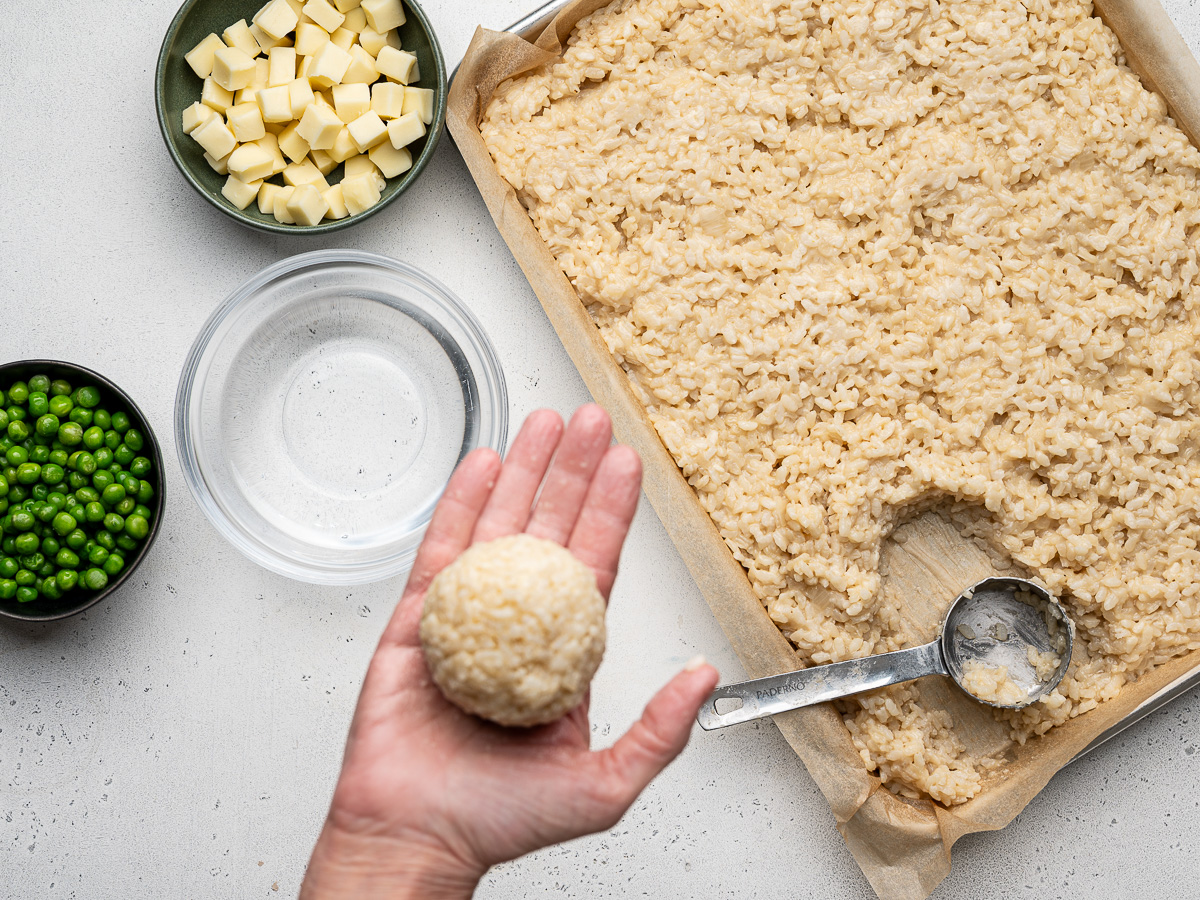
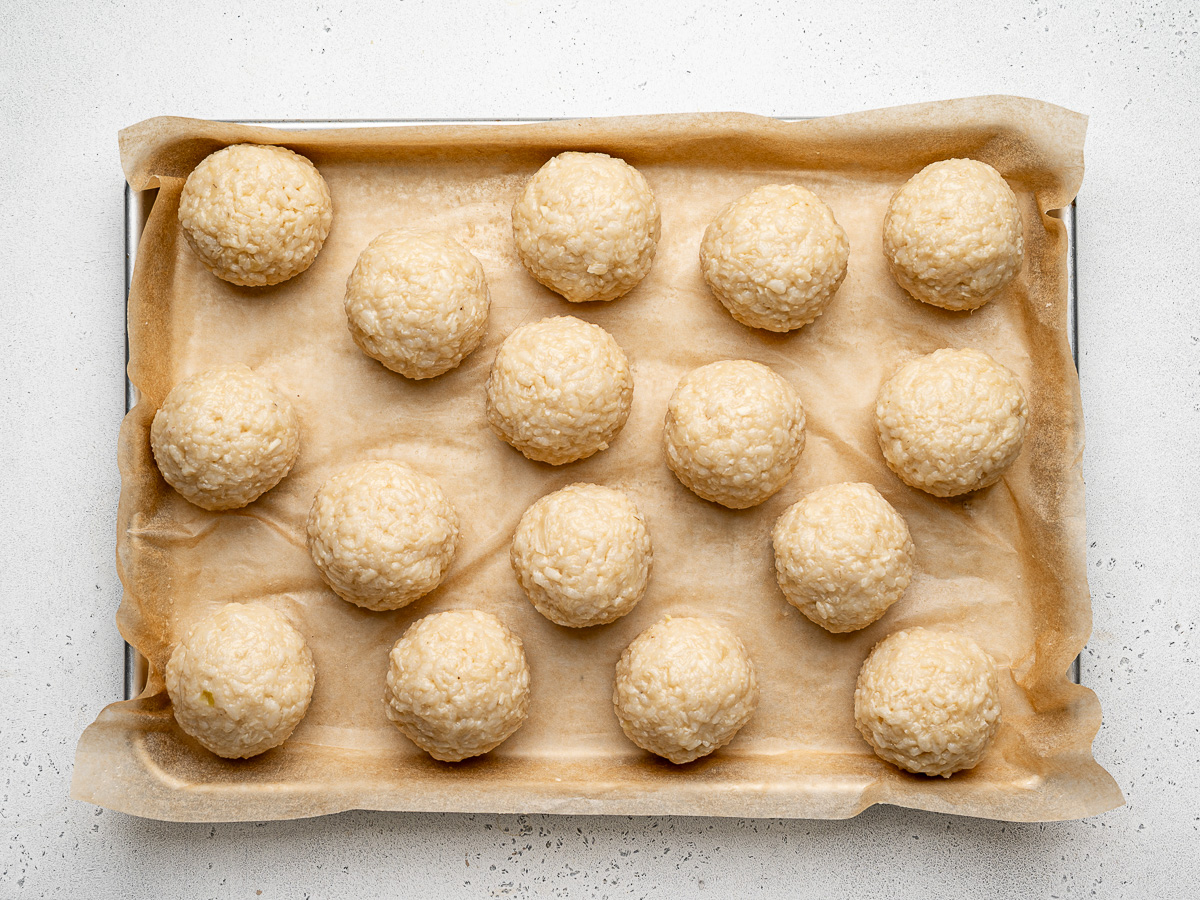
Shape the arancini: Scoop a portion of rice into your palm, flatten it slightly, and place a small cube of mozzarella in the center and 3 or 4 peas, if using. Enclose the cheese with the rice, forming a tight ball. Repeat with the remaining mixture.
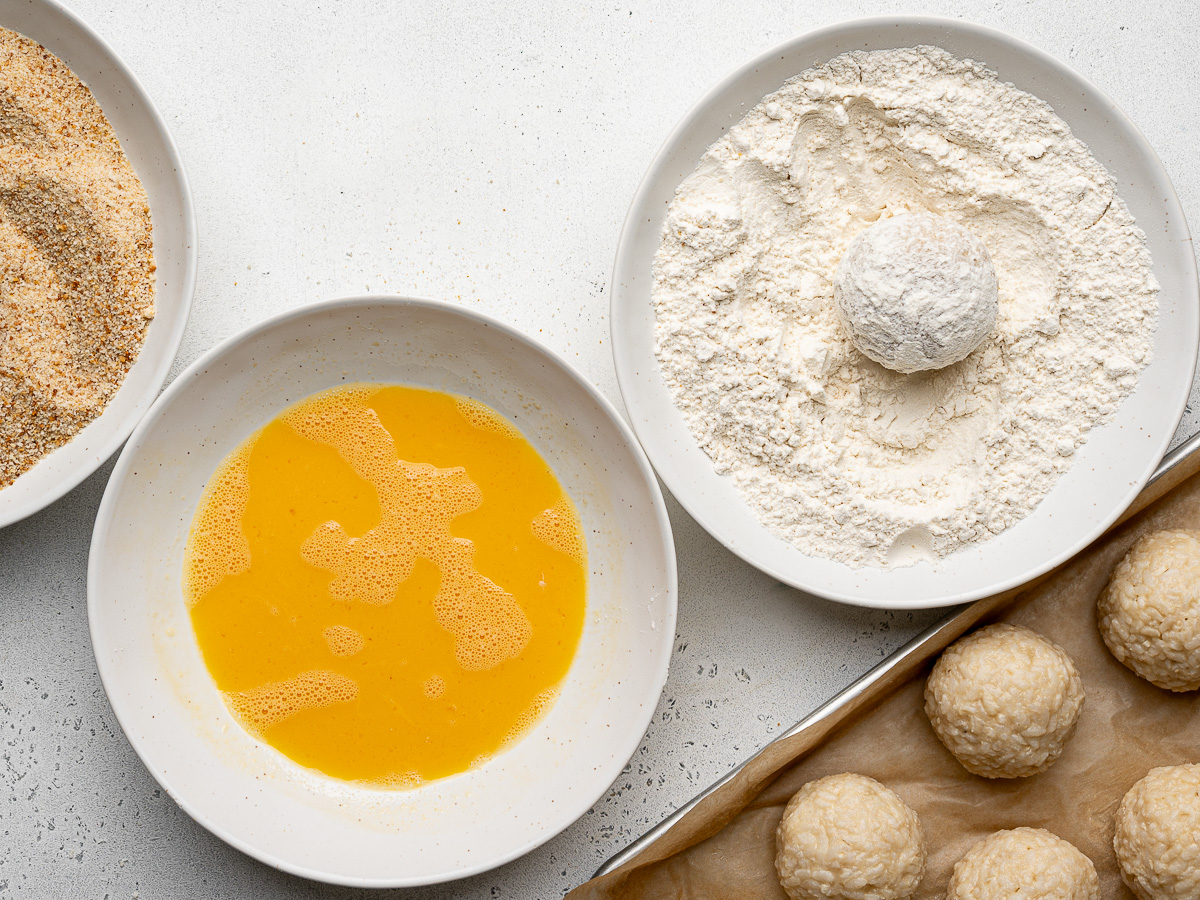
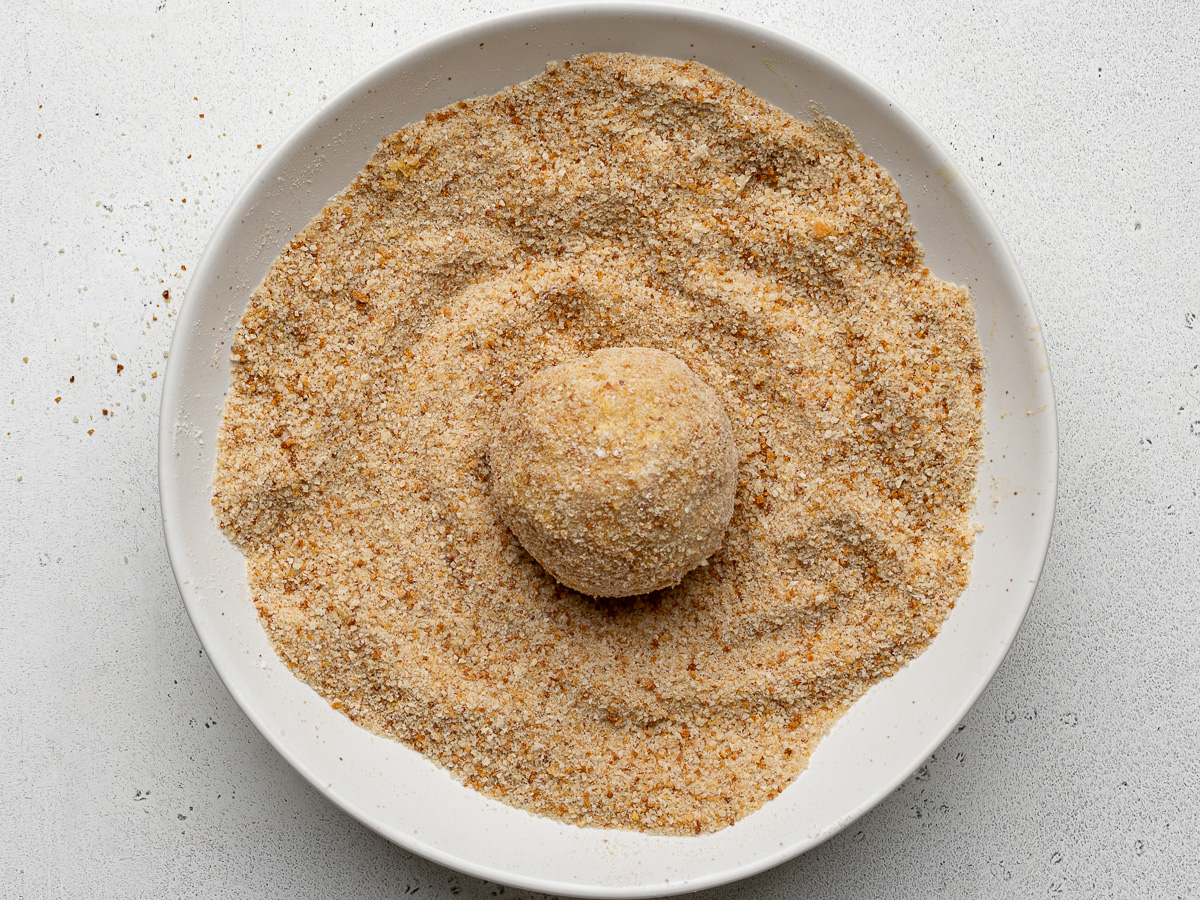
Coat the arancini: Working one ball at a time, roll in flour, dip in beaten eggs, and coat in breadcrumbs. Press the crumbs lightly so they adhere well.
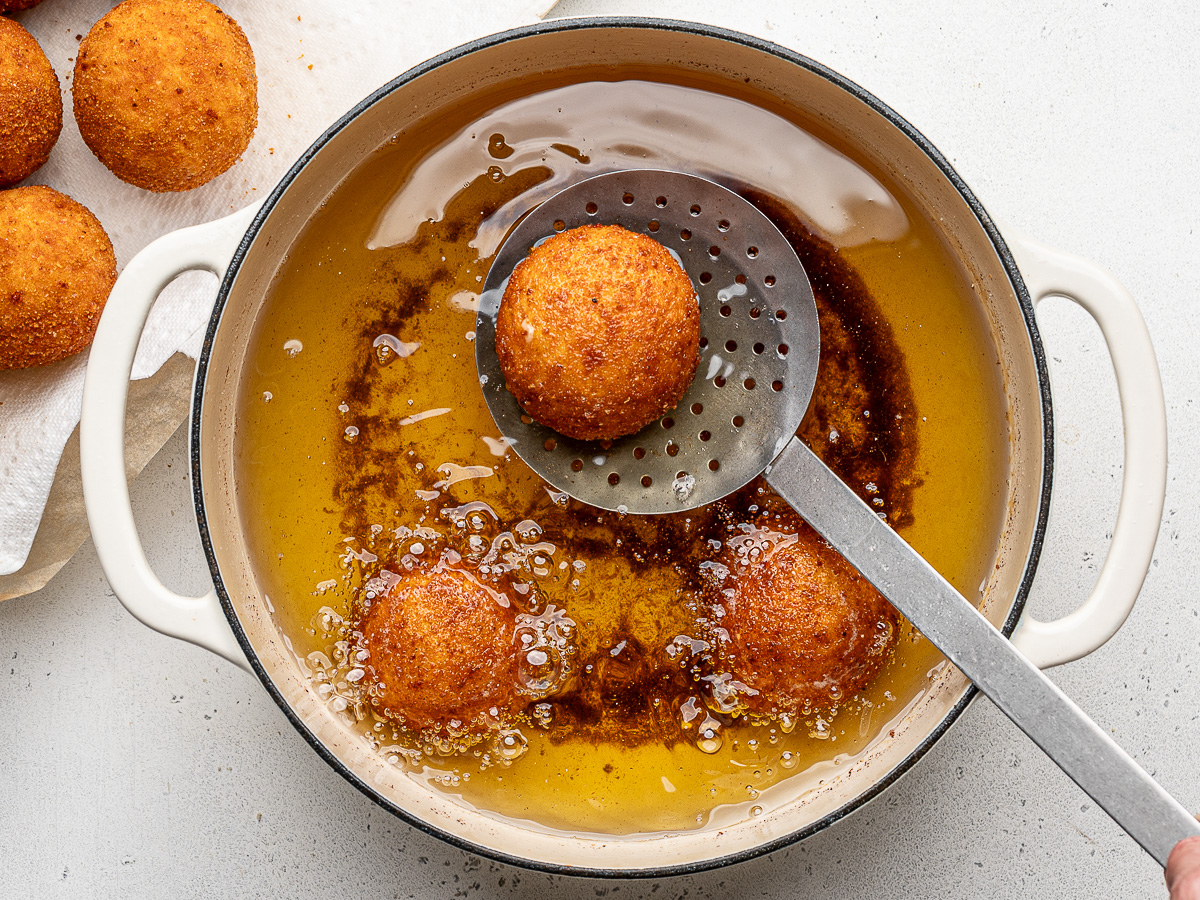
Fry: Heat oil in a deep pot or skillet to 350°F. Fry the arancini in batches until deeply golden and crisp, 4-5 minutes per batch. Transfer to a paper towel–lined plate and sprinkle with salt.
Serve: Enjoy warm, ideally with marinara, romesco, or your favorite dipping sauce.
Expert Tips
- Use short-grain rice only. Long-grain rice won’t get sticky enough to hold its shape.
- Cook the rice low and slow. The absorption method (covered, no stirring) ensures the rice turns sticky and cohesive.
- Cool completely before shaping. Room-temperature rice is fine, but warm or hot rice is harder to form into tight balls.
- Keep your hands slightly damp. This prevents sticking and helps form smooth, compact arancini.
- Don’t skimp on the cheese. Make sure the mozzarella cubes are small but generous so you get that signature ooey-gooey center.
- Press the coating firmly. A tight coating helps the arancini fry evenly and stay intact.
- Monitor the oil temperature. Aim for 350°F; too hot and they’ll brown too quickly, too cool and they’ll absorb oil.
- Fry in batches. Overcrowding lowers the oil temperature and results in greasy arancini.
- Salt immediately after frying. Salt adheres best when the arancini are hot.
- Serve warm. That molten mozzarella center waits for no one!
Frequently Asked Questions
Yes! You can cook the rice and shape the balls (without the coating) up to 1 day in advance. Keep them covered in the refrigerator until you’re ready to fry. They may take an extra minute to heat through.
Absolutely. Freeze fully shaped and coated arancini on a baking sheet, then transfer to a freezer-safe container or freezer bag for up to 2 months. Fry straight from frozen, adding 1–2 extra minutes to the cooking time.
If your arancini fell apart while frying, this usually means the rice wasn’t sticky enough or the balls weren’t compacted tightly. Make sure to use short-grain rice and press the mixture firmly around the filling.

Serving Suggestions
In Sicily, arancini are mostly eaten as a finger food despite their large size. That being said, arancini can be served as a starter to a meal, alongside other appetizers, or as a meal with a light salad on the side. Here’s some of our favorite ways to enjoy them:
- With a dipping sauce: Arancini are fantastic with warm tomato sauce, arrabbiata, romesco, pesto, or even a simple garlic aioli.
- As an appetizer: Serve on a platter with toothpicks and a couple of sauces for dipping. They disappear fast!
- With a salad: Pair with a crisp green salad or an herby arugula salad for a lighter, fresher contrast.
- Italian-style snack board: Add cured meats, olives, roasted peppers, and cheese for a fun aperitivo-style spread.
- For dinner: Round them out with a hearty soup like minestrone or a simple tomato basil soup.
Let Me Know Your Thoughts
If you gave this Arancini recipe a try, I would love to hear how it worked out for you. Share your thoughts in the comment section below or feel free to ask me anything — I always enjoy chatting with you.
Don’t forget to leave a star rating, too!~Sandra x
Arancini (Crispy Italian Rice Balls)
Ingredients
For the Rice
- 2 tablespoons olive oil
- 1 small onion, finely diced
- 2 garlic cloves, minced
- 1 teaspoon kosher salt, plus more to sprinkle
- 2 cups short-grain rice such as Arborio, Carnaroli, Vialone Nano, or Japanese short-grain
- 5 cups low-sodium chicken broth (or vegetable broth for vegetarian)
- 2 tablespoons unsalted butter
- 1 cup freshly grated Parmigiano Reggiano
For the Filling
- 1 cup frozen peas, thawed
- 8 ounces low-moisture mozzarella, cut into small cubes (see notes)
For the Coating
- 1 cup all-purpose flour
- 3 large eggs, beaten
- 2–3 cups fine dry breadcrumbs (or panko)
- Neutral oil, for frying (canola, vegetable, or avocado)
Instructions
- Heat the olive oil in a large pot over medium heat. Add the onion, garlic, and a pinch of salt. Cook until softened and fragrant, 3–4 minutes. Pour in the broth and bring to a boil. Stir in the rice, reduce heat to very low, cover, and simmer until the liquid is absorbed and the rice is soft and creamy, about 20 minutes. Remove from heat and stir in the butter and grated parmesan.
- Transfer the warm rice to a parchment-lined baking sheet. Spread it out in a thin, even layer and let cool for about 20 to 30 minutes. (Alternatively, once the rice has completely cooled, you can cover tightly and refrigerate overnight. Remove from fridge 20 minutes before shaping-the rice should not be fridge cold).
- Scoop about 1/4 cup of rice into your hand and flatten slightly. Add a few peas and two small cubes of mozzarella to the center. Add a smaller scoop of rice on top and shaping it into a tight ball. Note: You want to cup your hands and press the mixture into a ball, as opposed to rolling it. Repeat with the remaining rice mixture. You should have about 16 (2 1/2-inch round) rice balls, or make them smaller to serve a larger crowd. Chill the balls for at least 15 minutes (overnight is best).
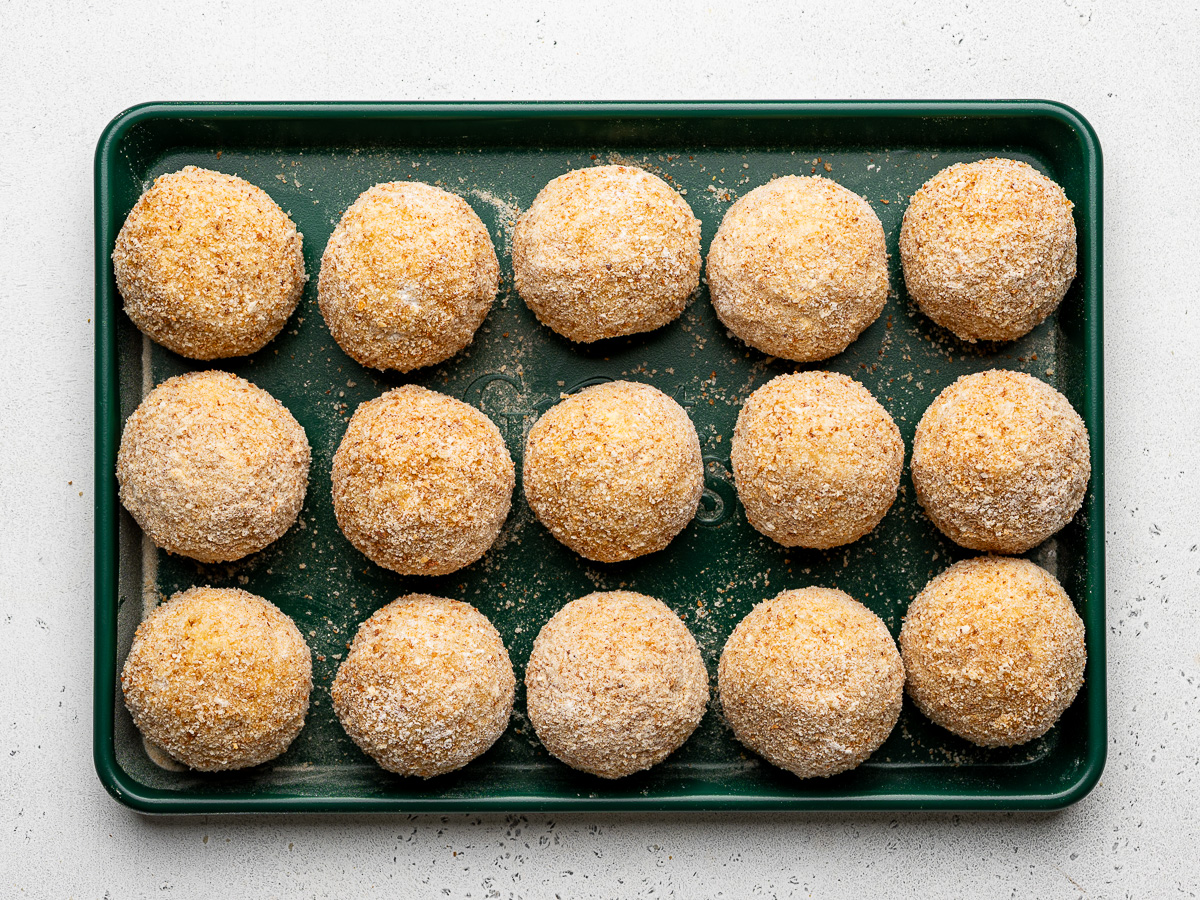
- When ready to fry the balls, line a baking sheet with parchment paper. Set up three bowls: one with flour, one with beaten eggs, and one with breadcrumbs. Roll each rice ball in flour to lightly coat, then dip in the egg, then coat thoroughly in breadcrumbs. Press lightly so the coating adheres well. Set on the prepared baking sheet and repeat until you have coated each rice ball.
- Heat 2–3 inches of oil in a deep pot or skillet to 350°F. Fry the arancini in batches (I put 3 or 4 at a time) until golden and crisp, 4–5 minutes, carefully rolling the rice balls often in the oil to ensure even cooking on all sides. Use a slotted spoon to transfer rice balls to a paper towel–lined plate and sprinkle with salt. Note: Keep an eye on the temperature of the oil and adjust as needed.
- Serve warm with marinara sauce, romesco, pesto, or your favorite dipping sauce.
Notes
- Cool completely before shaping. Room-temperature rice is fine, but warm or hot rice is harder to form into tight balls.
- Keep your hands slightly damp. This prevents sticking and helps form smooth, compact arancini.
- Don’t skimp on the cheese. Make sure the mozzarella cubes are small but generous so you get that signature ooey-gooey center.
- Press the coating firmly. A tight coating helps the arancini fry evenly and stay intact.
- Monitor the oil temperature. Aim for 350°F; too hot and they’ll brown too quickly, too cool and they’ll absorb a lot of oil.
- Fry in batches. Overcrowding lowers the oil temperature and results in greasy arancini.
- Salt immediately after frying. Salt adheres best when the arancini are hot.


Shlok
Crispy outside, gooey inside — perfect Italian treat!
Sandra Valvassori
Thank you, Shlok!
Susan M Dangerfield
Omg!!! I want that now!! Looks so incredible & I was raised on rice so this is exciting to learn new discoveries of “leftover rice!!” Thank You!!🙏
Sandra Valvassori
Haha I hope you give them a try, Susan! You will love them. ☺️
Denise
Can these be reheated?
Sandra Valvassori
Hi Denise, while arancini are best eaten freshly made, they will be delicious reheated. For best results, reheat them cold, straight out of the fridge, in a 375°F oven for about 10 to 12 minutes, or in an air fryer for 15 minutes. Hope this helps!