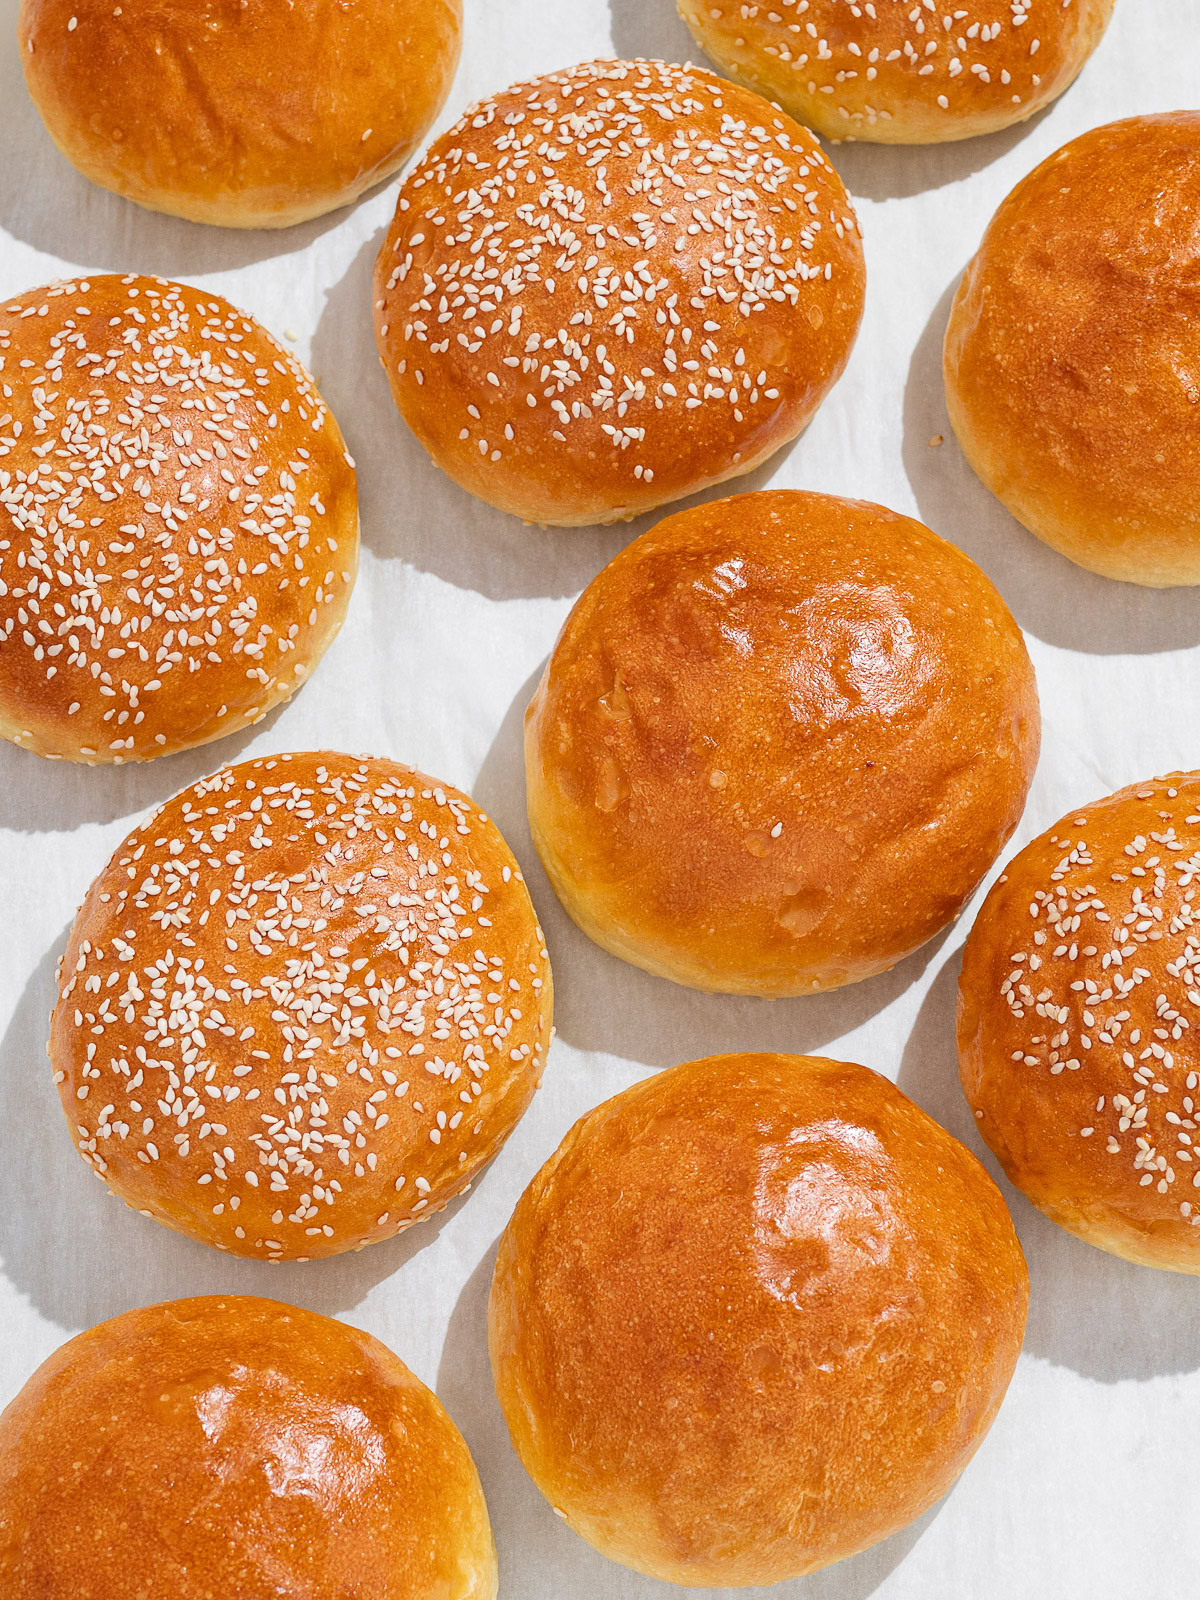
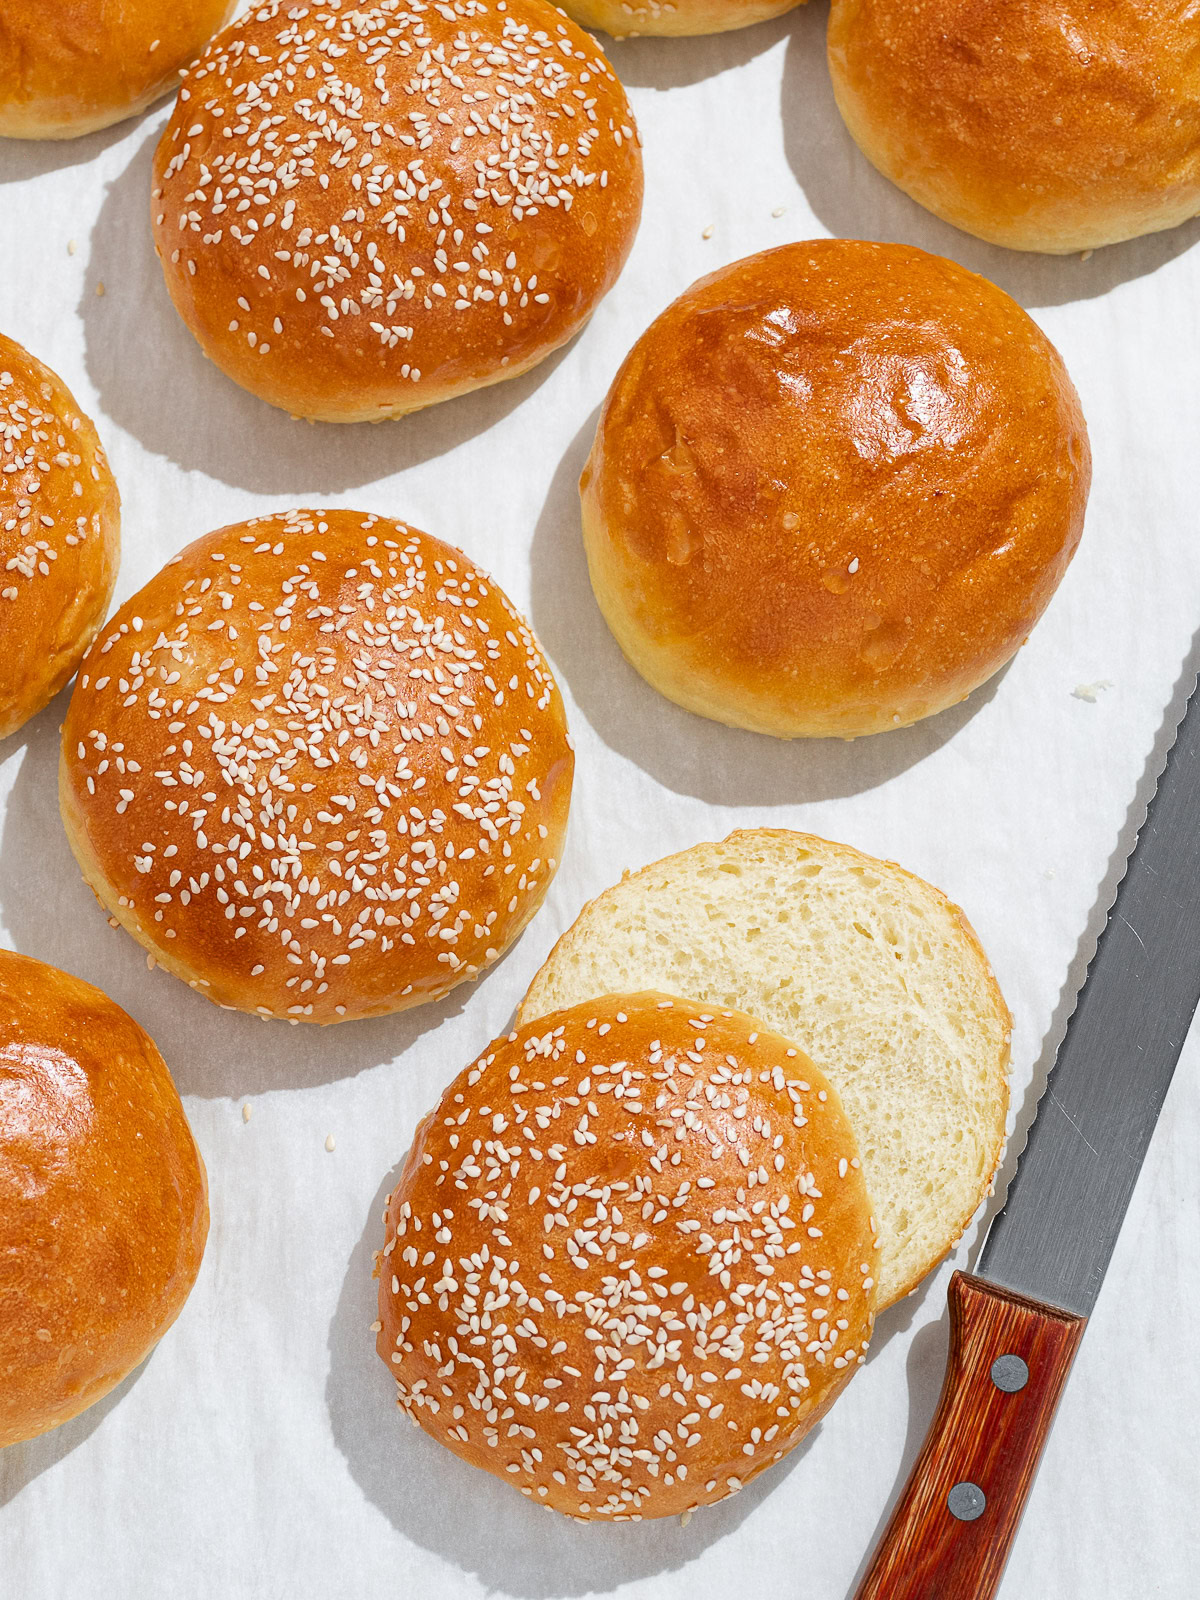
Light and puffy, yet strong enough to hold any patty, these homemade Light Brioche Hamburger Buns are guaranteed to be hit at your next burger cookout. Much easier to make than you think, once you try them, you’ll never want store bought buns again!
If you enjoy making your own burger patties, you simply must try your hand at making the buns as well. Homemade hamburger buns are a game-changer and these straightforward, light brioche buns, are easy and deeply satisfying to make, not to mention a dream to eat.
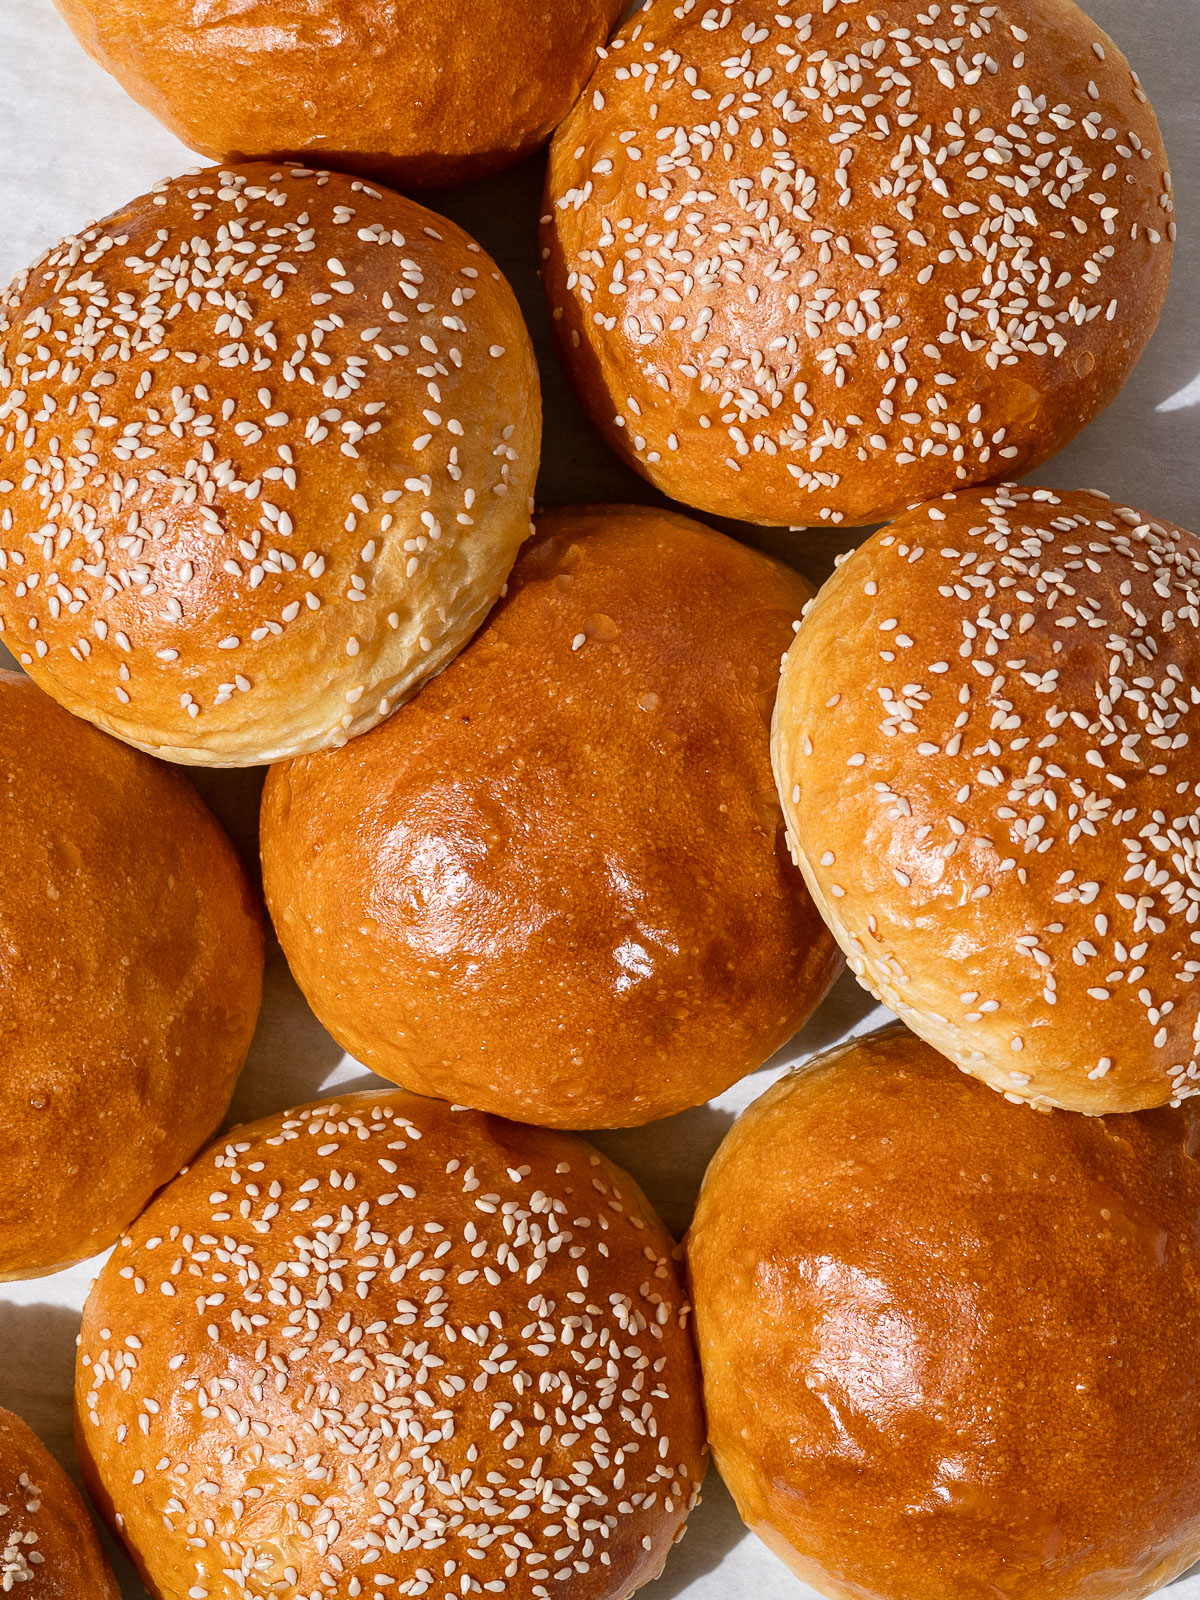
Brioche buns are absolutely delicious and have become increasingly popular to use for burgers. This recipe goes a little lighter on the butter and eggs than a traditional brioche dough (hence the name), but the buns are still gloriously fluffy, tender and flavourful.
- Why You Will Love This Recipe
- What Is Brioche?
- Ingredient Notes
- Active Dry Yeast Or Instant Yeast
- Why Is Bread Flour Necessary For This Recipe?
- How To Make Light Brioche Hamburger Buns
- How To Divide The Dough Evenly
- How To Properly Shape The Hamburger Buns
- Must Read Expert Tips!
- Why Did My Buns Deflate And Not Rise In The Oven?
- Where To Find Bread Flour?
- Frequently Asked Questions
- Hamburger Buns Serving Suggestions
- How to Store Or And Freeze Burger Buns
- Light Brioche Hamburger Buns
If the thought of working with yeast makes you run for the hills, fear not, because happily, this recipe was created for you and me and all the other non-bakers out there. The dough comes together easily in a mixer, or by hand, then all you need is a little time and patience to be rewarded with soft, butter-rich buns worthy of your best patty.
This post is filled with tips to guarantee the success of your homemade buns. But my best tip of all? Make sure to eat at least one bun that’s still warm enough from the oven to melt a smear of butter on contact. Then hide the rest of the buns somewhere so you don’t eat them all.
Why You Will Love This Recipe
I firmly believe there are few things more glorious than homemade bread and these light brioche buns will make you swoon. The recipe was created by Hidefumi Kubota, the baker at Comme Ça, and published by the New York Times more than a decade ago. It quickly became a much-loved, 5-star recipe and it is still adored and being adapted, re-published, and baked, by thousands all over the internet.
Though I’ve tweaked it just a tiny bit here and there, it is pretty flawless in its original form. Mainly, I adapted the recipe so it could be made in a stand mixer, as opposed to kneading by hand. The dough is extremely sticky (this is what makes the end result so delicious) and is a lot of work to knead by hand.
Now that you know that thousands (and thousands!) of people have successfully made this recipe, you can feel confident you can make it too. You’re going to love these buns.
What Is Brioche?
Brioche originated in France and much like regular bread, brioche contains flour, yeast, water and salt. But unlike most regular bread, brioche is also enriched with eggs, milk, sugar, and butter. The higher-fat ingredients give brioche its characteristic richness and an egg wash brushed on the outside gives it its distinctive golden crust.
Brioche dough can be used to make loaf bread (often braided), cinnamon rolls, or buns.
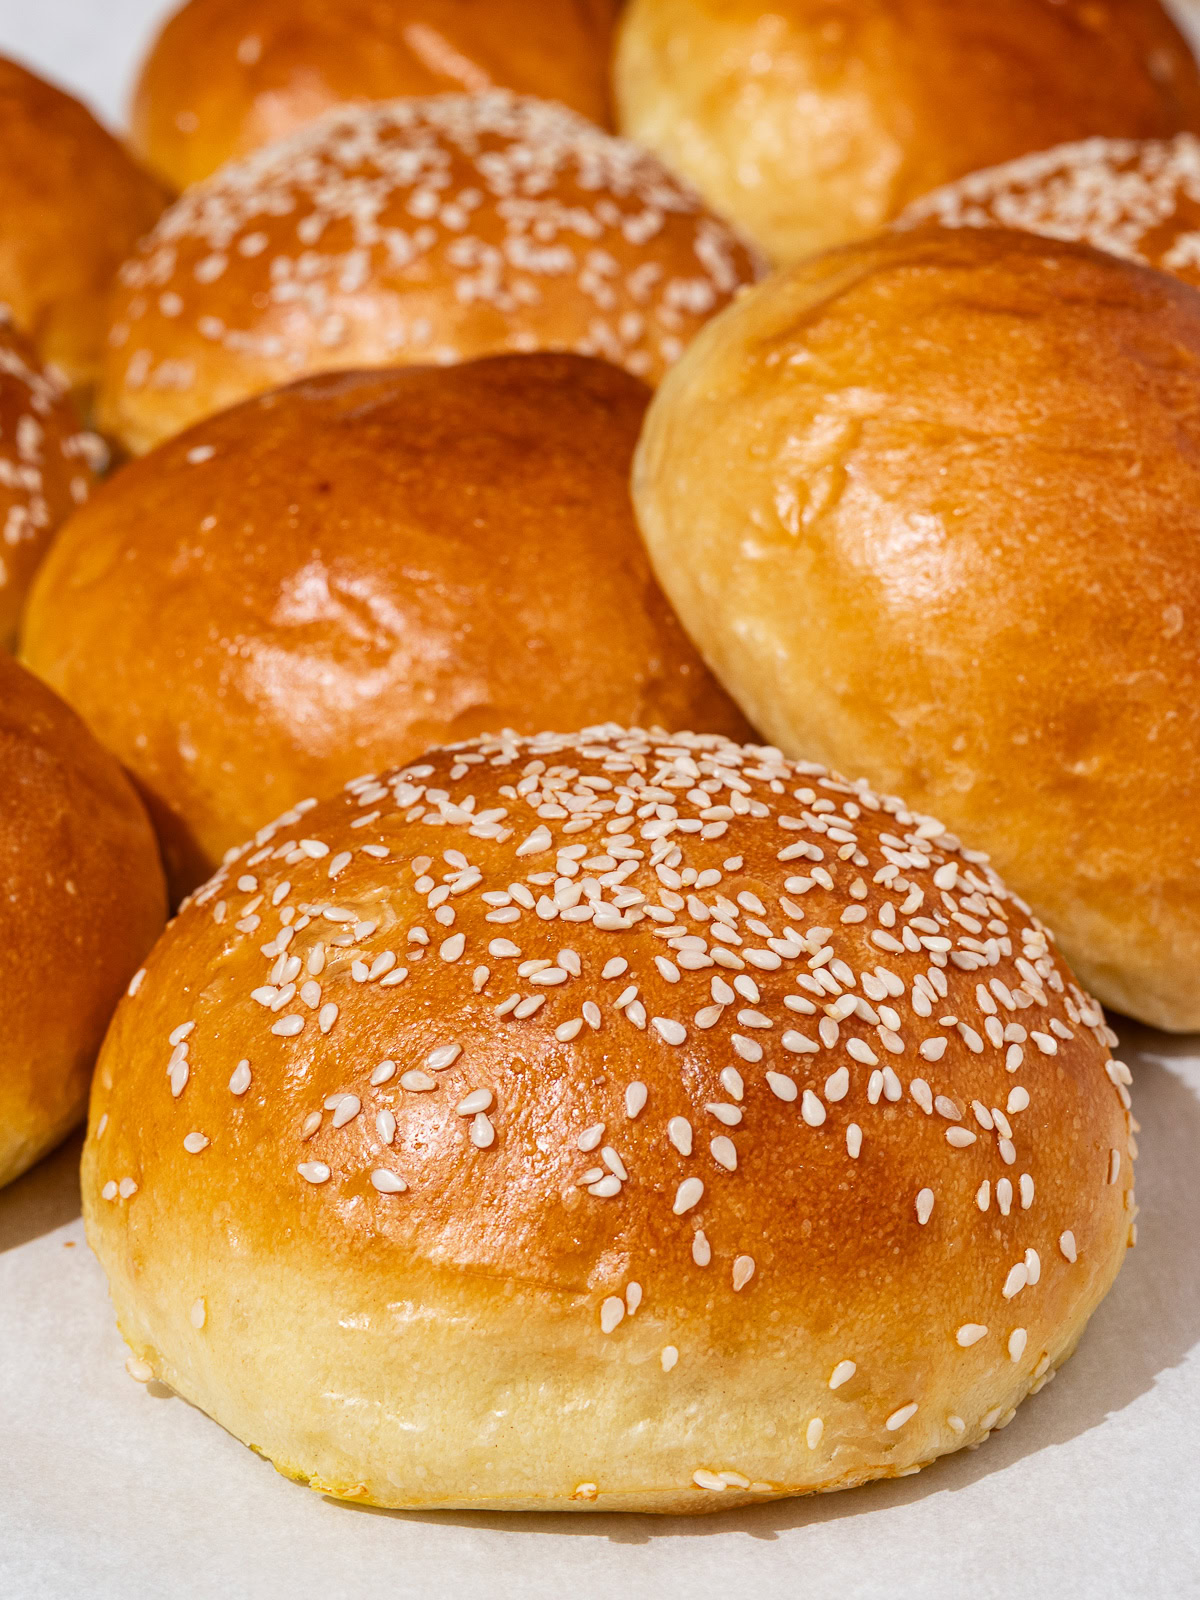
A classic brioche dough would likely be too soft for burger buns which is why for this recipe, the amount of butter and eggs is reduced. The buns have a little more structure so they can hold a burger patty without sagging, but are still mouth-watering soft on the inside with a golden, flakey texture on the outside. Sublime.
Ingredient Notes
These are the ingredients you will need to make the best buttery-rich hamburger buns.
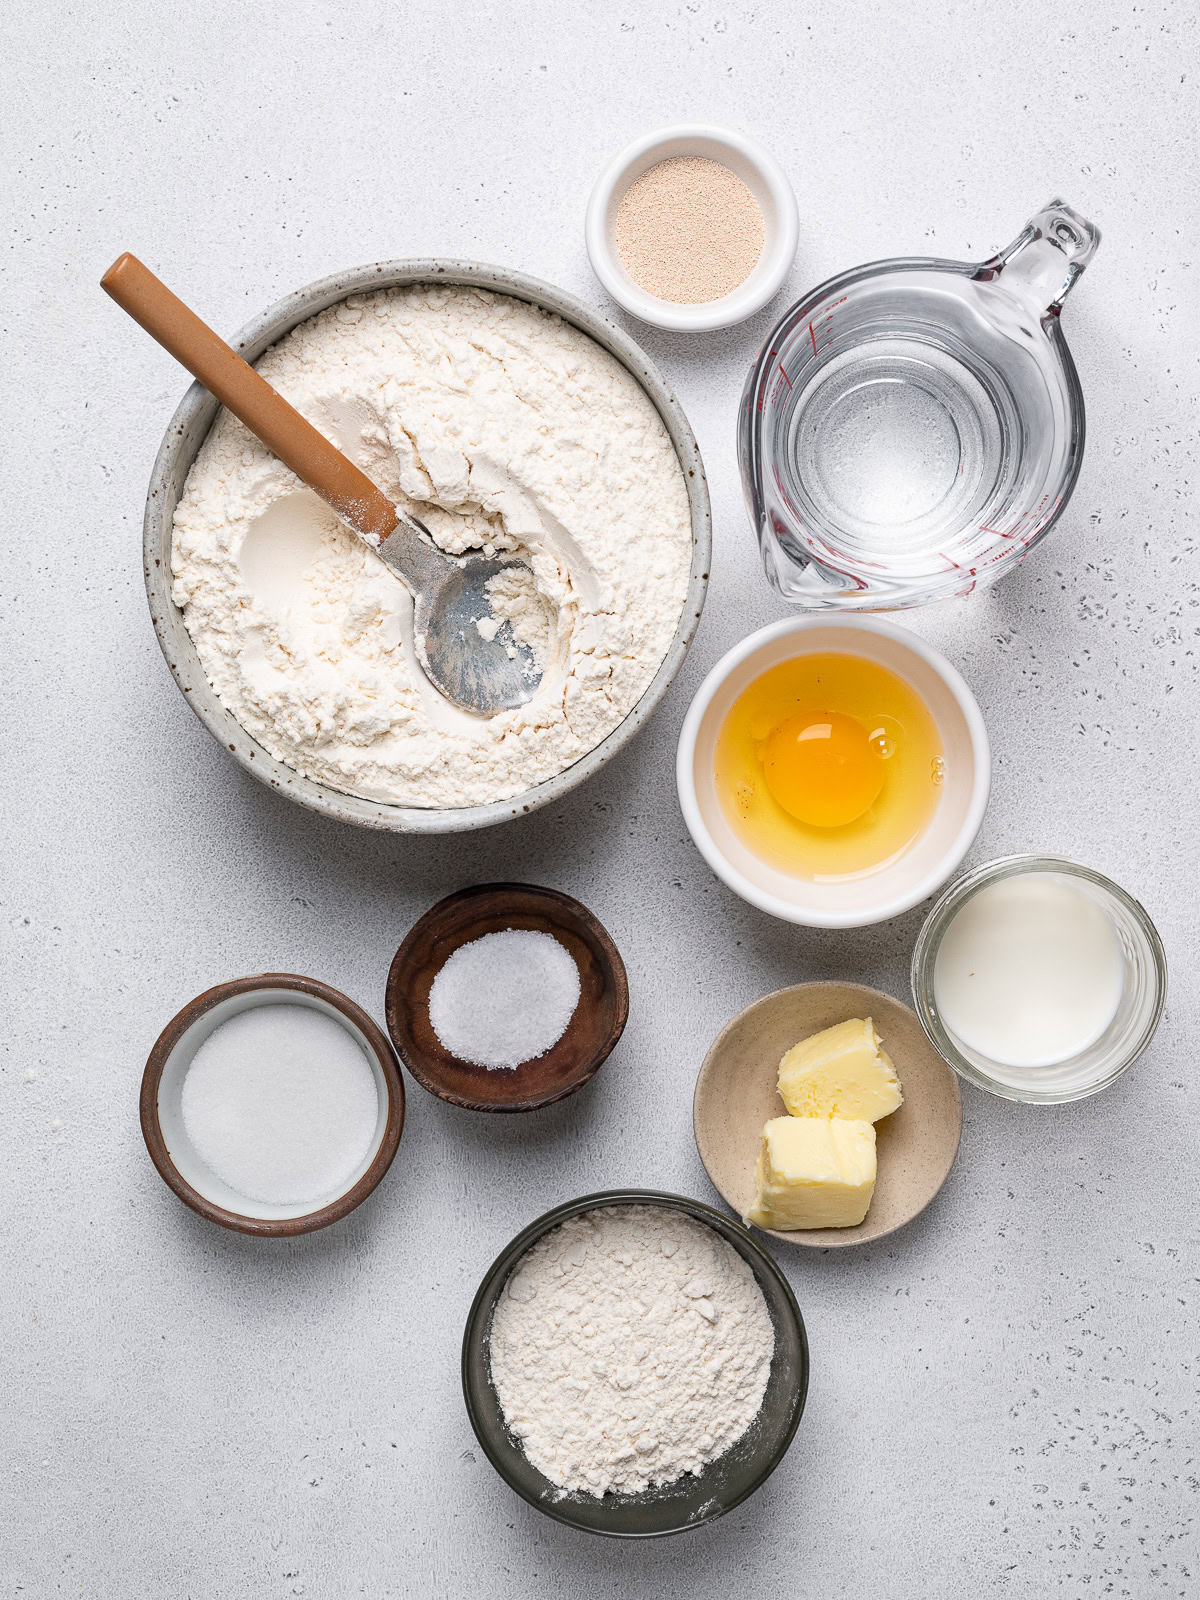
- Flour: For best results, it is essential to use both bread flour and all-purpose flour to make these light brioche hamburger buns. Read more on this below.
- Warm water – When mixing yeast with any liquid, the liquid should be warm in order to activate the yeast. The ideal temperature range is 105ºF to 115ºF. If you don’t have a thermometer to check the temperature, it should feel warm to the touch, but not hot and definitely not cool.
- Warm whole milk – Milk has a surprising amount of functions in this dough. It helps increase water absorption, it helps soften the dough, and it adds lovely richness to the dough. For best results, I like to use whole milk.
- Instant or active dry yeast – You can use active dry yeast or instant yeast to make these buns. I only buy SAF instant yeast for baking so that is what I use here as well. Read more on this below.
- Sugar – A little bit of sugar is needed to add a very subtle sweetness to the buns. Sugar is also pretty essential for adding moisture, ensuring a lofty rise, and aid with browning.
- Egg – You will need two large eggs for this recipe. One is used in the dough and the other is used for an egg wash to brush on the buns.
- Salt – If you’ve ever had bread that tasted bland, it was probably missing salt. I find it crucial in just about any baked goods but particularly for these buns. I use fine sea salt, or Diamond Crystal Kosher salt. Reduce the amount if using Morton Kosher salt or table salt.
- Butter – For this recipe, you will need 2 1/2 tablespoons of butter which will add moisture and rich flavours to these light brioche buns. If possible, use a good quality, unsalted butter for best results. In addition, make sure the butter is on the cooler side of room temperature.
- Sesame seeds – Optional as a topping for the buns. In our family, we seem to be very divided with some really disliking the seeds, and others (mostly me), liking the seeds. So I top just a few of the buns. Feel free to top with everything bagel seasoning, poppy seeds or even nigella seeds.
Active Dry Yeast Or Instant Yeast
You can use either one for making these buns. Active dry yeast needs to be proofed (allowed to bloom in warm water before using) whereas instant yeast can be added directly into the dry ingredients. I always buy instant yeast because it’s easier to use and helps dough rise faster.
That said, because I don’t bake a lot, I’m never sure whether my instant yeast is fresh enough so I almost always proof it, just in case. This way, I won’t be throwing out an entire batch of dough that didn’t rise.
Why Is Bread Flour Necessary For This Recipe?
You probably already know that bread flour has a higher percentage of protein than all-purpose flour. But you may be wondering why the higher protein is so important for making bread. Well, this is because more protein means more gluten can develop in the dough which is what gives bread its structure.
In addition, bread flour absorbs more water so it’s a better choice for recipes like this one that call for a lot of liquid. If you were to use only all-purpose flour for this recipe, you would have to reduce the liquid. This will work, but the buns will not be as tall and airy.
The small amount of all-purpose flour is added to keep the buns from being too tall and stiff.
How To Make Light Brioche Hamburger Buns
The original NYT recipe calls for kneading the dough by hand. Though doable, I find this dough too wet and sticky to knead by hand so I prefer to use a stand mixer. If you would like to knead it by hand, I explain how in the FAQ’s below.
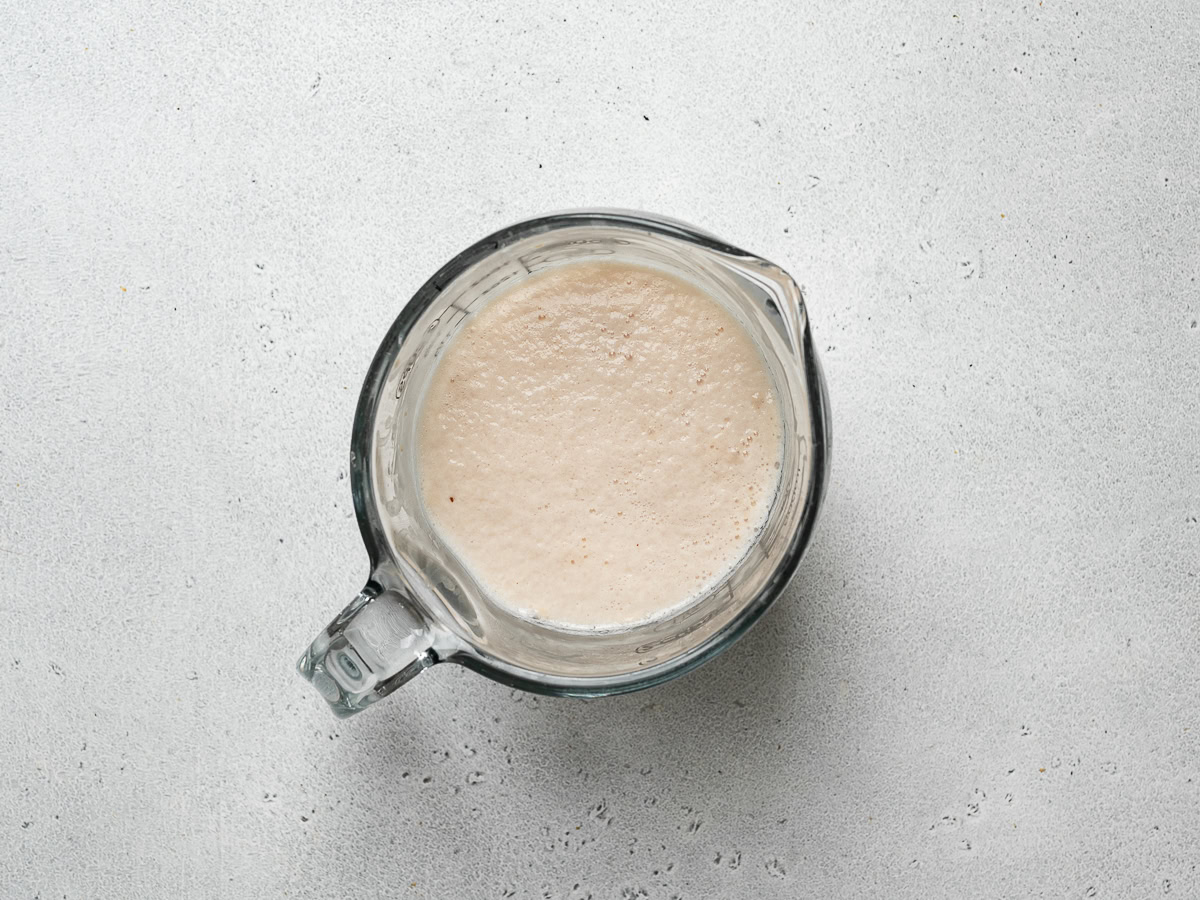
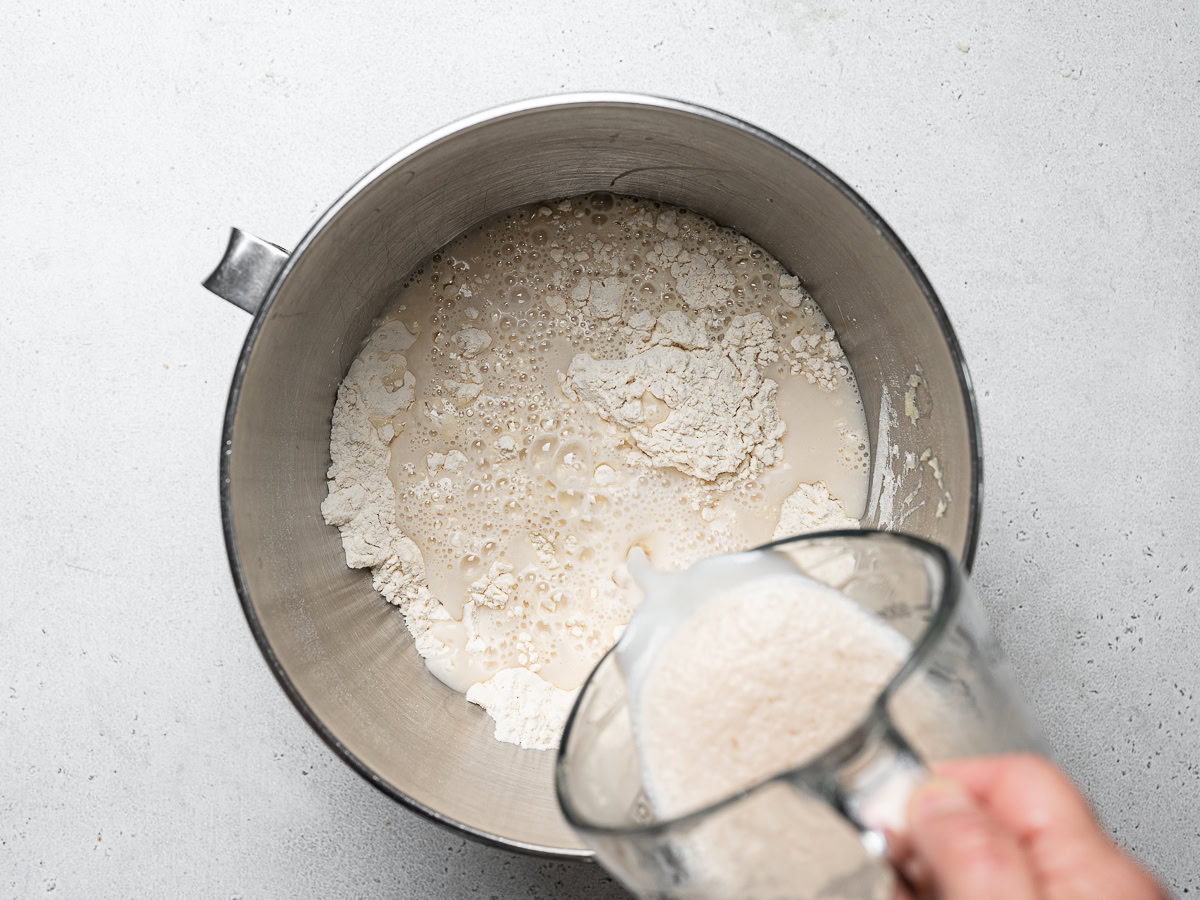
STEP 1: In a 2 cup measuring cup, or small bowl, combine the warm water, warmed milk, yeast and part of the sugar. Let stand until a thin layer of foam is visible on the top, about 5 minutes. In a separate small bowl, whisk 1 egg.
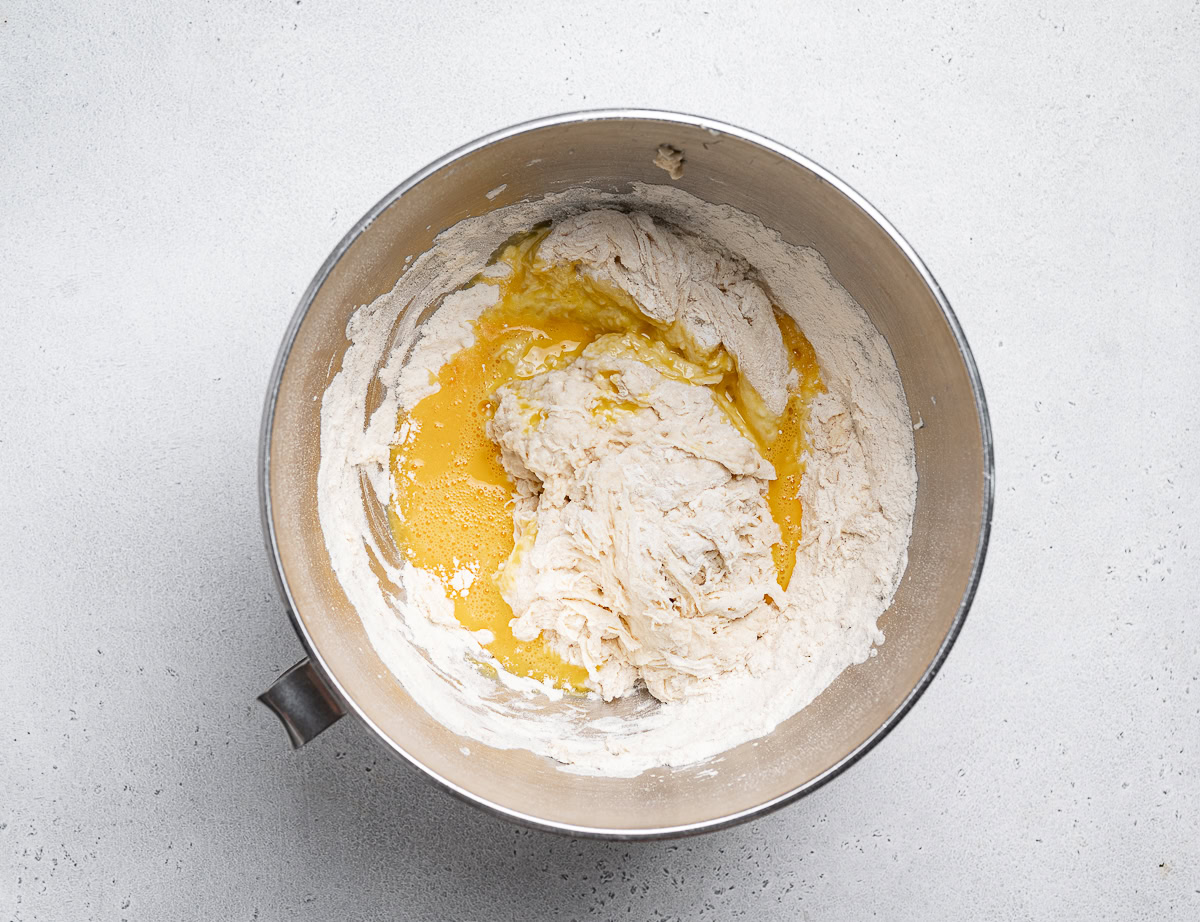
STEP 2: Add the flours, salt and remaining sugar to the bowl of a stand mixer fitted with the dough hook. Pour in the yeast mixture and mix on low speed just until all the ingredients are combined. Add in the beaten egg and mix until incorporated, about 30 seconds. With the mixer still running on low (I use #3 on my Kitchen Aid mixer), add the butter and continue kneading for 8 – 10 minutes. The mixture should look silky and smooth but it might still feel quite sticky, which is fine.
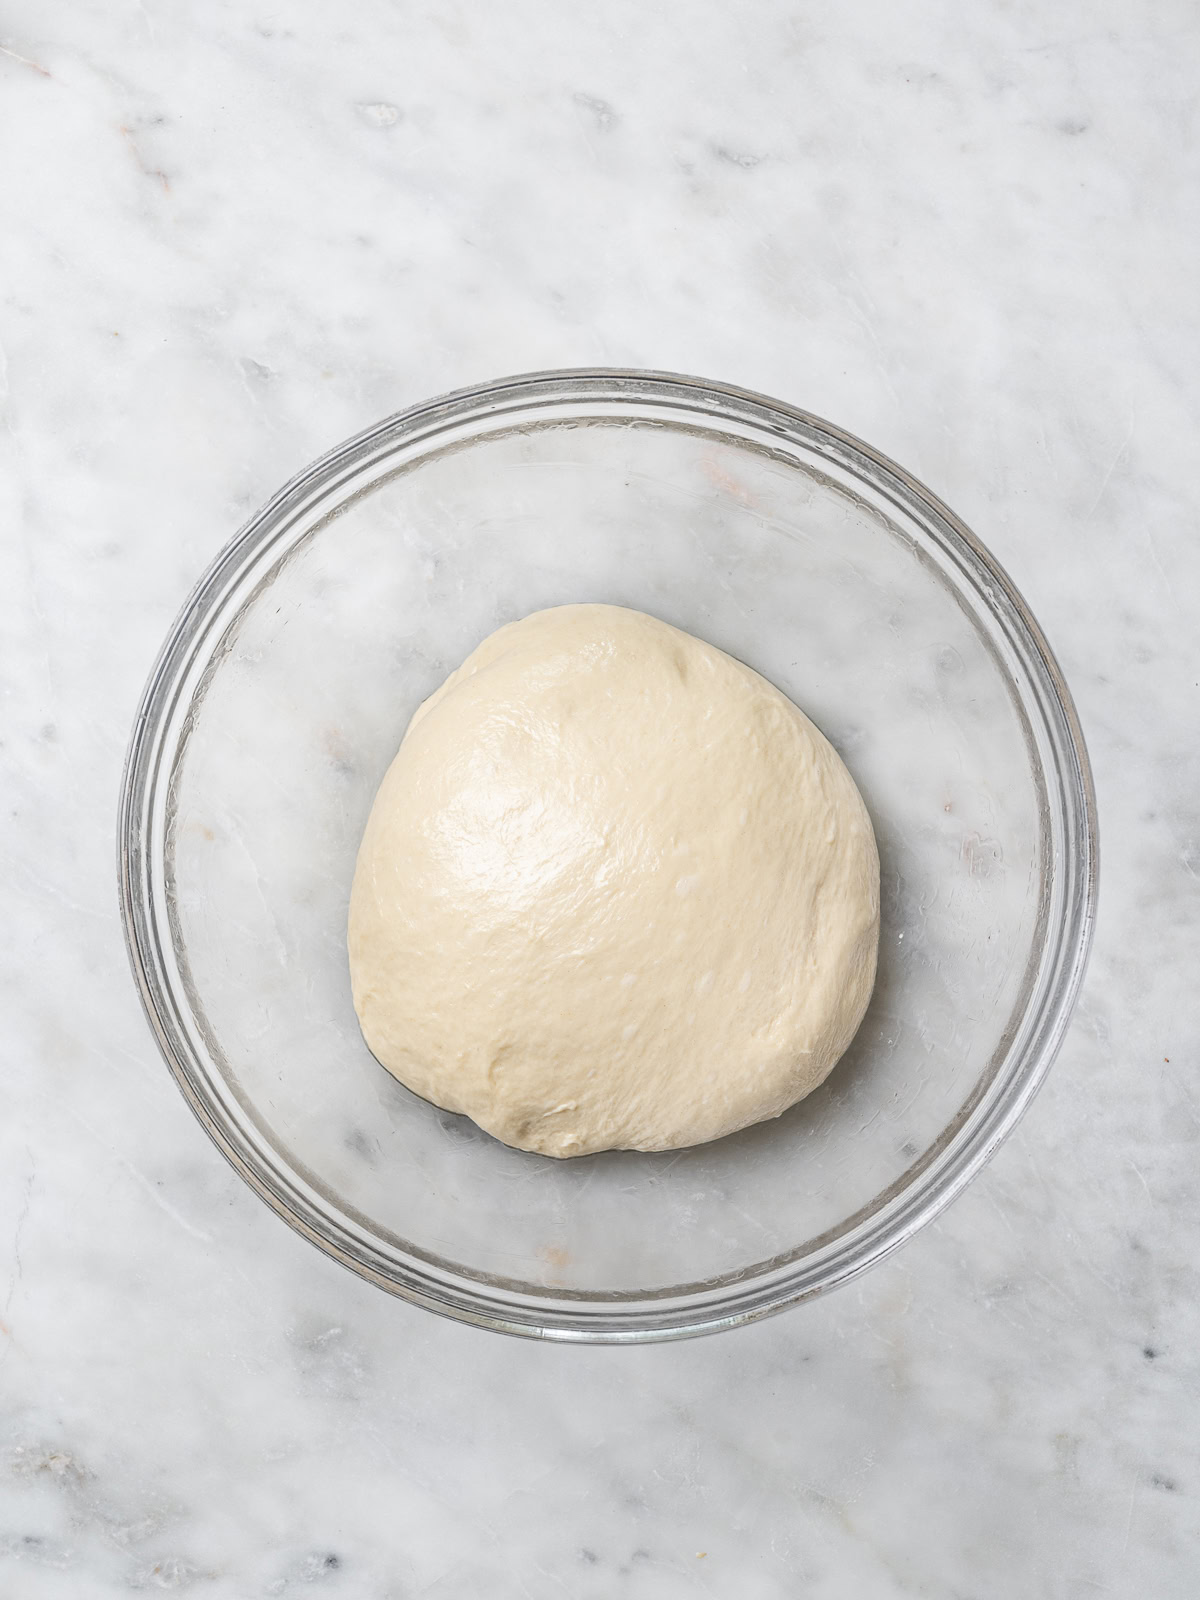
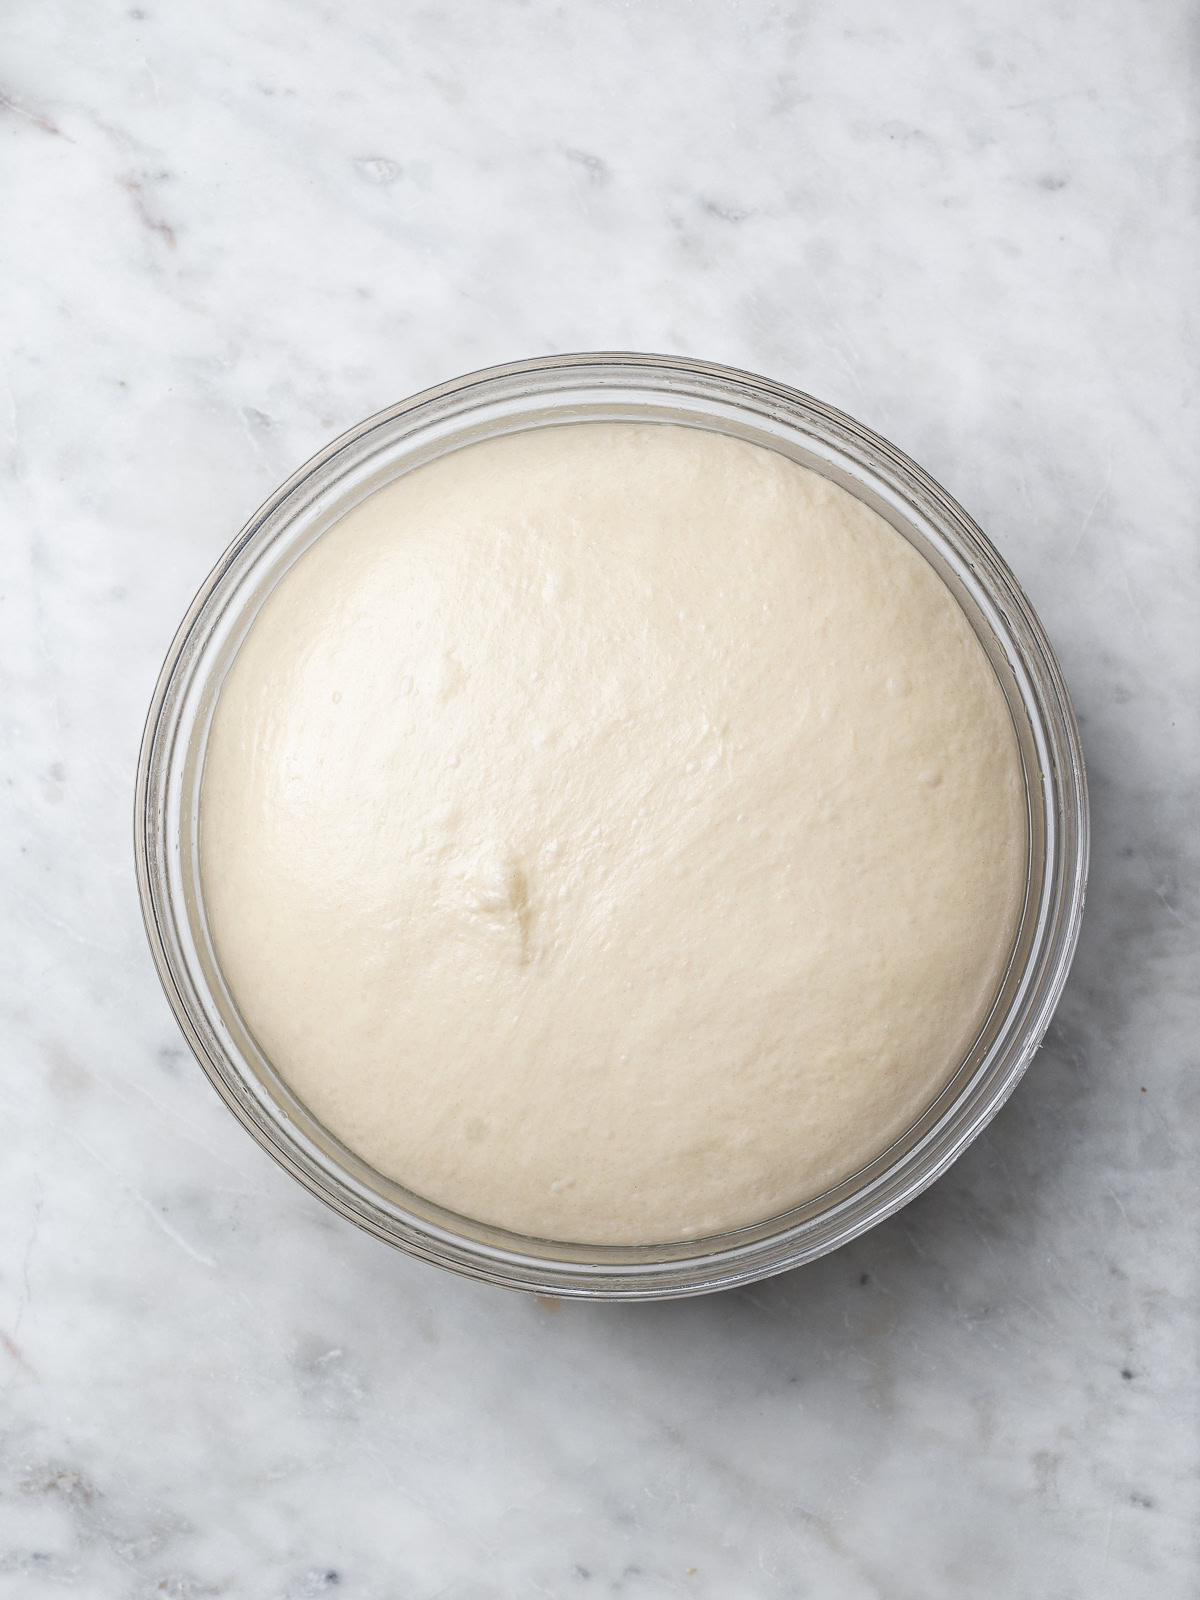
STEP 3: Lightly oil a large bowl. Using a plastic dough scraper, scoop out the dough onto an unfloured counter (or surface). Use the dough scraper to help you fold the dough into a rough ball then transfer it to the oiled bowl. Cover bowl with a damp kitchen towel or plastic wrap and let rise in a warm place until doubled in size. Depending on how warm your kitchen is this will take about 1 to 2 hours.
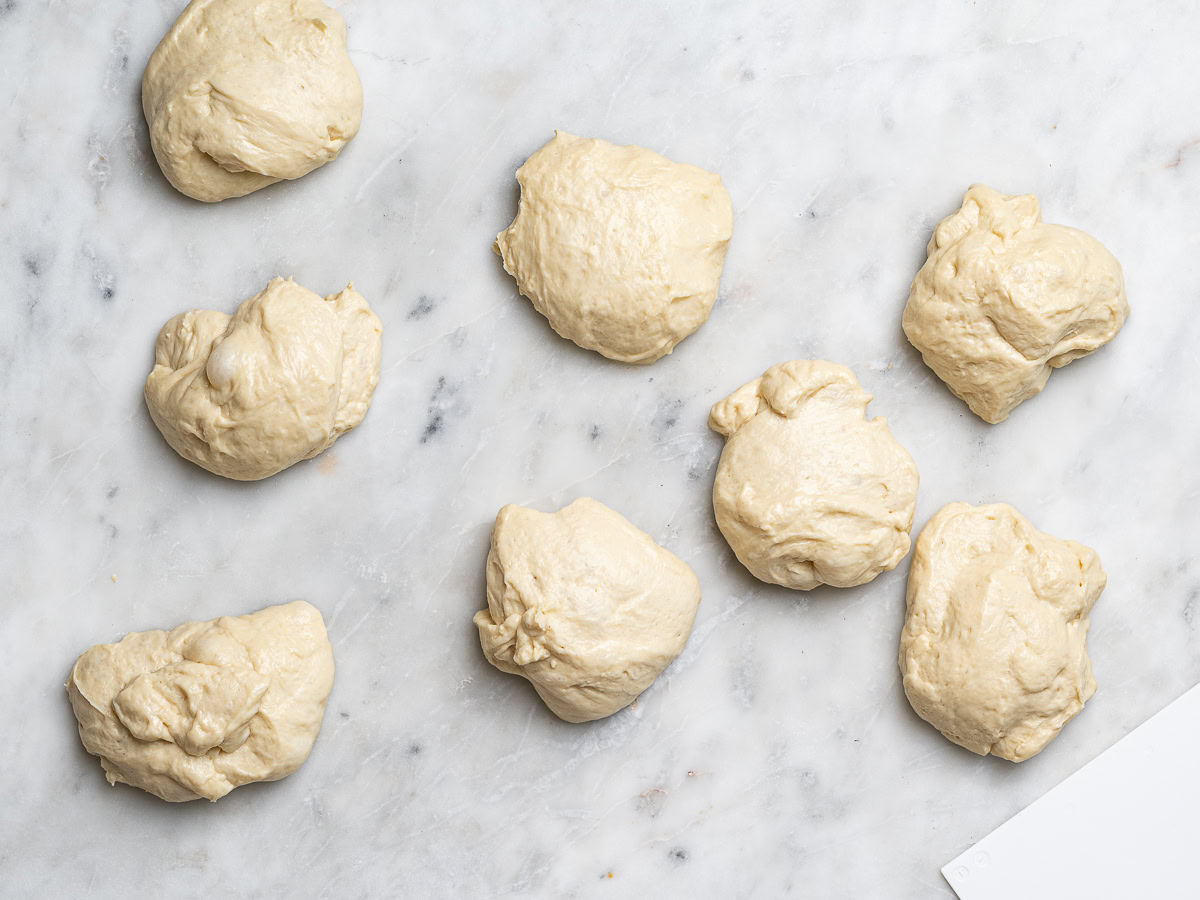
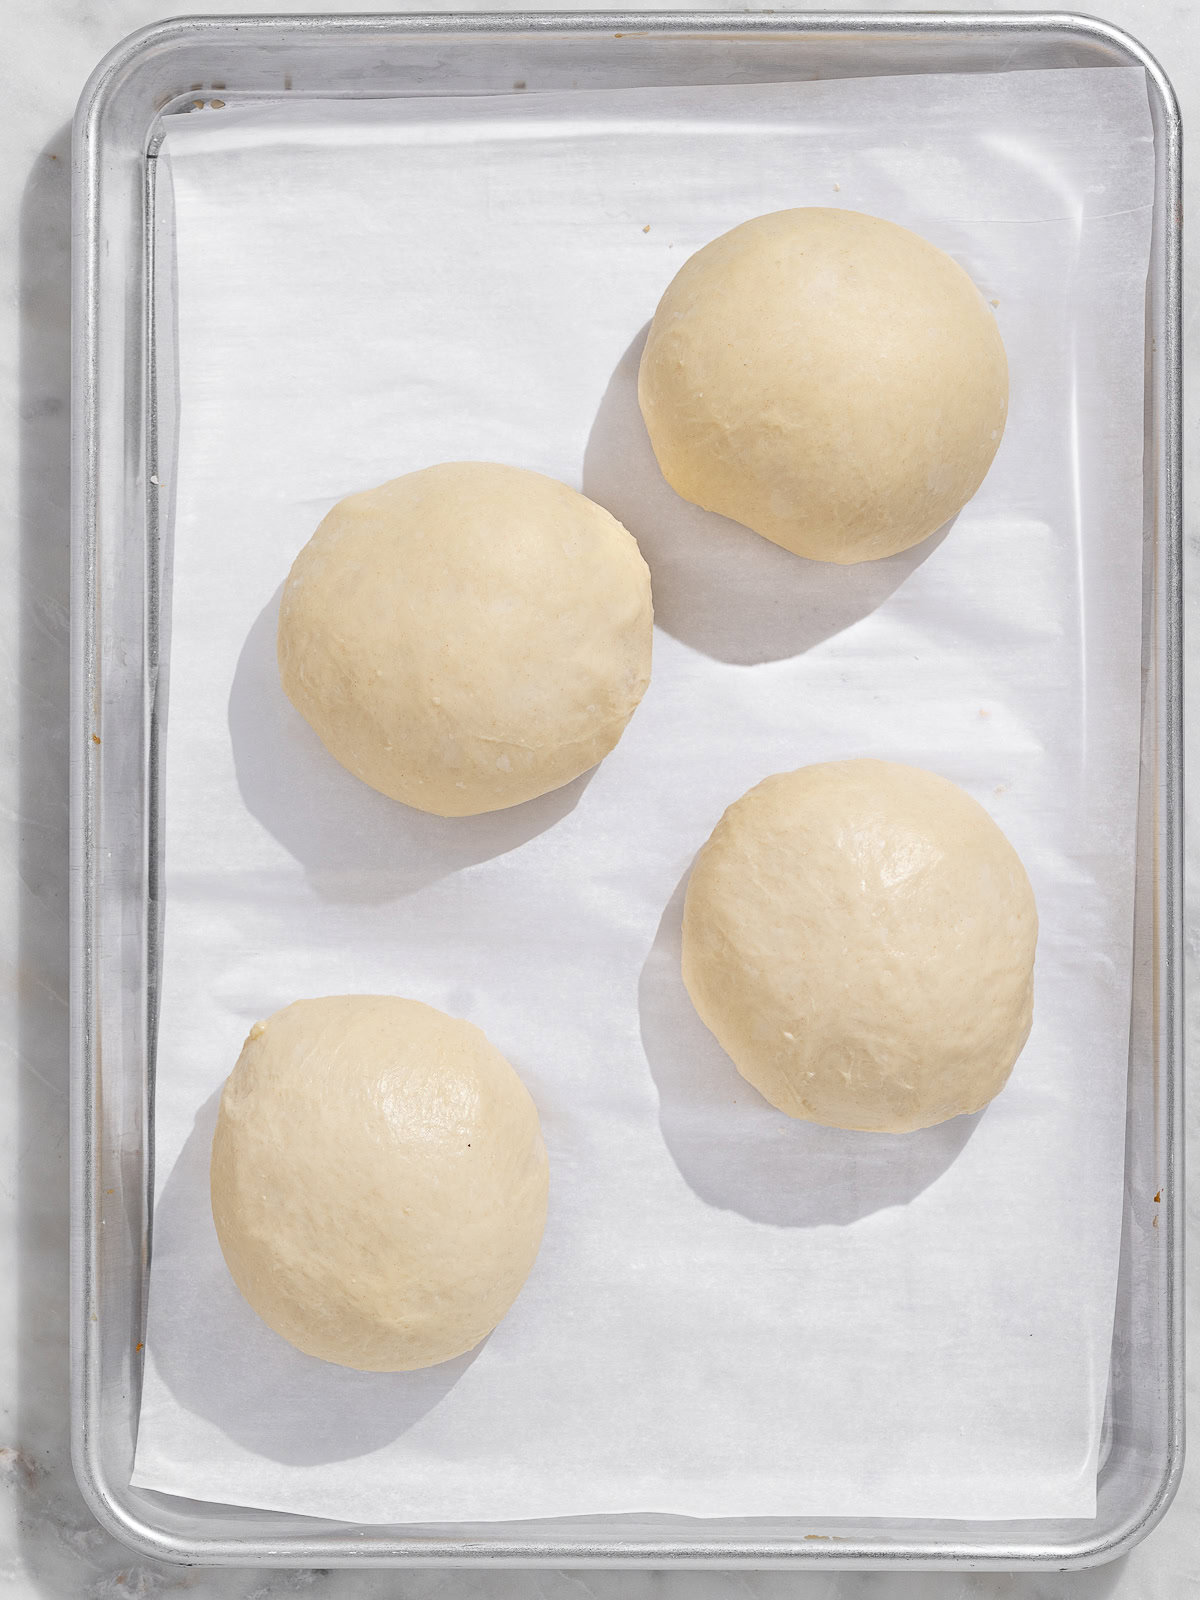
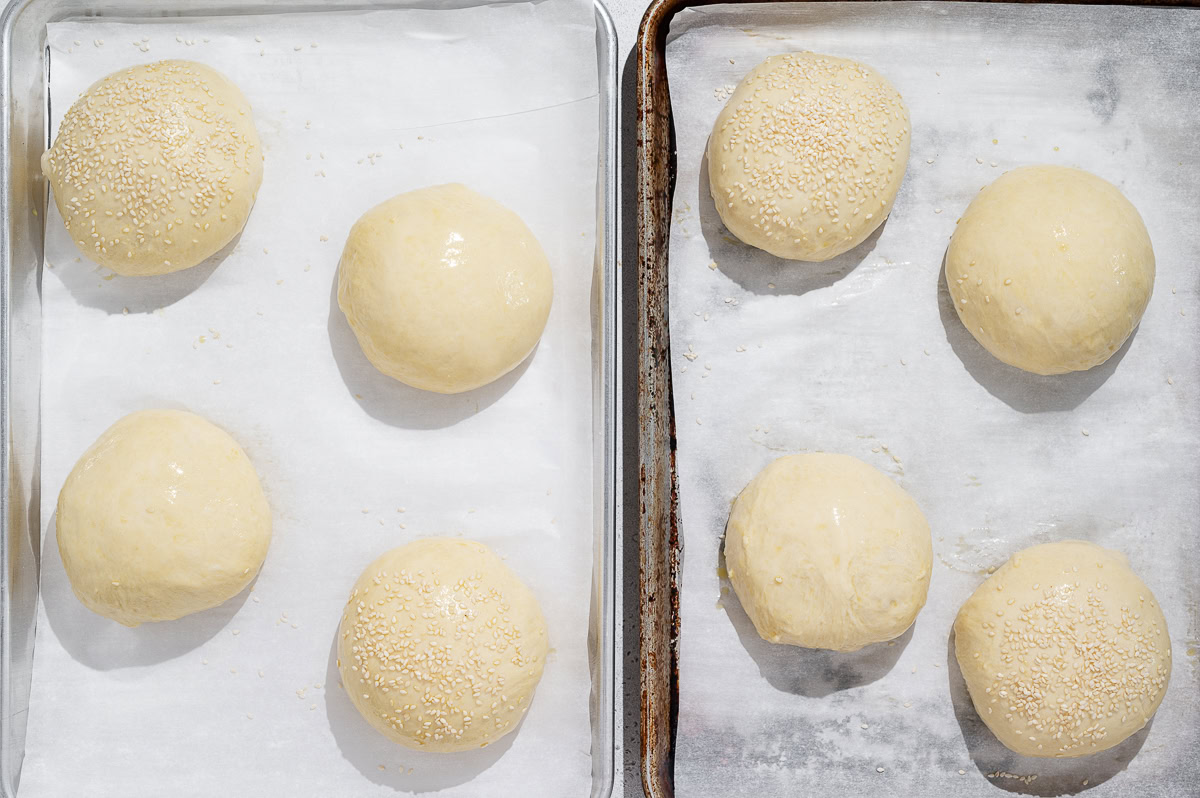
STEP 4: Divide the dough into 8 equal pieces. (See section below on how to divide the dough evenly.) Shape each piece into taught balls on the prepared pan(s), spaced at least 2-3 inches apart. (See section below on how to properly shape the dough balls.) Cover with a light, clean kitchen towel and let rise again until balls look puffy and almost, but not quite, doubled in size. This could take as little as 45 minutes to 1 hour. However, if your kitchen is very cold it could take up to 2 hours.
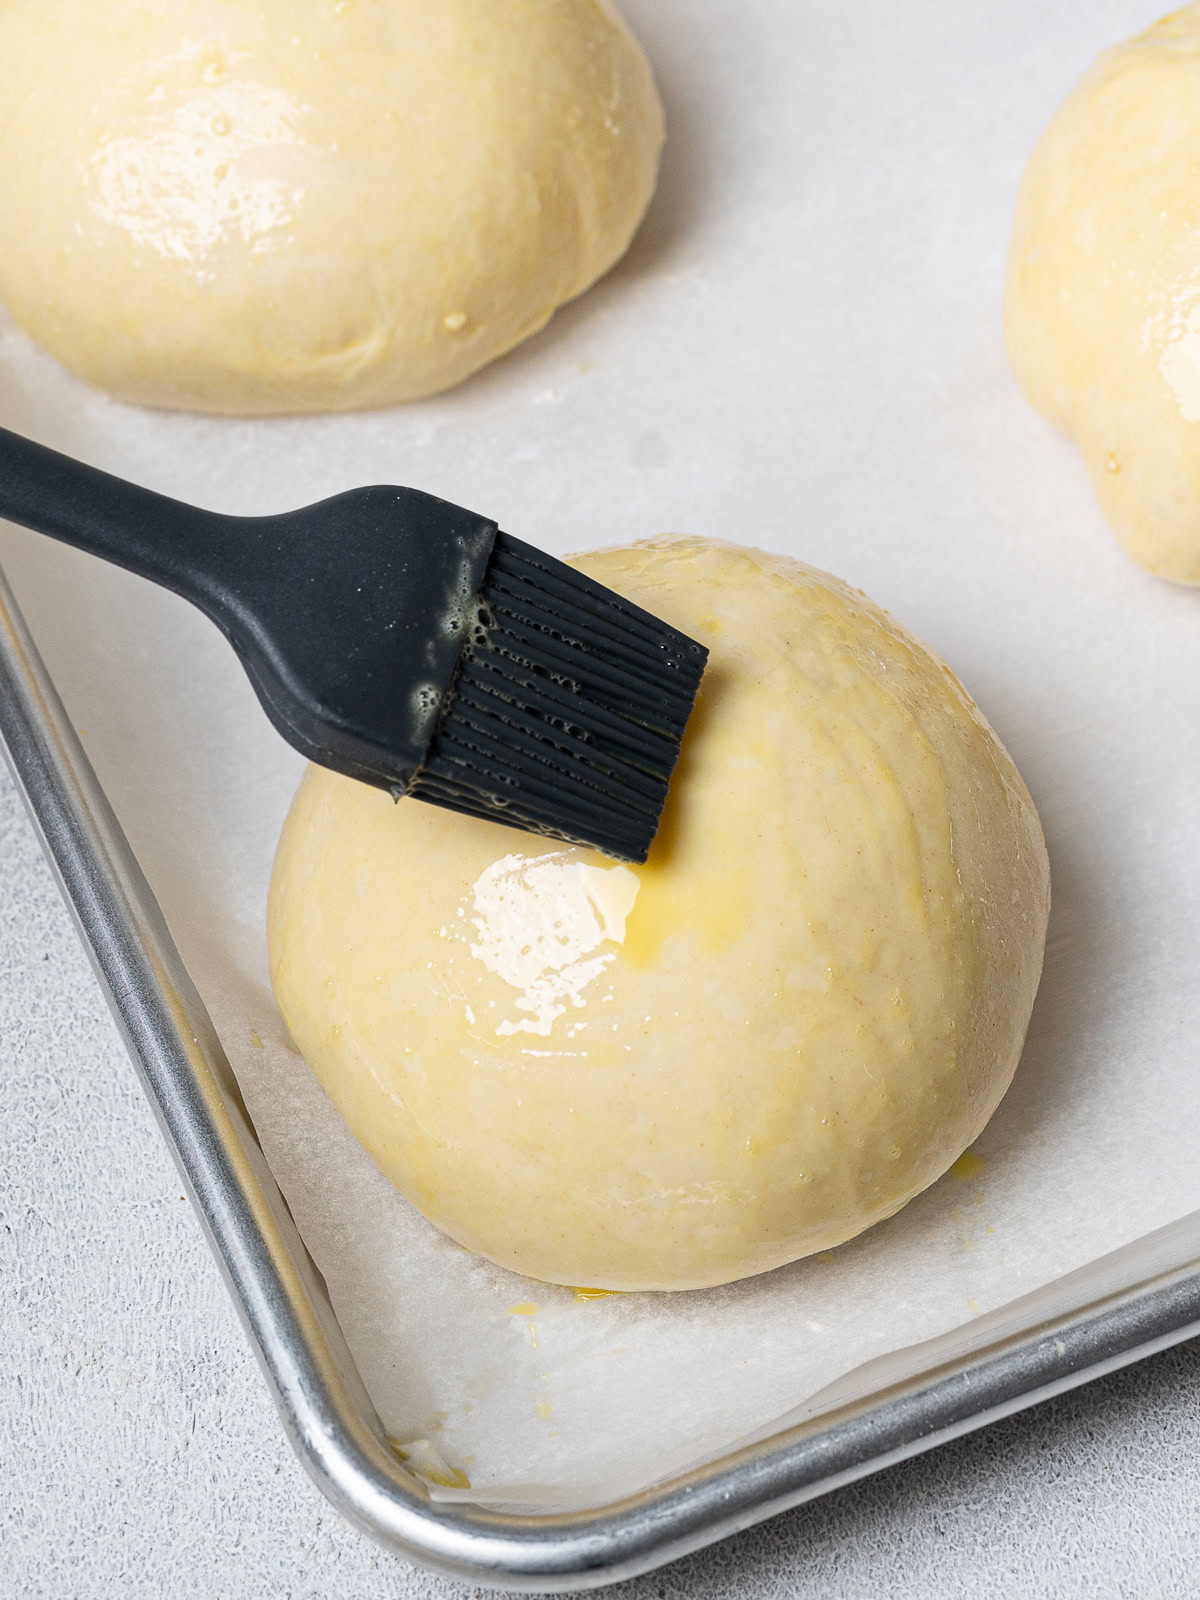
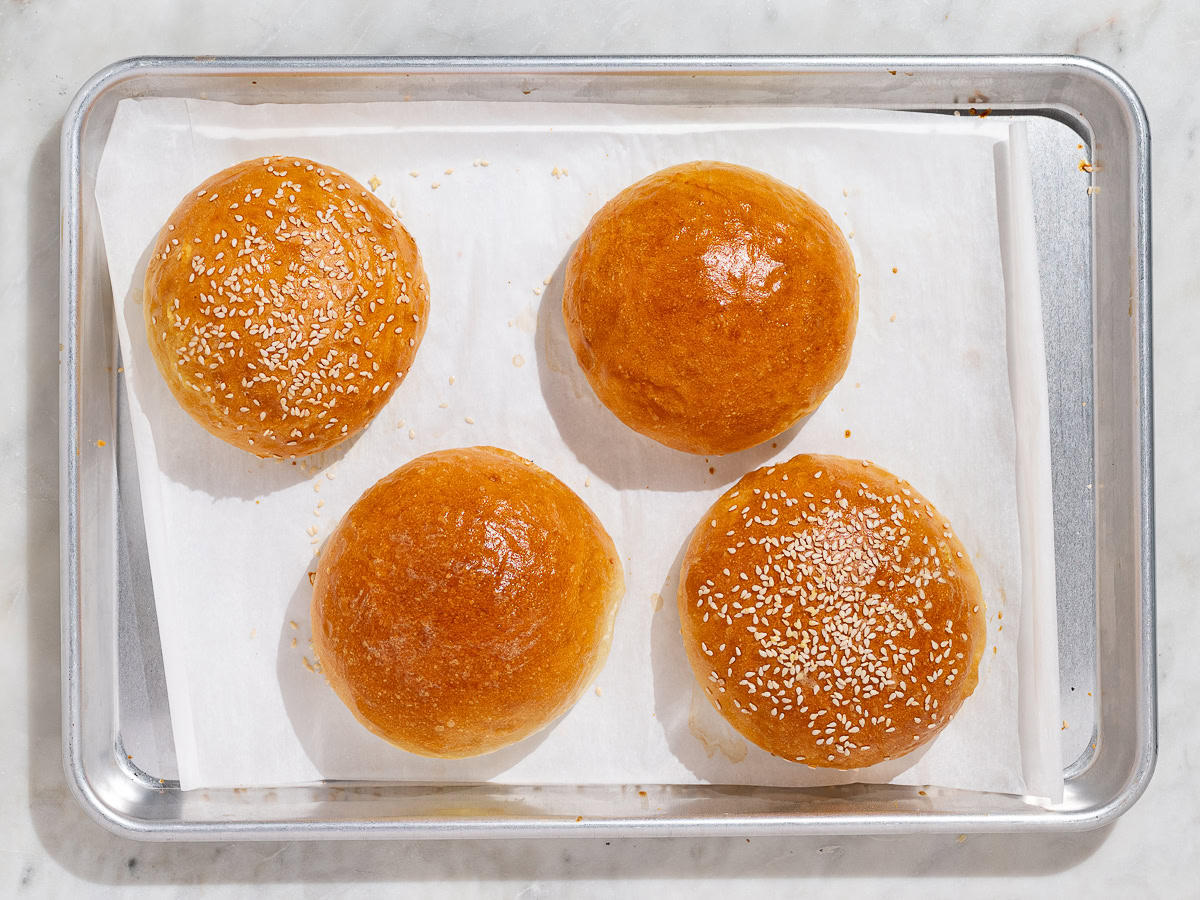
Step 5: Lightly brush the tops and sides of the buns with the egg wash and sprinkle with sesame seeds, if using. Bake at 400°F for about 15 minutes, rotating halfway through baking, until the tops are golden brown. Transfer buns to a wire rack to cool completely before slicing.
Find the complete recipe with measurements below.
How To Divide The Dough Evenly
You can certainly eyeball the size of each piece, but if you want exactly 8 equal pieces, you will have to weigh them. To do this, weigh the whole dough ball on a digital scale then divide that weight by 8. Then weigh each piece to that amount.
Note that even if you use the exact same recipe every time, the brand of flour, humidity, etc, will affect the weight of the dough so you should weigh it every time. My dough pretty consistently weighs around 790-800 grams so my ball pieces are about 97-100 grams each.
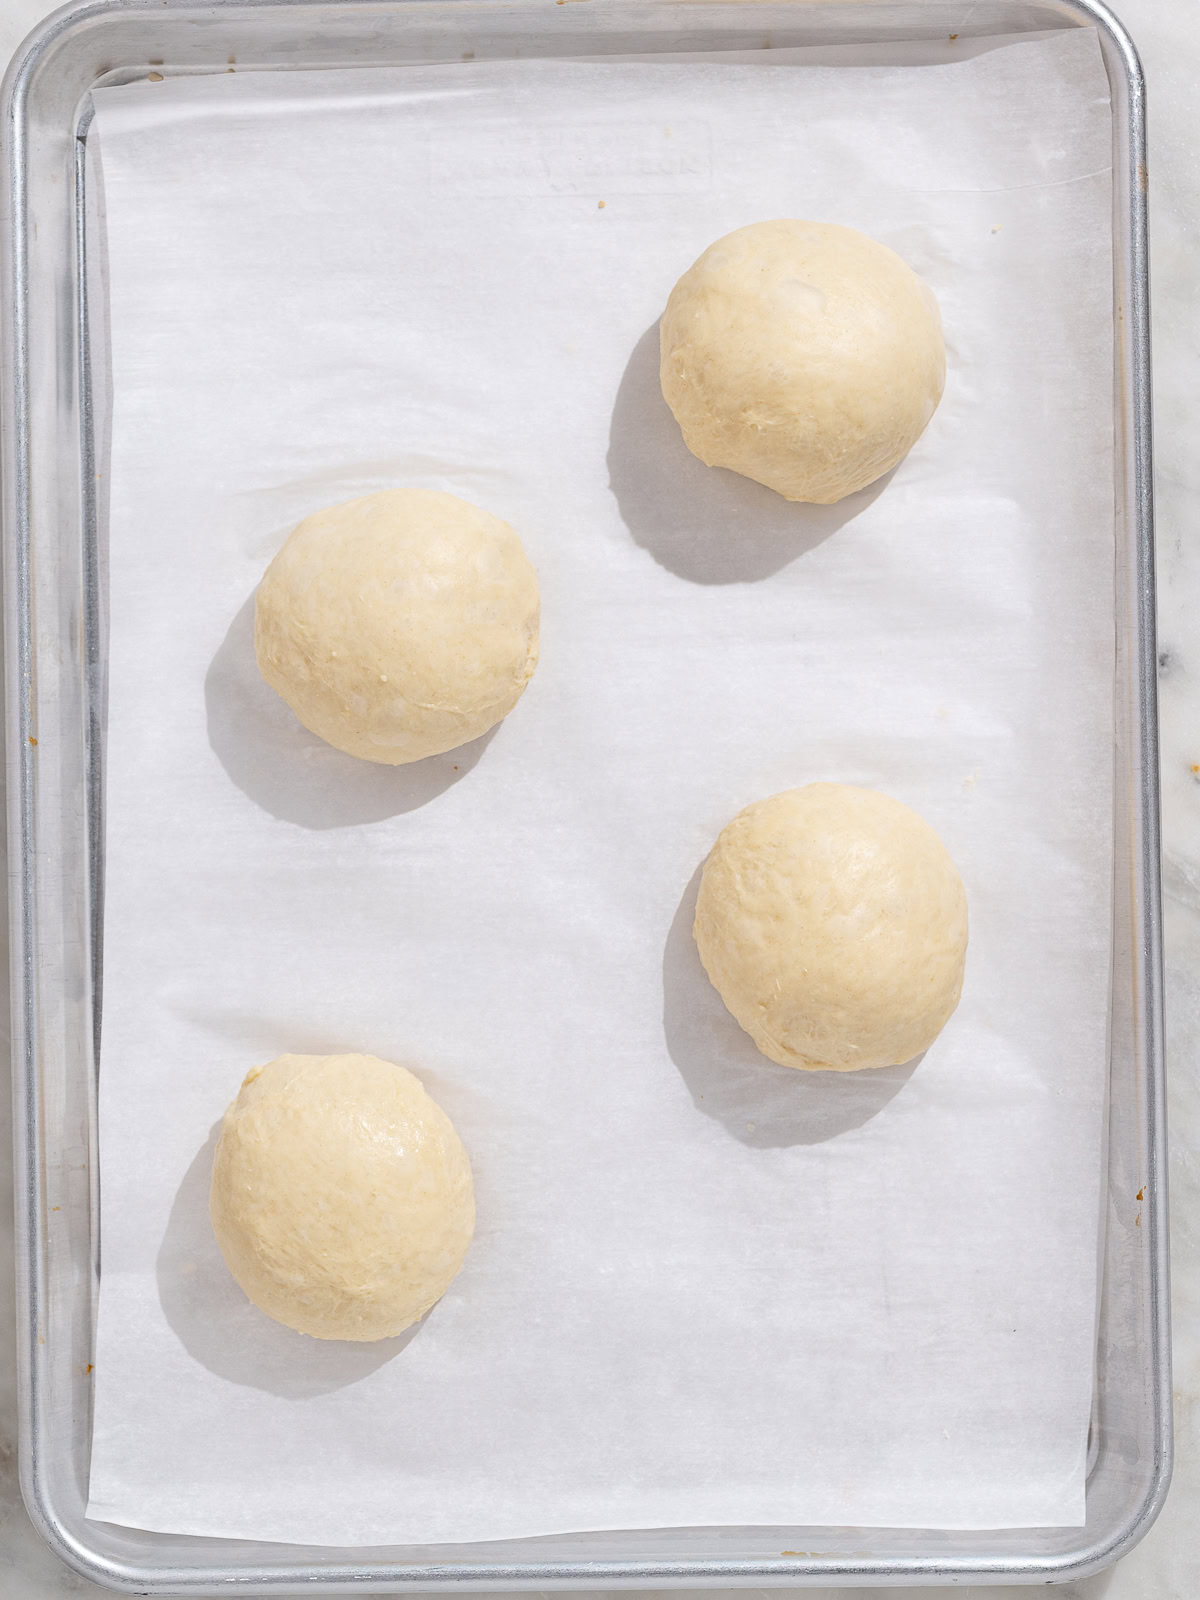
How To Properly Shape The Hamburger Buns
Shaping the buns could be the only tricky part of this recipe. You aren’t just shaping dough balls, you’re trying to create tension at the top of the dough ball. Otherwise the buns will be too flat and not rise properly.
I realize this is easier said than done because you are working with a very sticky dough and you don’t want to add more flour unless absolutely necessary. But if you work fast, it’s very doable and much less difficult than it sounds. Here’s how you do it:
Working with one piece of dough at a time, pull the outer edges towards a middle point and keep pinching them together to create a taught surface on the underside. Even if your dough seems too sticky, resist the urge to add more flour unless absolutely necessary.

Once you have finished pinching, flip the ball seam side down and place it on an un-floured surface. Cup the ball lightly with your hand and gently roll the bottom around until the ball has a smooth, taught surface.
Must Read Expert Tips!
- Weigh your ingredients. You can get away with not weighing the liquids but cup measurements are just not precise enough when weighing flour. Since we are using a lot of flour it is important to get the amount right. If you don’t have a digital scale, be sure to start by fluffing the flour, then spoon it into the measuring cup without packing it down. Then, finish by scraping a knife across the top of the measuring cup to level the flour.
- This is One. Sticky. Dough. But that’s what makes these buns fluffy and delicious so resist the urge to add too much flour when shaping the dough balls. If you add too much flour the buns will be dense and dry rather than light and airy. Add just the bare minimum you need to be able to shape the buns.
- If you are making this recipe on a super hot, humid day, hold back 1/4 cup of water. I recently made the buns on a really humid day and I had to add quite a bit of flour to work with the dough, which is not ideal. You’re better off starting with a little less water, than adding more flour later.
- A silicone/plastic bench scraper is pretty essential. You could get by without one, I suppose. But soooo much easier to work with this sticky dough if you have one.
- Don’t use melted butter. The butter should be soft but no where near a melted state. It needs to be soft enough to incorporate into the dough but not too warm or melted that it will make the dough greasy. Keep it on the cold-ish side of soft.
- Lightly oil your hands. If the dough is way too sticky for shaping the balls, very lightly oil your hands.
- The second rise should not take longer than 1 hour. Particularly on hot, humid days. I find if I let the buns rise for much longer, they are too puffy and huge once baked. Or worse, they are over-proofed and ruined.
- Brush the egg wash on the side of the buns, too. For a lovely burnished-golden-brown bun, make sure to brush the egg wash all over the bun, including the down the sides. That said, you want to use a light hand with the egg wash so you don’t get a puddle at the bottom of the bun.
- Place the dough to rise in a warm spot. For best results, place the dough to rise in a warm spot of your kitchen. If your kitchen is very cold, try placing in the oven (not turned on) with the oven light on.
- For extra airy and moist buns, place a tray of water on the oven floor. This creates steam which will help the buns rise nice and high without drying out.
- Don’t worry if your buns stick together during baking. Just let them cool, then separate.
- These buns are best when used the day you make them. The good news is, they freeze beautifully so you can make a batch and freeze for later.
Why Did My Buns Deflate And Not Rise In The Oven?
The main reason this happens is because the dough may have been over-proofed. During the summer, or if your kitchen is very warm, I find it only takes 1 hour for the ball of dough to proof. The shaped buns take even less, about 45 minutes.
My best advice is don’t go so much by the time given in the recipe. Instead, judge more by what the dough looks like. Once the buns look puffy and bigger, they’re good to go.
Another reason your buns may not rise, is because the yeast was old or your liquids were not the right temperature. Be sure to look for the foamy layer in your yeast mixture. No foaming or bubbling means the yeast is dead and you need to start again or buy new yeast.
Where To Find Bread Flour?
Regardless of what flour I’m using, I prefer to use unbleached flour. In the US you can easily find lovely unbleached bread flour by brands such as Bob’s Red Mill, or King Arthur Flour at well-stocked grocery stores.
Unfortunately in Canada, it is a bit harder to find unbleached bread flour at regular supermarkets. Occasionally, I have had luck finding Bob’s Red Mill Bread Flour here and here. For a less expensive option, Bulk Barn seems to always have it. If there is a well-stocked baking store in your area, it is definitely worth checking out as they might sell some really nice Canadian unbleached bread flour.
Frequently Asked Questions
To freeze the dough, place the shaped rolls on a sheet pan and place in the freezer (without letting them rise). Once frozen, transfer to an airtight container individually wrapped and freeze for up to 2 months. Thaw at room temperature, and let rise until puffed and/or doubled in size.
Unfortunately, I don’t think a gluten-free flour would work for this recipe. This is a very high hydration dough so a gluten-free flour would not be strong enough to get the dough to hold its shape.
You absolutely can! Because this is a very sticky dough, a plastic bench scraper will come in very handy, particularly if kneading by hand. With just a tiny bit of flour on the surface, slap the dough down, then lift it up again with the help of the dough scraper. Keep slapping it down on the counter, and lifting it up again until it starts to get less sticky and becomes smooth and elastic, about 8 to 10 minutes.
These hamburger buns freeze beautifully so go ahead and make a double batch so you can have them ready for your next burger cookout! See section below for instructions on how to store and freeze the buns. .
Hamburger Buns Serving Suggestions
My first tip for serving these delicious buns with burgers, is to slice and toast them. I prefer to toast them on the grill or a grill pan but if you have a toaster oven, or a toaster that can fir the buns, that works too!
Obviously, these light brioche buns are joy to eat with any type of burger. Try them with this Poblano Turkey Burger, this Black Bean Burger, or these Juicy Chicken and Zucchini Burgers.
These hamburger buns are so buttery and delicious, you can absolutely serve them as dinner rolls or use them for sandwiches. Try using the buns for an egg salad sandwich, or toast the buns and make open faced BLT’s — yum!
How to Store Or And Freeze Burger Buns
These light brioche hamburger buns will go stale pretty quickly so it is best to freeze any unused buns the day you bake them. If you would like to store them on the counter, you can bring them back to life (somewhat) by toasting in the oven, toaster, or grill. I do not recommend refrigerating them as they will lose too much moisture and become stale even quicker.
To store at room temperature: Store the cooled baked buns in an airtight container for up to two days at room temperature.
To freeze: Store in an airtight container in the freezer for up to 2 months. Thaw the buns at room temperature, or gently in the microwave, before toasting toasting in the oven, toaster, or grill.
***If you give this Light Brioche Hamburger Buns recipe a try, please feel free to leave a comment and/or a star rating below. We appreciate and welcome all your feedback. Thank you!
Light Brioche Hamburger Buns
Ingredients
- 1 cup ( 227 ml) warm water (between 105ºF and 115°F)
- 3 Tablespoons (45 g) warm milk (between 105ºF and 115°F)
- 2 teaspoons (7 g) instant yeast or active dry yeast
- 2 1/2 (35 g) tablespoons white sugar, divided
- 1 large egg, brought to room temperature
- 3 cups (375 g) bread flour
- 1/3 cup (45 g) all-purpose flour
- 1 1/2 teaspoons fine sea salt (or Kosher salt)
- 2 1/2 tablespoons (35 g) unsalted butter, slightly softened
For egg wash topping
- 1 large egg
- 1 tablespoon cold water
- sesame seeds (optional)
Instructions
- In a 2 cup measuring cup, or small bowl, combine the warm water, warm milk, yeast and 1/2 tablespoon of the sugar. Let stand until a thin layer of foam is visible on the top, about 5 minutes. In a separate small bowl, whisk the egg.
- In the bowl of a stand mixer fitted with the dough hook, place the bread flour, all-purpose flour, salt and remaining 2 tablespoons of sugar. Mix briefly just to combine then pour in the yeast mixture. Mix on low speed until all the ingredients are combined, about 1 minute. Add in the the beaten egg and mix until incorporated, about 30 seconds. With the mixer still running on low (I use #3 on my Kitchen Aid mixer), add the butter and continue kneading for 8 – 10 minutes. The mixture should look smooth and silky but it might still feel quite sticky, which is fine.
- Lightly oil a large bowl. Using a plastic dough scraper, scoop out the dough onto an unfloured surface. Use the dough scraper to help you fold the dough into a rough ball then transfer it to the oiled bowl. Cover the bowl with a damp kitchen towel or plastic wrap and let rise in a warm place until doubled, or almost doubled, in size. Depending on how warm your kitchen is, this will take about 1 to 2 hours.
- Line one large baking sheet with parchment paper. Alternatively, use two smaller sheet pans so the buns will not stick together when baking.
- Turn the dough out onto a clean, unfloured surface and divide into 8 equal pieces. If the dough is impossibly sticky to work with, add just a tiny bit of flour to your work surface.
- Working with one piece of dough at a time, pull the outer edges towards a middle point and keep pinching them together to create a taught surface on the underside. Even if your dough still seems too sticky, resist the urge to add more flour unless absolutely necessary. Flip the ball seam side down and place it on an un-floured surface. Cup the ball lightly with your hand and gently roll the bottom around until the ball has a smooth, taught surface. Place each ball on the prepared pan(s), spaced at least 2-3 inches apart.
- Cover with a clean kitchen towel and let rise again until balls look puffy and almost, but not quite, doubled in size. This could take 45 minutes to 1 hour. However, if your kitchen is very cold it could take up to 1 1/2 hours.
- 30 minutes (or so) before the buns are done rising, place a shallow pan filled with 1-inch of water on oven floor. Preheat oven to 400ºF.
- In a small bowl, beat the egg and water to make the egg wash. Lightly brush the tops and sides of the buns with the egg wash and sprinkle with sesame seeds, if using. Bake for about 15-18 minutes, rotating halfway through baking, until the tops are golden brown. Transfer buns to a wire rack to cool completely before slicing.
Notes
-
- This is One. Sticky. Dough. But that’s what makes these buns fluffy and delicious so resist the urge to add too much flour when shaping the dough balls. If you add too much flour the buns will be dense and dry rather than light and airy. Add just the bare minimum you need to be able to shape the buns.
-
- If you are making this recipe on a super hot, humid day, hold back 1/4 cup of water. I recently made the buns on a really humid day and I had to add quite a bit of flour to work with the dough, which is not ideal. You’re better off starting with a little less water, than adding more flour later.
-
- If necessary, add a little more flour. The flour you use, and the weather will impact how sticky your dough is. If your dough is impossibly sticky to work with, go ahead and sparingly sprinkle in a bit more flour.
-
- The second rise should not take longer than 1 hour. Particularly on hot, humid days. I find if I let the buns rise for much longer, they are too puffy and huge once baked. Or worse, they are over-proofed and ruined.
-
- To store: These hamburger buns are truly best the day they are baked but they will keep for a few days. For best results, do not refrigerate the buns. Instead, store the cooled baked buns in an airtight container for up to two days at room temperature. Slice and toast before using.


Join the Conversation