Bring on the fall flavors with this one-bowl Gluten-Free Pumpkin Bread that is delightfully moist, perfectly spiced, and smothered in the most luscious olive oil glaze. It is one of the easiest quick breads you’ll ever make and it’s absolutely mouth-watering, too. Bonus, your home will smell like cinnamon and cloves and comfort.
An Easy, Gluten-Free Pumpkin Bread That Will Steal The Show
A classic pumpkin bread is notoriously easy to make, even easier than banana bread because there are no bananas to mash. This gluten-free version is just as easy and the only special ingredient you need to buy is a gluten-free flour mix.
This recipe is an adaptation of the infamous kabocha cake from the Gjelina Cookbook, but unlike that recipe, we do not roast a kabocha squash to make our pumpkin puree. Delicious as that may be, I like to keep this recipe fuss-free, quick, and straightforward. My adaptation also uses gluten-free flour and less sugar with a surprisingly fabulous result.
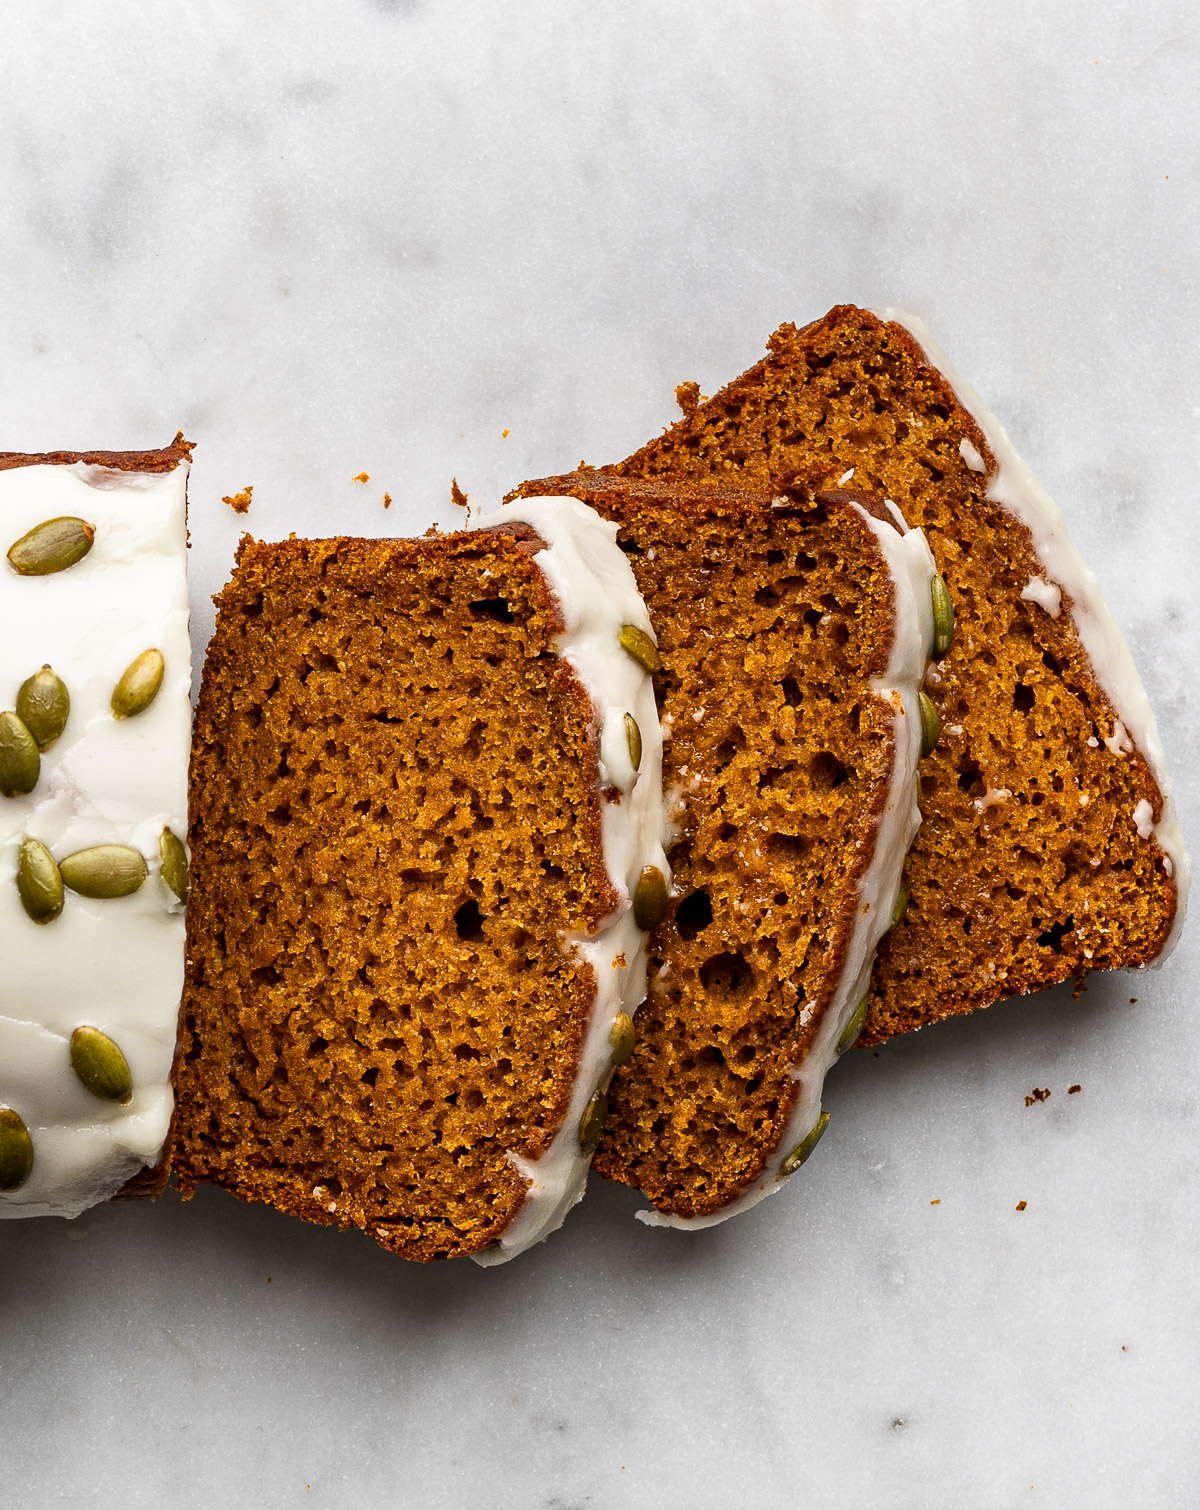
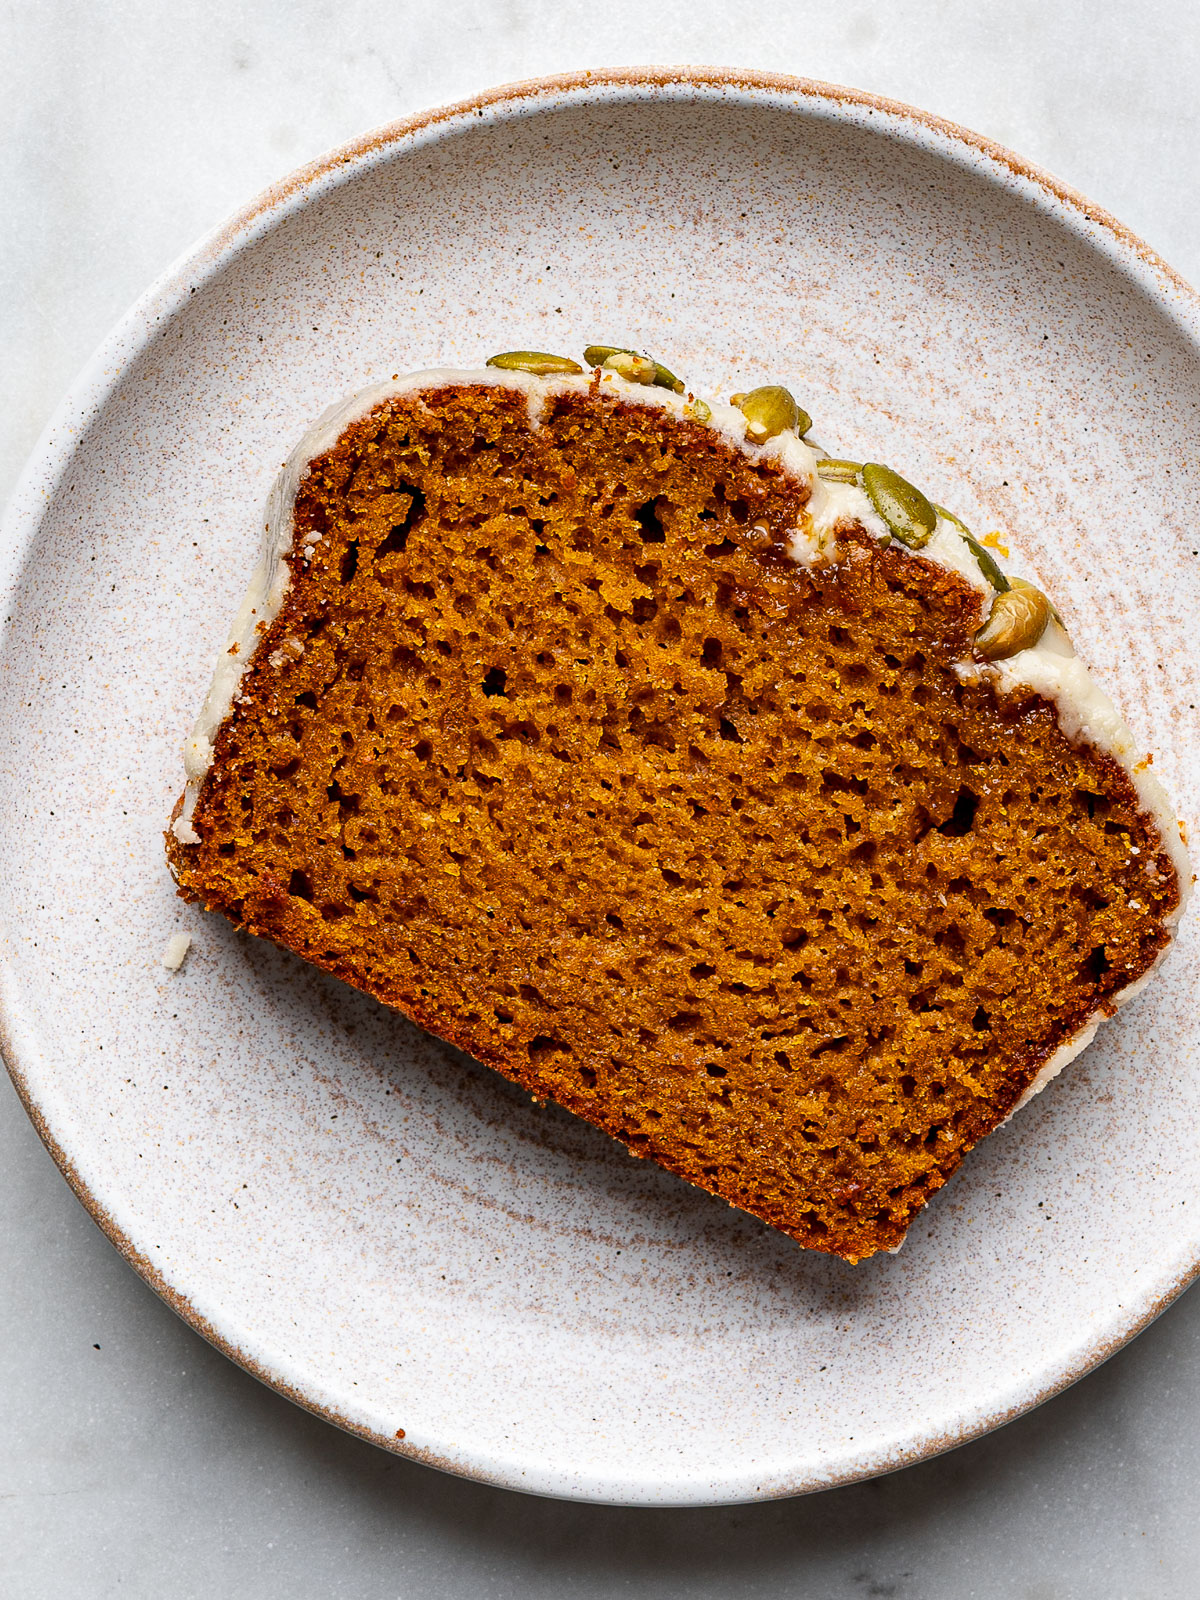
Oil, eggs, and pumpkin puree ensure this quick bread stays moist, while warming spices and brown sugar add caramel notes and depth of flavor. It’s so moist and deeply flavored, in fact, no one would ever guess it’s wheat-free.
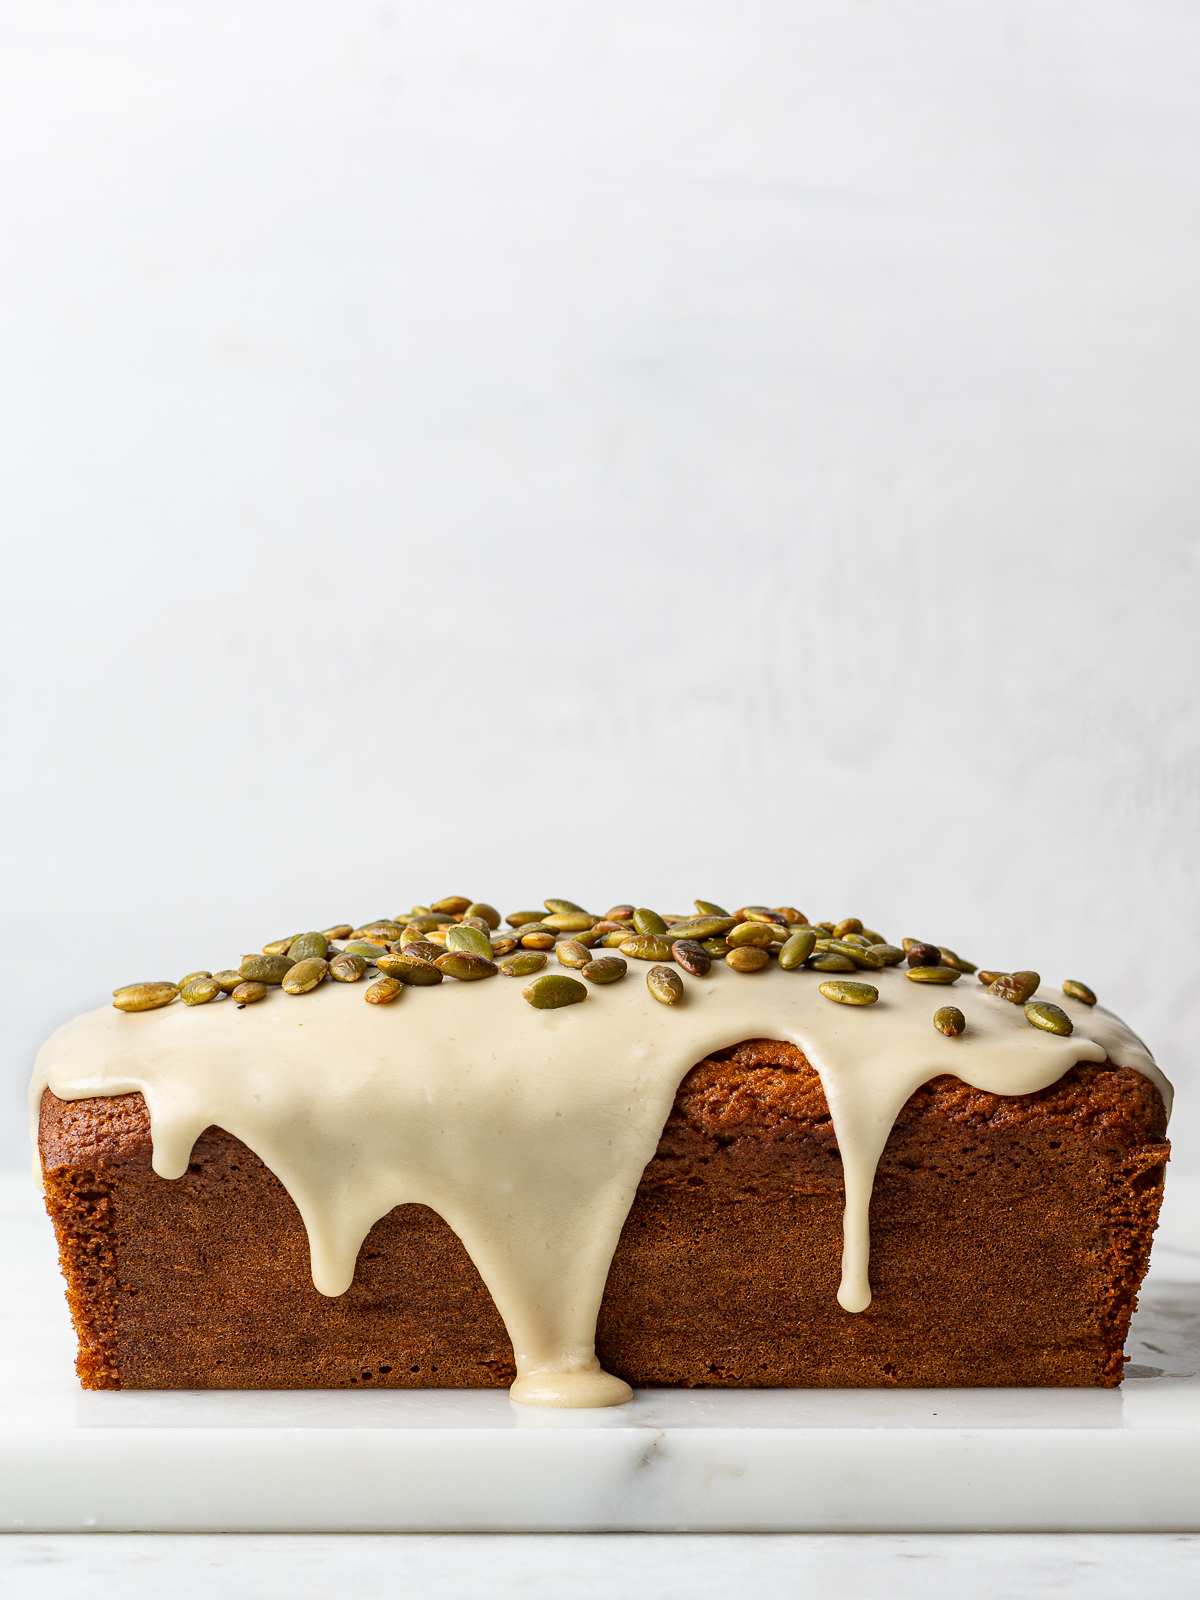
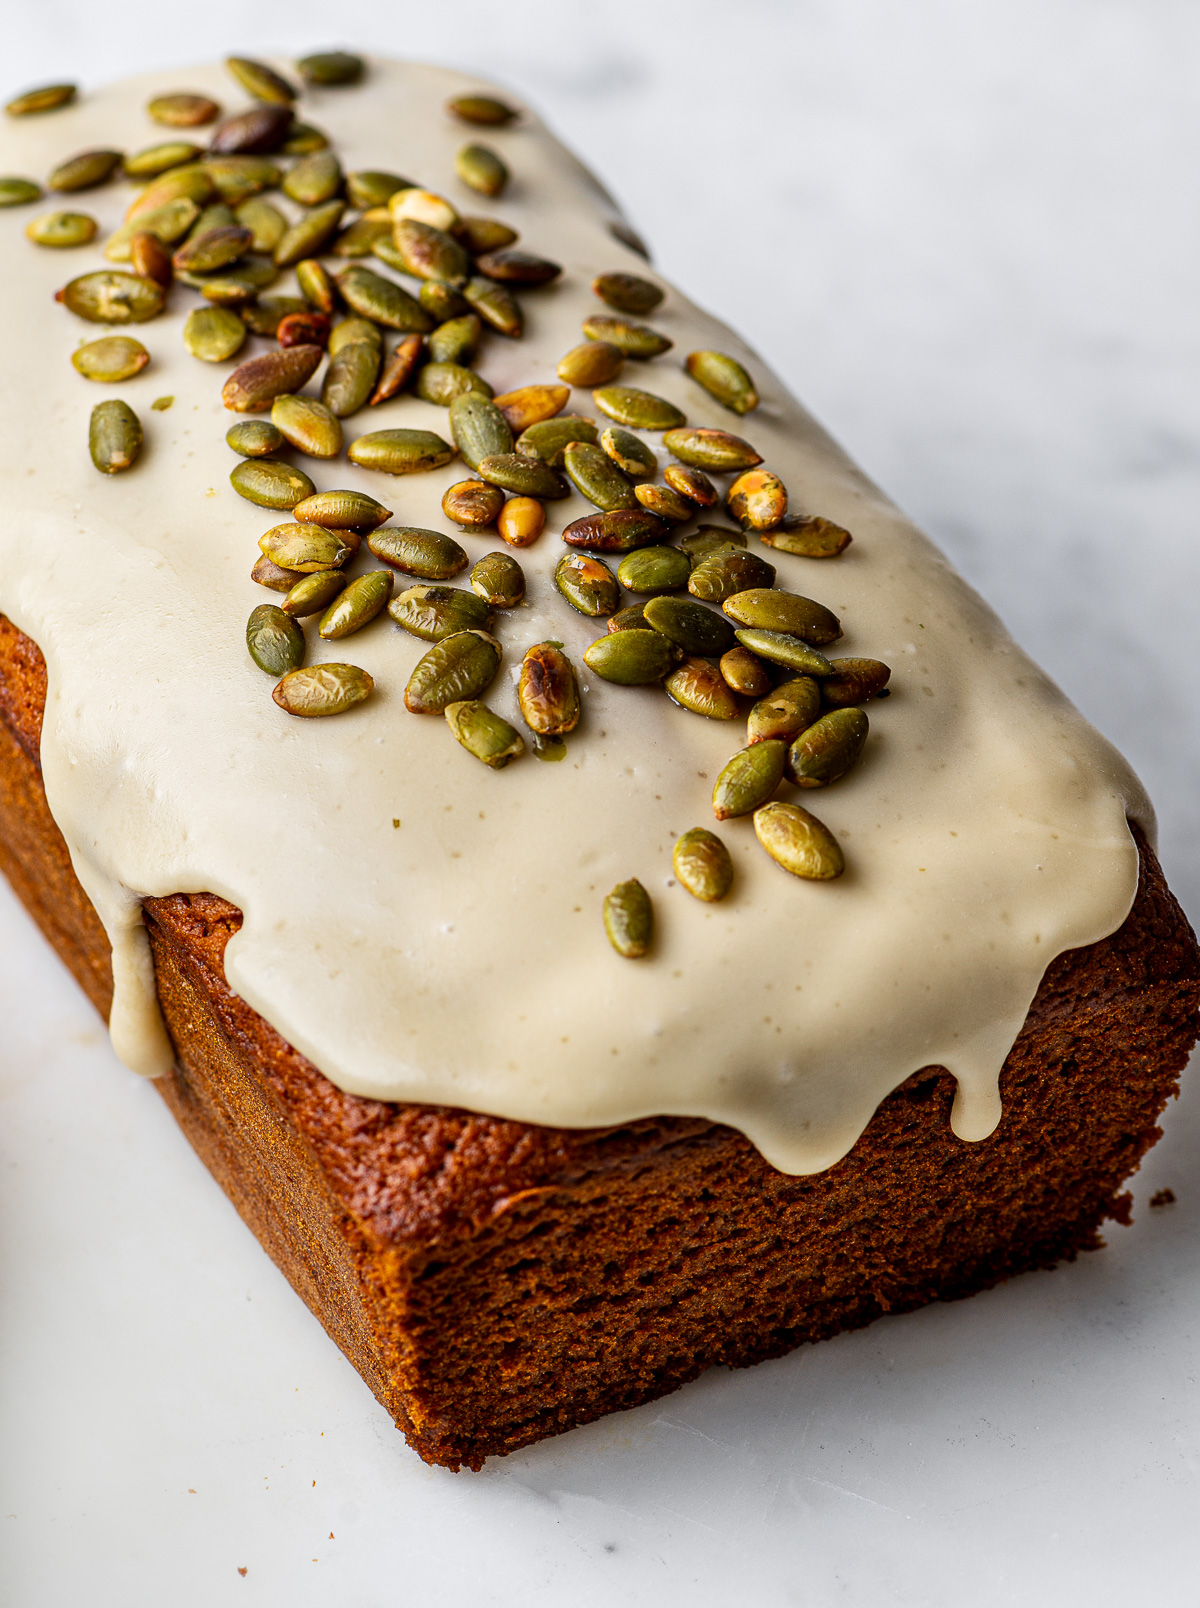
I typically never glaze my quick breads, but the sweet glaze from the original recipe is so unique and so delicious, I love adding it for a special. It includes olive oil, which may sound odd but it gives the glaze a silky, glossy finish and a subtle savory note. Feel free to omit if you wish, the loaf is just as glorious without it.
Finally, and perhaps best of all, you will be using just one bowl and a whisk to mix all the ingredients – no mixer required – and the gluten-free bread will rise beautifully. This is a cozy, autumnal snacking cake with the perfect balance of sweetness and warming spices — keeping a supply around the house this time of year, is a very smart thing to do.
Recipe Ingredients And Notes
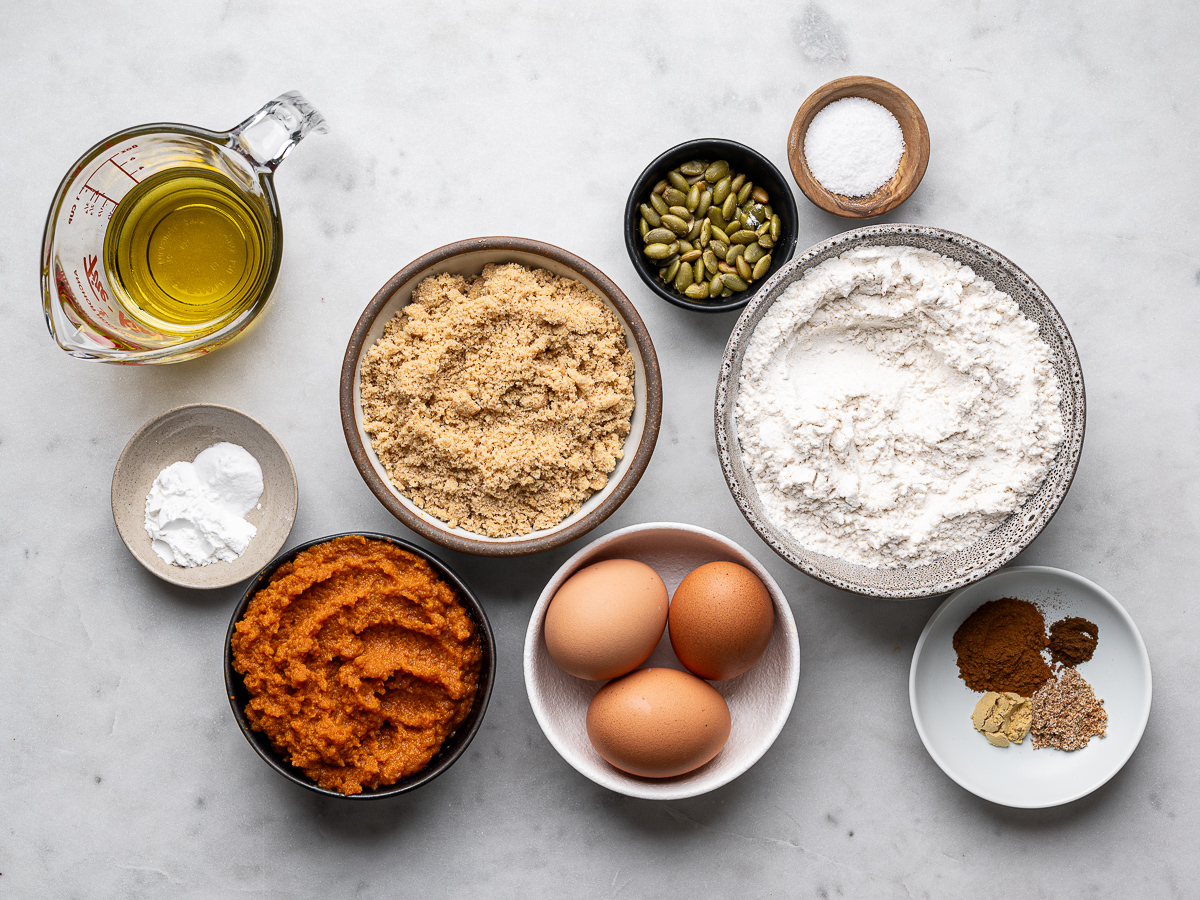
- Pumpkin puree: For this recipe you will need 1 cup of pure canned pumpkin puree. Make sure you don’t grab pumpkin pie filling by mistake as this will have many other flavors added and will to work for this recipe.
- Flour: I use Bob’s Red Mill 1 to 1 GF flour. If you are in the US, I know King Arthur Measure for Measure GF flour will work perfectly as well. If you’ve had success with any other GF flour brand, go ahead and use it but make sure you check the ingredients – if it does not have xanthan gum, add ½ a teaspoon to the flour mix.
- Baking soda and powder: I use both to get a nice rise and fluffy texture.
- Sugar: I like to use light brown sugar for this pumpkin bread recipe. Brown sugar is the acidic component in the recipe that activates the baking soda. This gives the pumpkin bread a beautiful rise and helps keep it fluffy. You can use white sugar if you wish, but you won’t get the same caramel notes or fluffiness.
- Eggs: You will need 3 large eggs for this pumpkin bread. I have not tested it with flax eggs to make it vegan so I cannot make any recommendations.
- Oil: The original recipe from Gjelina uses olive oil for the batter. I find it a little over powering in this pumpkin bread so I use avocado oil. Coconut oil will also work, or any other healthy neutral oil. If you need to use olive oil, make sure you use a very light olive oil, not extra-virgin.
- Spices: Here you can use a store-bought pumpkin spice mix, but I prefer to add my own blend of warm spices; cinnamon, ground ginger, ground nutmeg, allspice, and a pinch of ground cloves.
*Note: For the detailed measurements, please see the recipe card below.
Variations And Substitutions
- Add ins: The original recipe adds chopped bittersweet chocolate. If you would like to try this, stir in 3/4 cup chopped bittersweet chocolate to the batter. Other options are chopped nuts or dried cranberries.
- Sugar: If you’d like to use coconut sugar, you can. However, coconut sugar will not be as sweet or as moist as brown sugar so add an extra 1/4 cup.
- Flour: If you don’t need this pumpkin bread to be gluten-free, use the same amount of regular all-purpose flour.
Good To Know
Not only is this a great cake to make ahead—it stays nice and moist for days—but the flavor gets even better the second day and beyond! Because of this, it’s a great quick bread for gifting, especially during the holidays. Tip: If gifting the loaf, omit the glaze or apply a very thin layer so it doesn’t get messy.
How to Make Pumpkin Bread
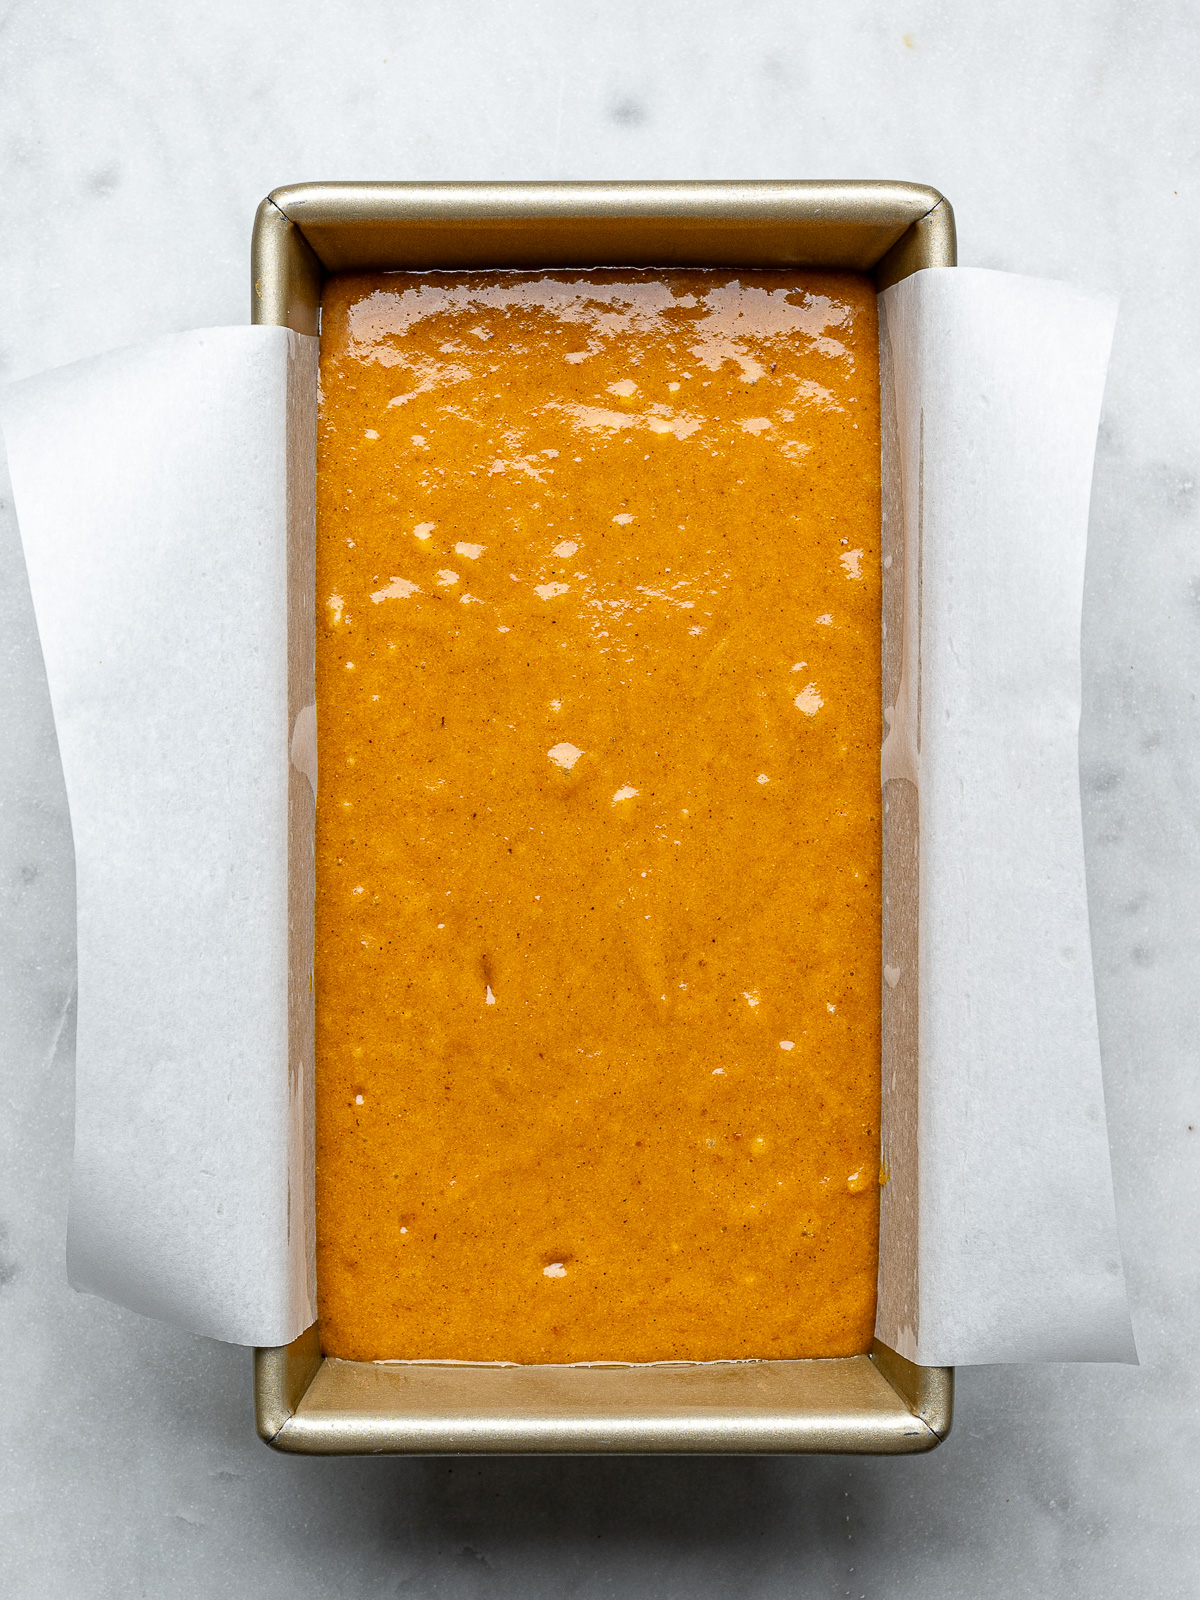
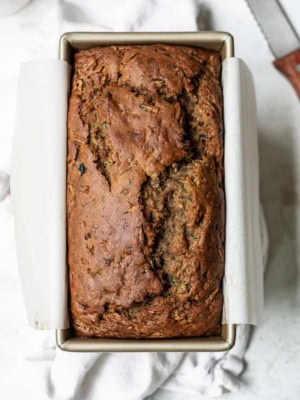
Step 1: Preheat the oven to 350°F. Lightly grease a 9×5 metal loaf pan all over. Add a parchment sling for easy removal.
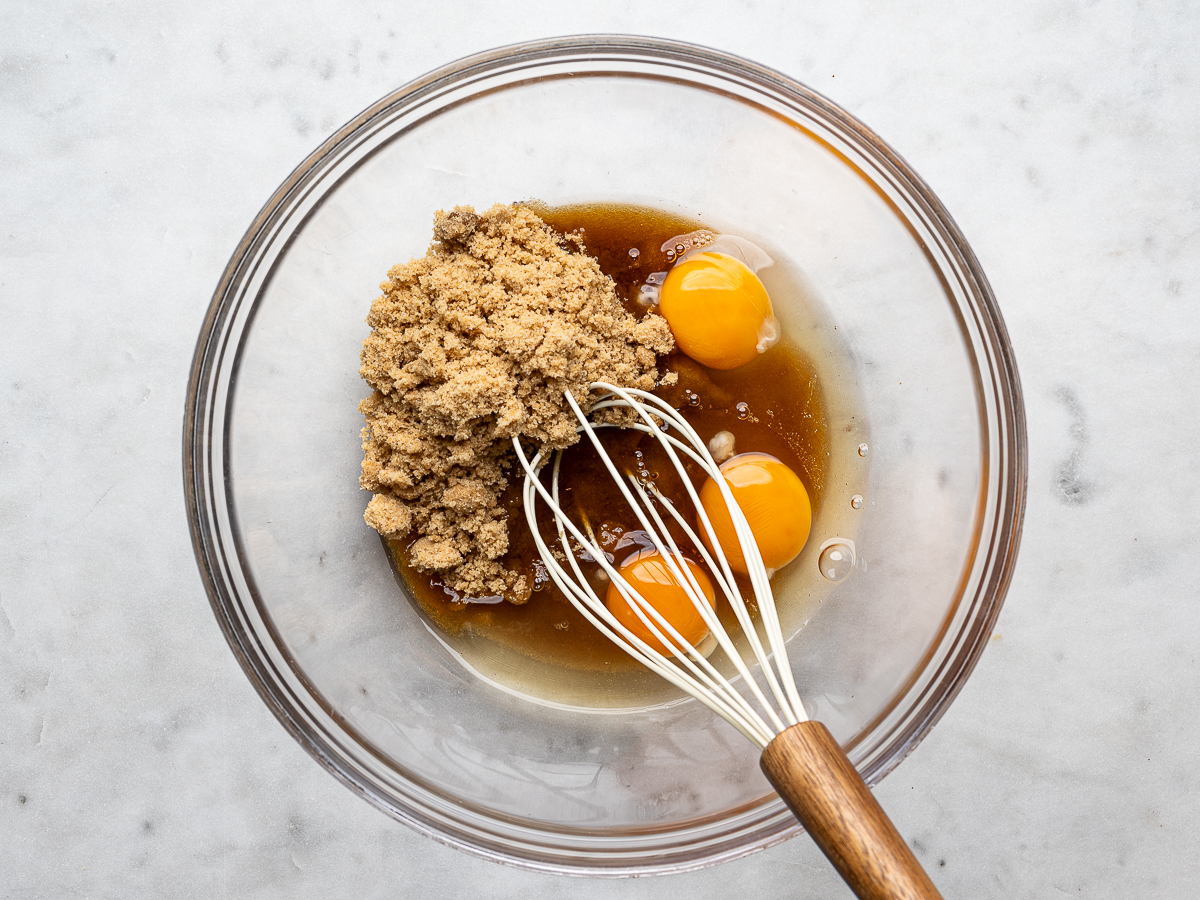
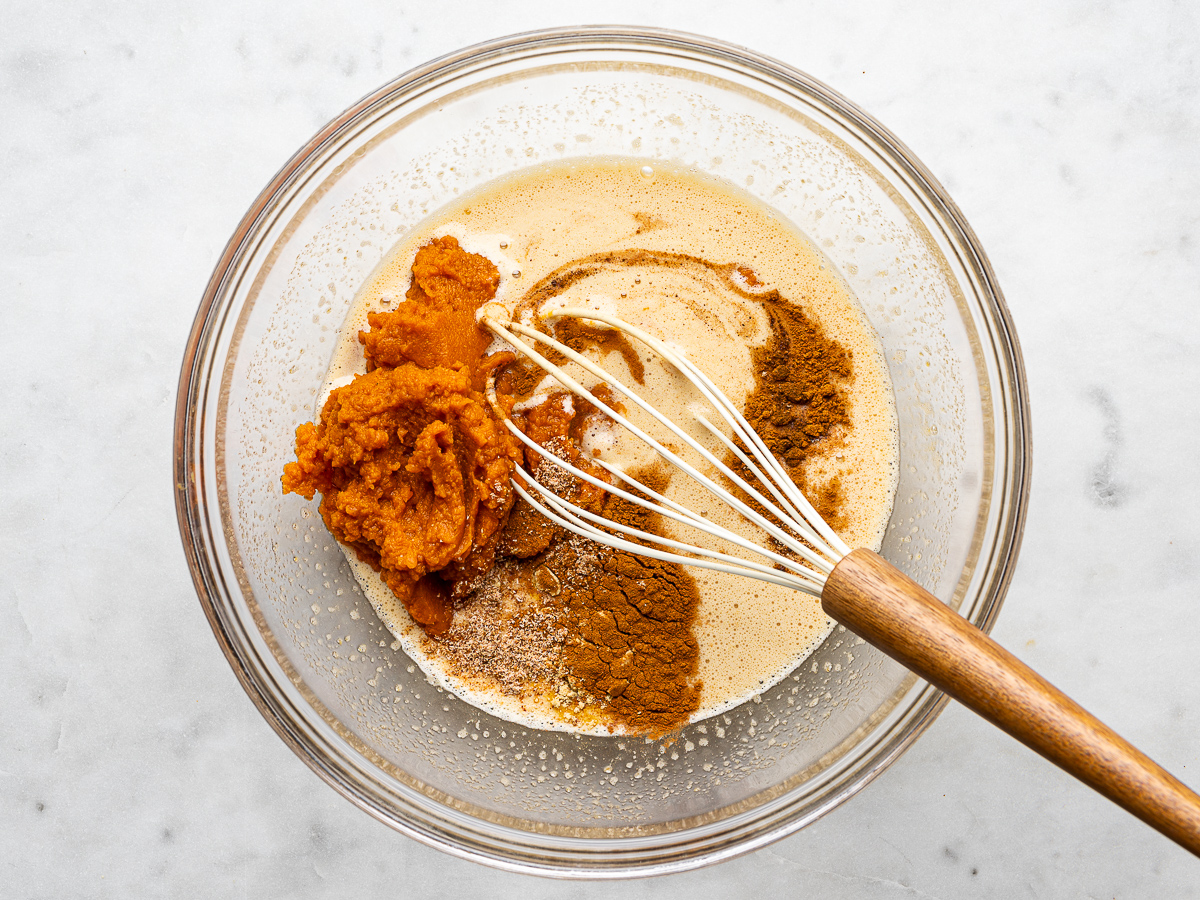
Step 2: In a large bowl, whisk the brown sugar and eggs until pale and foamy, about 1 minute.
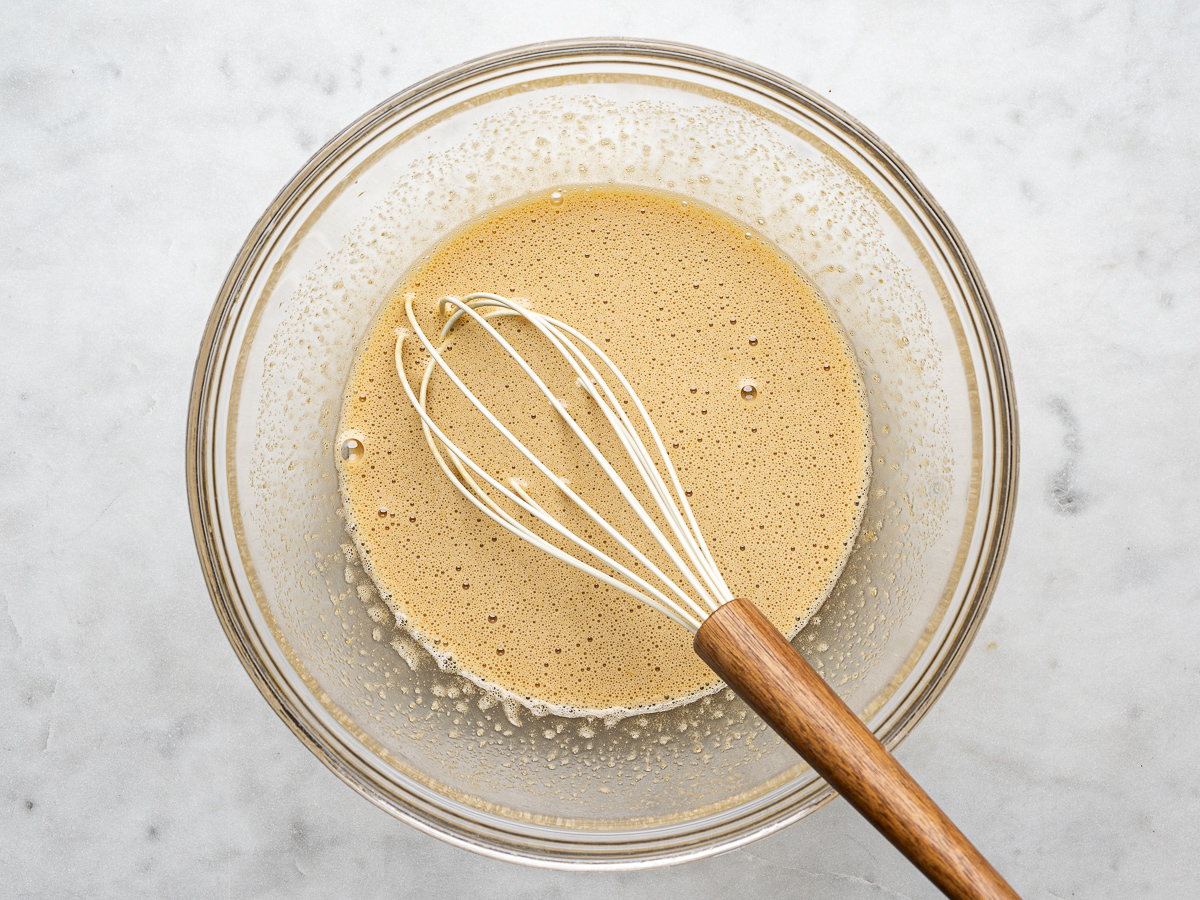
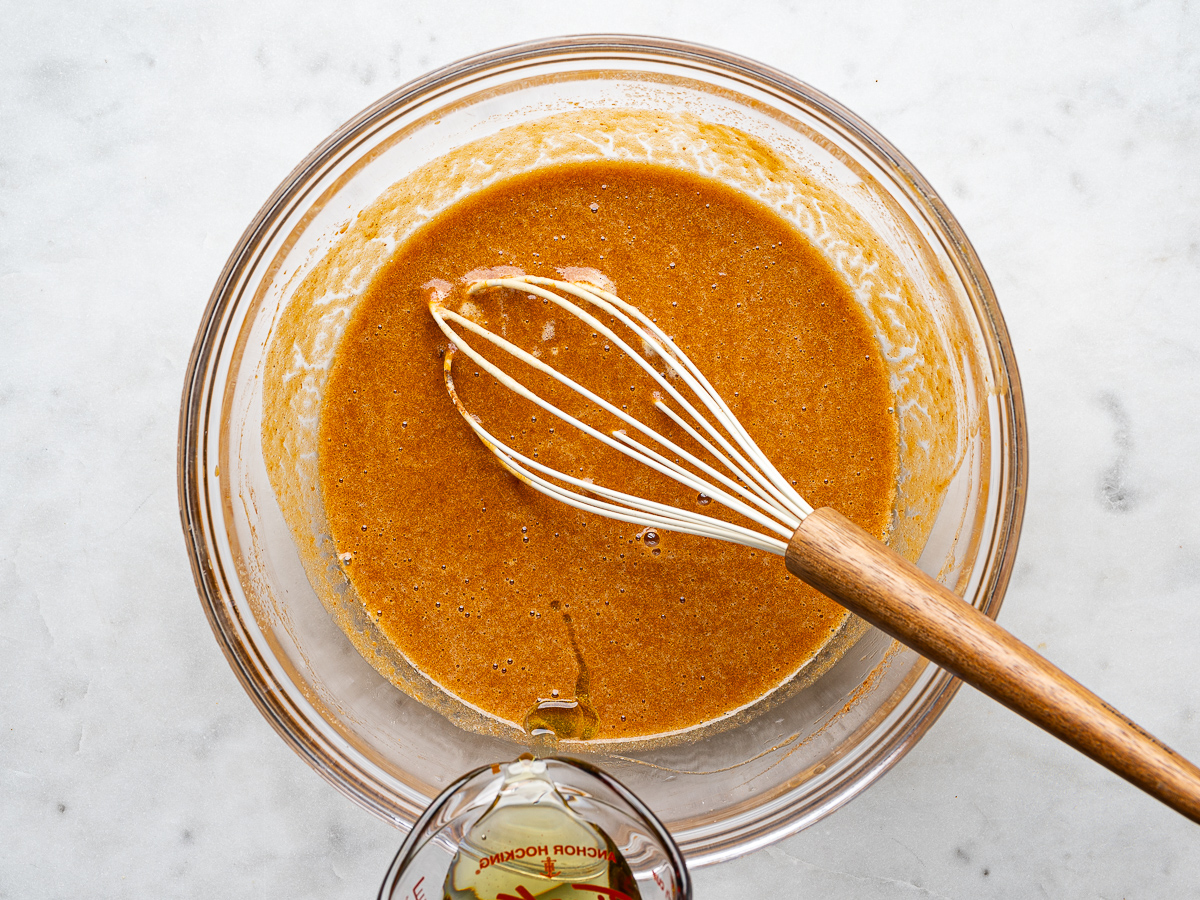
Step 3: Add the pumpkin puree, cinnamon, ginger, nutmeg, cloves, and salt. Whisk to combine then, slowly drizzle in the oil, whisking aggressively, until the mixture is smooth and emulsified.
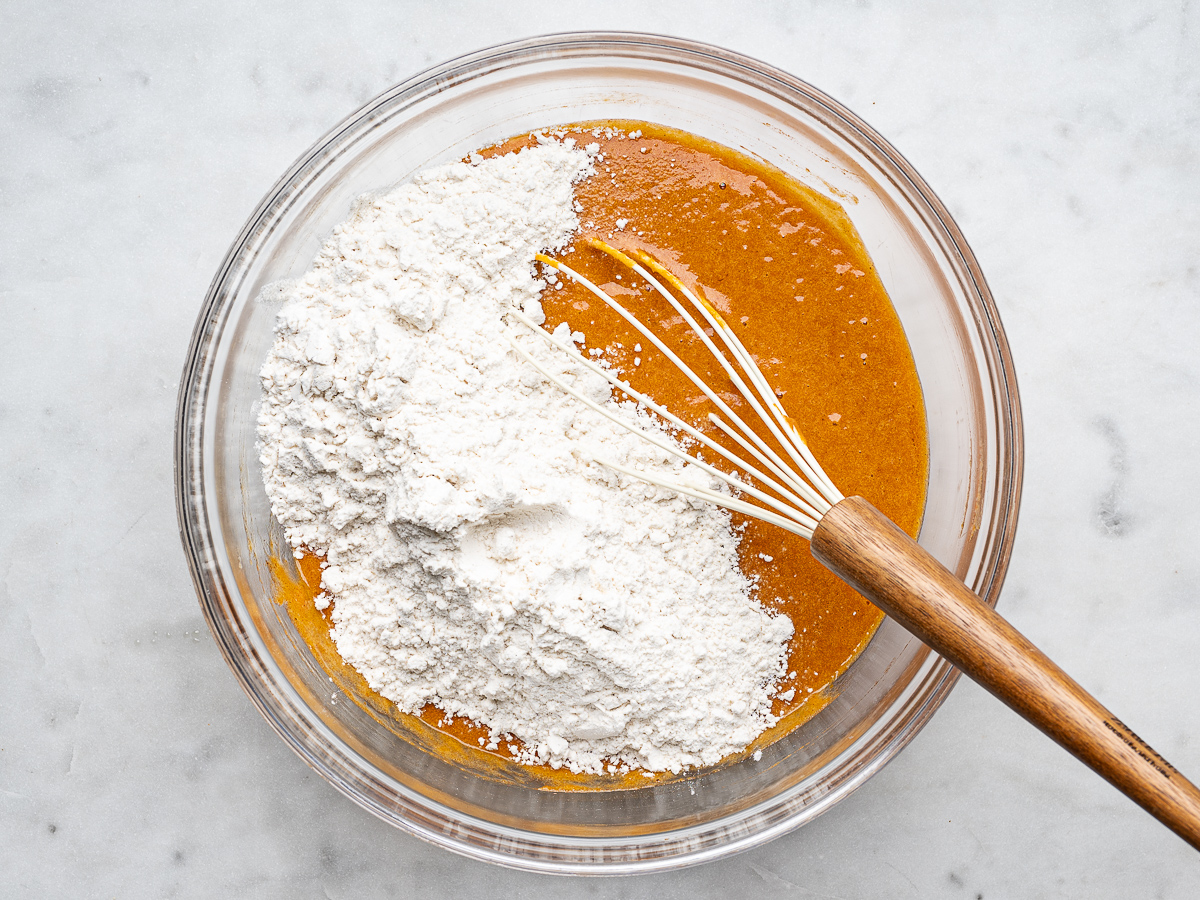
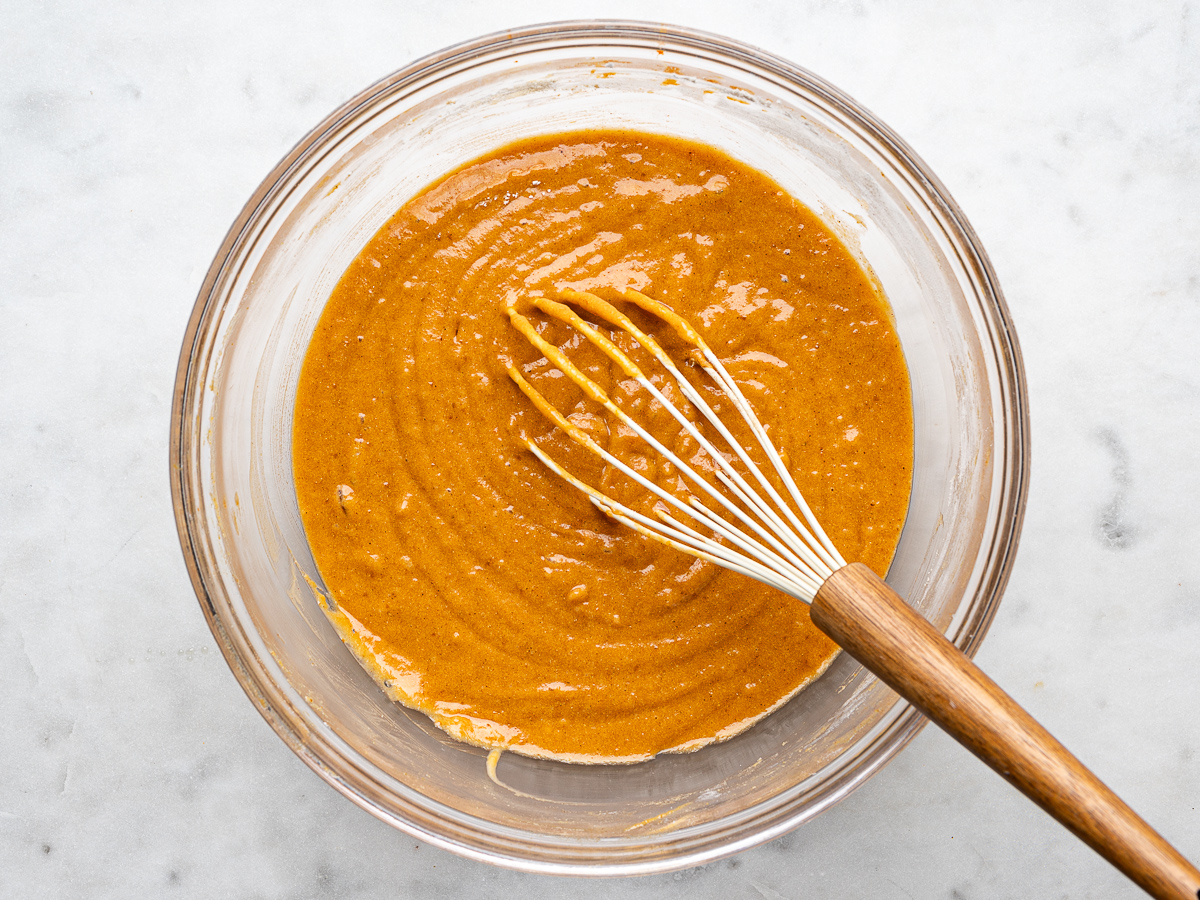
Step 4: Add the flour, baking powder and baking soda and whisk until batter is mostly smooth (a few small lumps are okay) and no flour streaks remain.
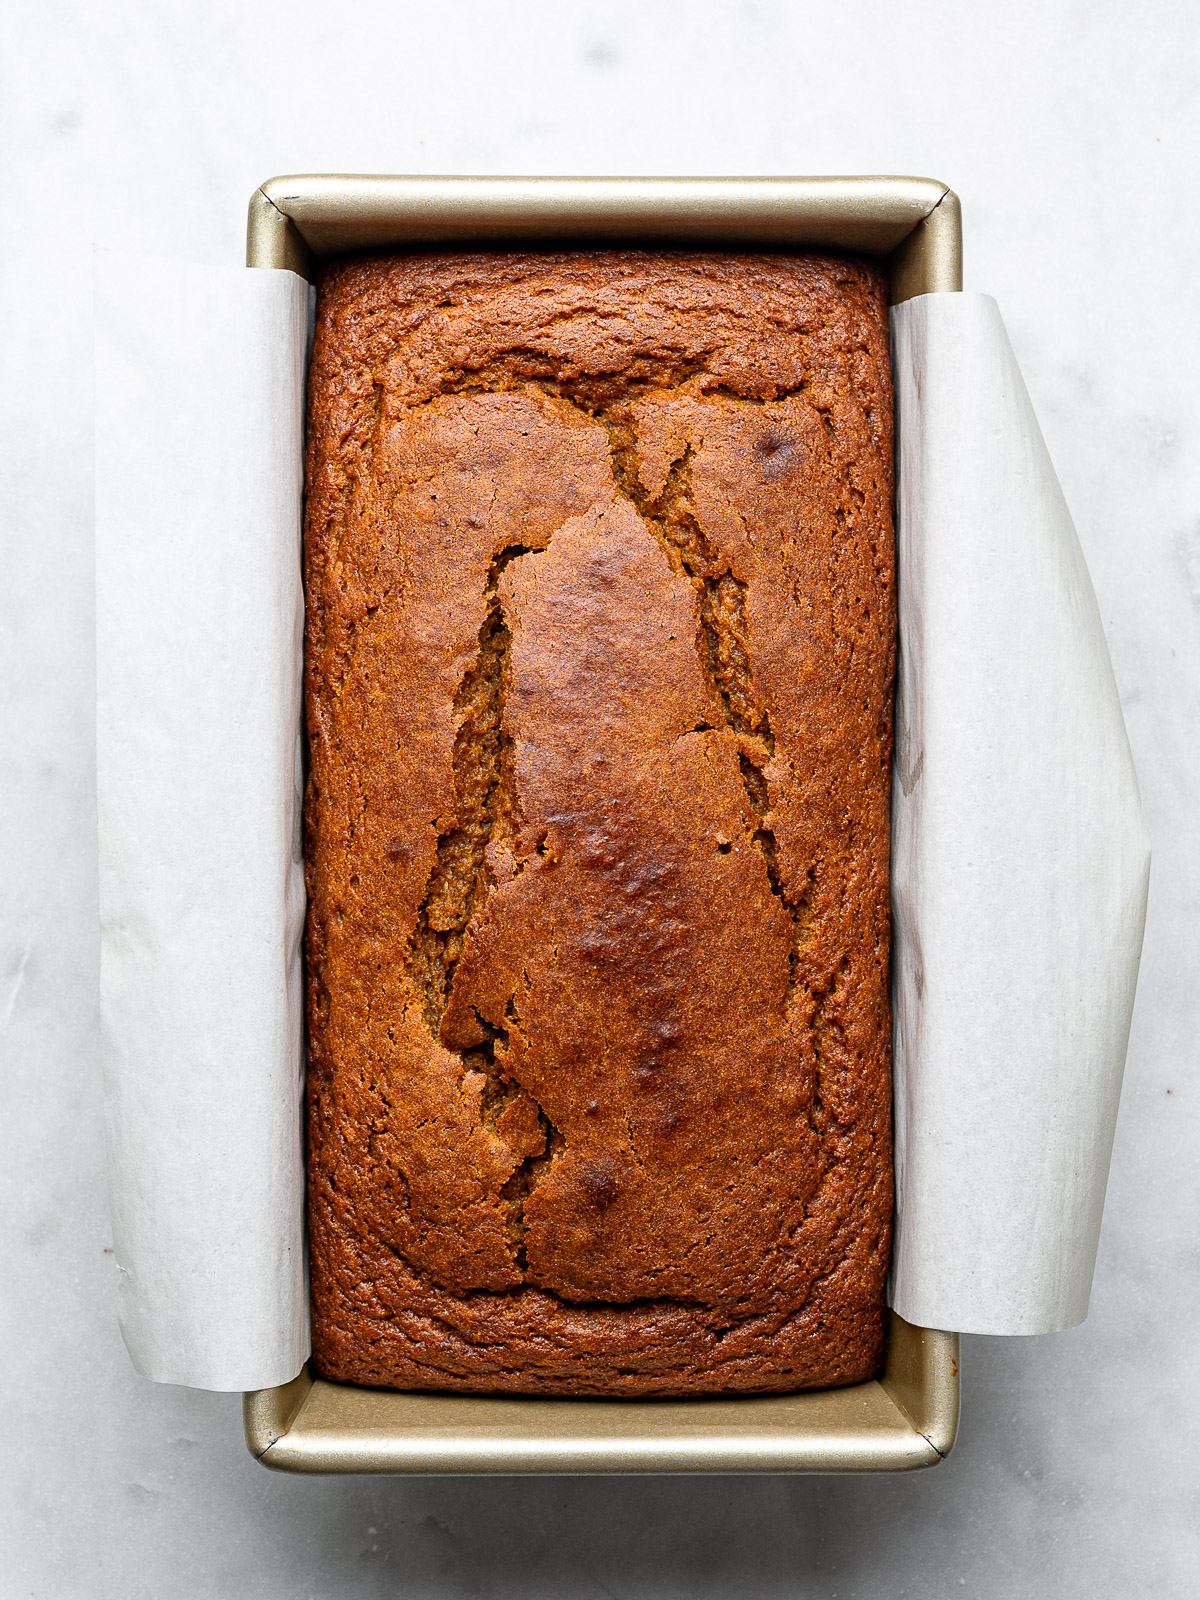
Step 5: Pour the batter into the prepared pan and smooth the top of the batter with an offset spatula. Bake for 50 to 60 minutes. Set the pan on a wire rack to cool for about 20 minutes, then use the parchment paper to lift the cake out of the pan and set it on the rack to cool completely.
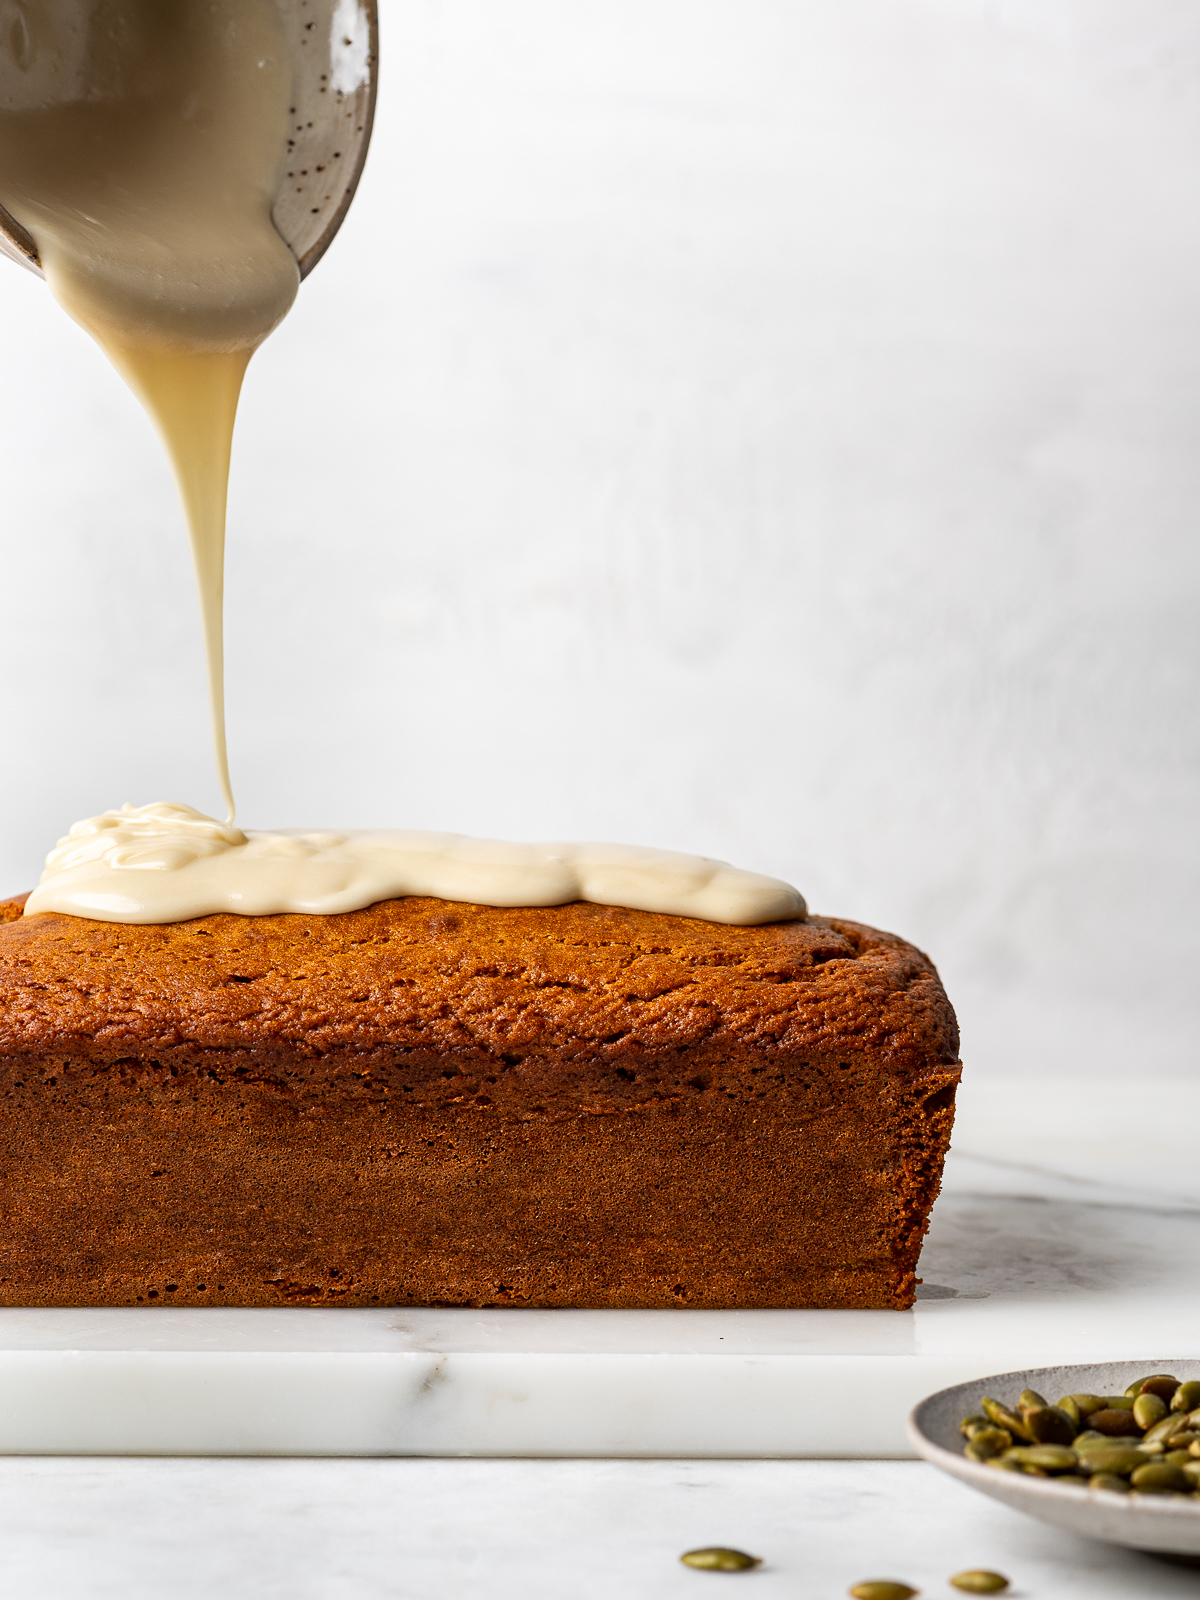
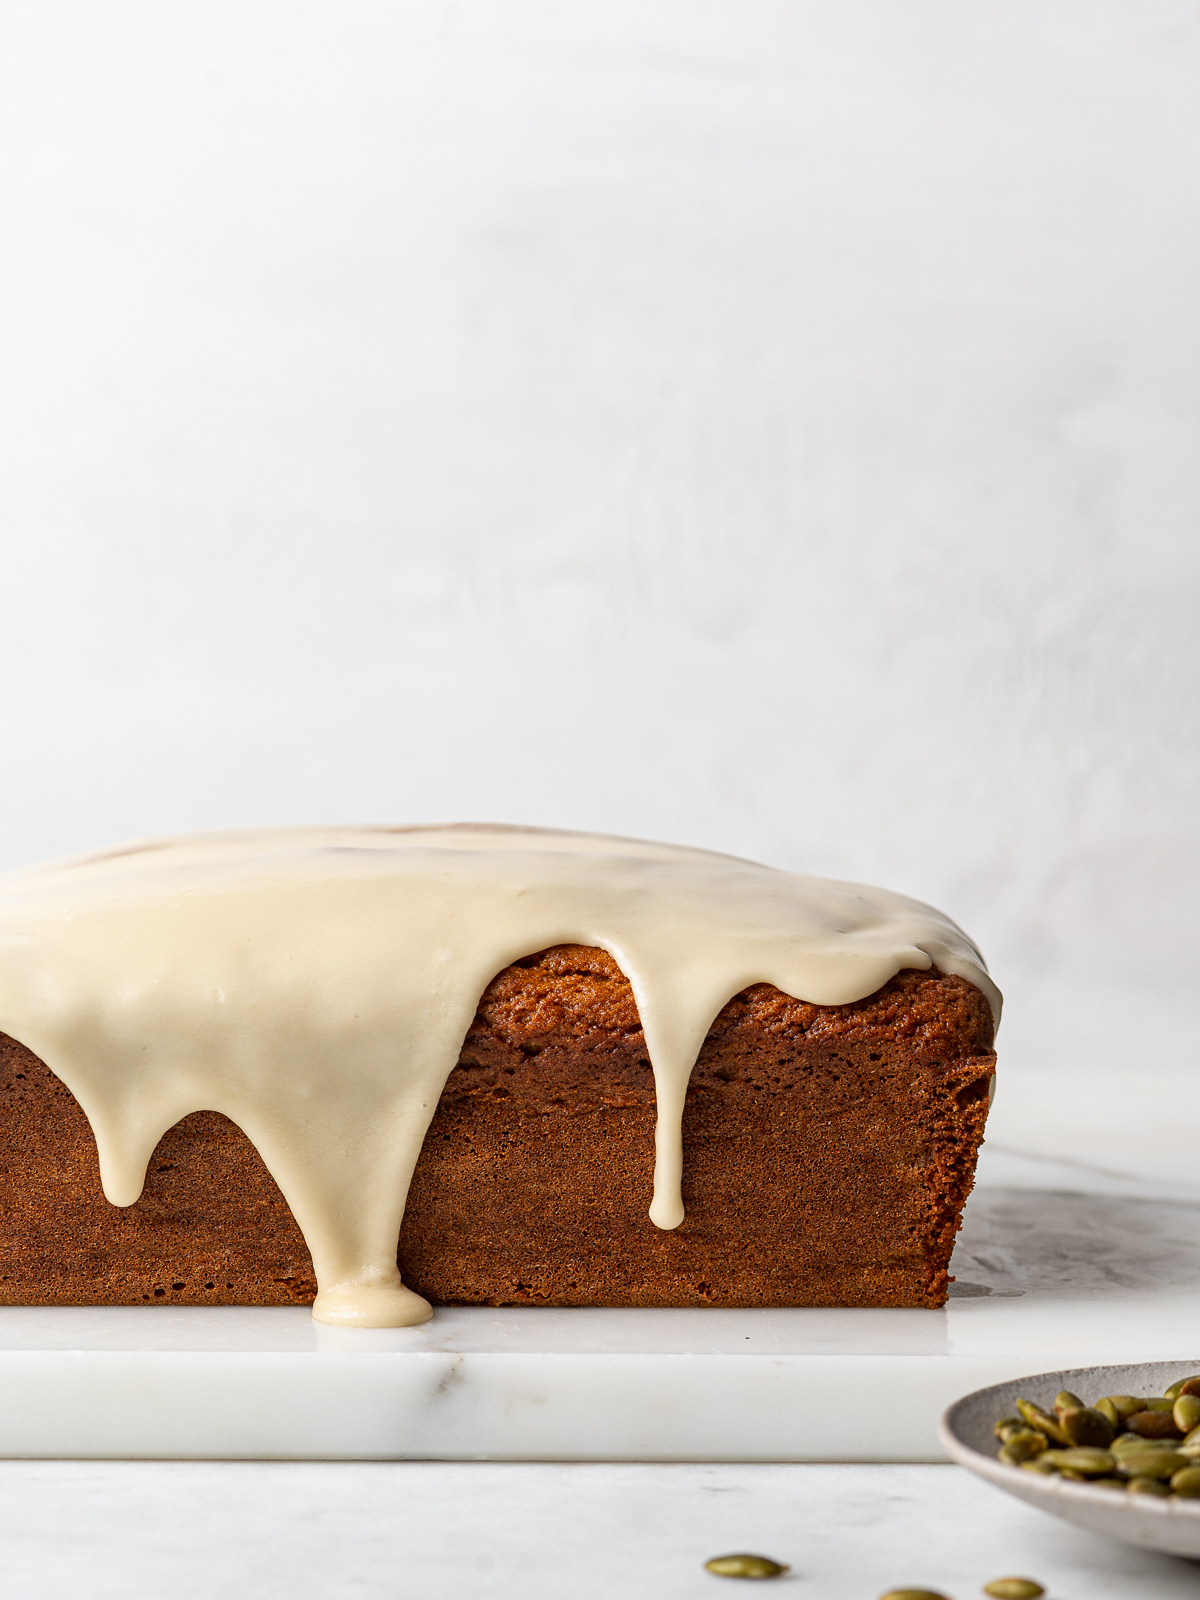
Step 6: MAKE THE GLAZE (OPTIONAL): In a small bowl, combine the confectioner’s sugar, olive oil, 2 tablespoons hot water, and a pinch of kosher salt. Whisk until smooth, adding more water or sugar as needed to make a thick but pourable glaze.
Step 7: Pour the glaze over the cooled cake and sprinkle with pepitas, if using. Let the glaze set before serving, about 20 to 30 minutes.
Baking Tips
- Make a paper sling. In addition to greasing the pan, the easiest way to remove the loaf once baked is to create a paper sling in the loaf pan. Simply line the pan with a strip of parchment paper that hangs over the two long sides.
- Tent the loaf with foil. Because the bread takes almost an hour to cook, the top can start browning too quickly. Covering in a foil tent for the last 10 minutes will allow the loaf to bake fully in the middle without getting too brown on top.
- Testing for doneness. You will know the pumpkin bread is done baking when a skewer inserted in the center comes out mostly clean, with just a few moist crumbs. Or, if using an instant-read thermometer, the temperature should be between 200ºF and 206ºF.
Pan Size Matters
I am always surprised when a loaf recipe doesn’t specify which size of loaf pan to use. There is a big difference between a 9×5-inch loaf pan, and an 8×4-inch. Some will say they are 9×5, but the inside of the pan actually measures 8×5 so make sure you measure yours inside as well.
This pumpkin bread will work using either size, however, the cooking time will vary depending on which one you use. The bread will also be slightly loftier if you use an 8×5-inch pan.
If you use a 9×5-inch pan, this pumpkin bread will be done between 50-55 minutes. If using an 8×5-inch, it will be done in 60-65 minutes.
You can also use an 8×8-inch square pan to bake this pumpkin bread. The baking time will be 25 to 35 minutes.
How To Avoid Underbaked Or Sunken Pumpkin Bread
I have tested this gluten-free pumpkin bread recipe dozens of times and I have never had an undercooked middle, nor has it sunk in the center. I always bake it for exactly 60 minutes and it comes out perfect. That said, it took a lot of trial and error to get there. Here are my top tips to avoid any of the common issues with gluten-free breads, or quick breads in general:
Use a digital scale. For consistent results every time you bake, you a digital scale. This will provide exact measurements, which is crucial for baking because it relies on precise ingredient ratios. Unlike using measuring cups, which can vary due to factors like ingredient density (e.g., flour can be packed or sifted), weighing ensures you’re adding the right amounts every time.
Use the right size pan. The pan you use affects the cooking time (see section above). For a perfectly baked pumpkin bread, follow my pan size recommendations.
If possible, avoid using organic canned pumpkin puree. Canned organic pumpkin puree tends to be a lot wetter. This will make for a very wet batter that will take long to cook and may result in your pumpkin bread not having enough structure. Organic or not, if your pumpkin puree looks very wet, consider straining out some of the liquid.
Know your oven. Most home ovens are less accurate than we think and some can run a lot hotter or cooler. If you suspect your oven runs a little hot, start checking your pumpkin bread 5 to 10 minutes before it’s supposed to be done baking. Similarly, if you think your oven does not run very hot, keep baking the bread until a skewer inserted in the center comes out mostly clean, with just a few moist crumbs.
If possible, don’t open the oven until ready to check for doneness. Opening the oven door, even for just a few seconds, will cause the oven temperature to drop which could make your pumpkin bread deflate a little.
Use fresh leaveners. Make sure your baking powder and baking soda are not past their prime. Otherwise, the bread will not rise or fully bake in the center.
Gluten-free breads take a little longer to bake. Remember gluten-free flour blends are a little softer than wheat flours so baked goods require a little more time to cook. Be patient, and let the bread cook as long as it needs to. If it starts to brown too much on top, place a tented piece of foil over the pan.
Let it cool completely before serving! I know it’s hard to resist a warm slice, but a gluten-free quick bread, in particular, should be cooled before slicing. This allows the flavors to intensify and the interior crumb to really set.
Recipe FAQ’s
Unfortunately, you cannot. Using exclusively almond flour for this recipe will not provide enough structure for the bread. You can experiment using almond flour mixed with other gluten-free flours, but I have not tested this.
This gluten-free pumpkin bread will be very similar in flavor to a regular pumpkin bread, but the texture may not be quite as fluffy. Depending on the gluten-free flour you use, it may also be more moist – which for quick breads is not a bad thing!
Gluten-free baked goods can sometimes collapse in the middle due to underbaking, or using too much liquid. Ensure your bread is baked through by testing with a toothpick, and avoid opening the oven door too early. For more tips on this, see section above.
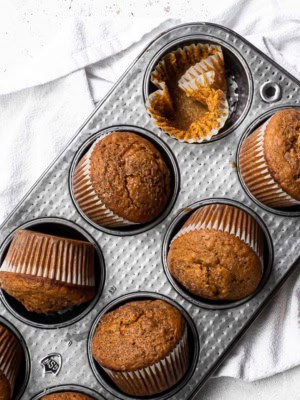
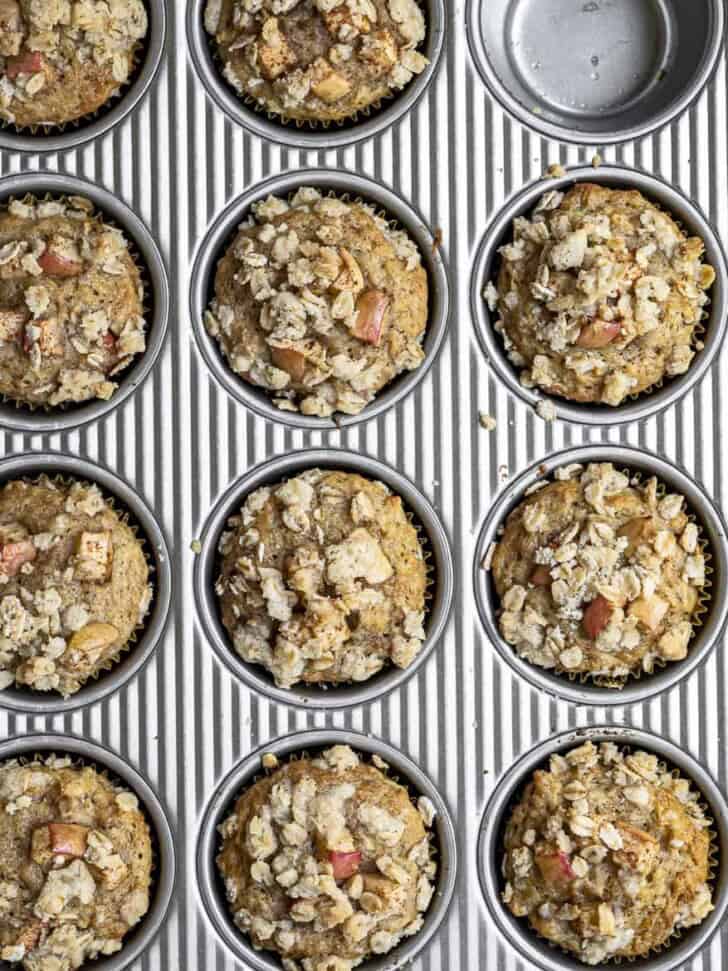
Yes, you can easily convert this bread recipe into muffins. Simply divide the mixed batter evenly into a prepared muffin tin and bake at 375ºF for about 20-22 minutes. Check for doneness by inserting a toothpick into the center and seeing that it comes out mostly clean.
How To Store And Freeze Gluten-Free Pumpkin Bread
- To store on the counter: Once the pumpkin bread has completely cooled, wrap it tightly in plastic wrap or place it in an airtight container to prevent it from drying out. Keep it at room temperature in a cool, dry place for up to 4 days.
- To store in the refrigerator: Wrap the bread tightly in plastic wrap or foil and place it in an airtight container or ziplock bag. Store it in the refrigerator for up to 6 days. Keep in mind that refrigeration may make the bread slightly denser, so allow it to come to room temperature or reheat it slightly before serving.
- To freeze gluten-free pumpkin bread: Like most quick breads, this gluten free pumpkin bread freezes really well. Wrap it tightly in plastic wrap, then in aluminum foil. Store it in an airtight container or freezer bag. It can last for up to 3 months in the freezer. When you’re ready to eat it, thaw at room temperature or reheat it in the oven or microwave.
More Cozy Fall Recipes To Try
Let Me Know Your Thoughts
If you gave this Gluten-Free Pumpkin Bread recipe a try, I would love to hear how it worked out for you. Share your thoughts in the comment section below or feel free to ask me anything — I always enjoy chatting with you.
Don’t forget to leave a star rating, too!~Sandra x
Gluten-Free Pumpkin Bread
Ingredients
- 1 cup (200g) light brown sugar (if adding glaze, reduce sugar to 3/4 cup)
- 3 large eggs
- 1 cup (230g) pumpkin puree – NOT pie filling
- 1 teaspoon ground cinnamon
- 1/4 teaspoon ground ginger
- 1/4 teaspoon nutmeg
- 1/8 teaspoon ground cloves
- 1/2 teaspoon kosher salt (see notes)
- 1/3 cup (67g) neutral oil (I use avocado oil, can use coconut oil or a very, very light olive oil)
- 1 1/2 cups (190g) Gluten-Free flour blend – see notes
- 1 1/2 teaspoon baking powder
- 1/2 teaspoon baking soda
Optional Olive Oil Glaze
- 1 cup 100g confectioner’s sugar (icing sugar)
- 2 Tablespoons olive oil
- 2 tablespoons hot water
- pinch of kosher salt
- 2 tablespoons pepitas (pumpkin seeds) – optional
Instructions
- Preheat the oven to 350°F. Lightly grease a 9×5 metal loaf pan all over. For extra insurance so the cake doesn’t stick, line the pan with a strip of parchment paper that hangs over the two longer sides.
- In a large bowl, whisk the brown sugar and eggs until pale and foamy, about 1 minute. Add the pumpkin puree, cinnamon, ginger, nutmeg, cloves, and salt. Whisk to combine then slowly drizzle in the oil, whisking constantly, until the mixture is smooth and emulsified.
- Add the flour, baking powder and baking soda and whisk until batter is mostly smooth (a few small lumps are okay) and no flour streaks remain.
- Pour the batter into the prepared pan and smooth the top of the batter with an offset spatula.
- Bake for 50 to 60 minutes, until a skewer inserted into the center of the loaf comes out clean. Set the pan on a wire rack to cool for about 20 minutes. Then use the parchment paper to lift the cake out of the pan and set it on the rack to cool completely.
- MAKE THE GLAZE (OPTIONAL): In a small bowl, combine the confectioner's sugar, olive oil, hot water, and salt. Whisk until smooth, adding more water or sugar as needed to make a thick but pourable glaze.
- Pour the glaze over the cooled cake and sprinkle with pepitas, if using. Let the glaze set before serving, about 20 to 30 minutes.


Lisa
SO GOOD! Yesterday my daughter came home from school and wanted to bake. I mentioned that you had just posted a new pumpkin loaf (and we had fresh puree in the fridge) so she whipped up a loaf. This is so delicious, not too sweet (we used the less sweet version and skipped the glaze) and so moist and flavourful! It warms our gluten free hearts and we will definitely be making this again (this week!). Thanks Sandra!
Sandra Valvassori
Woohoo! I am so happy you and your family enjoyed this recipe, Lisa! Love that your daughter likes to bake :)) Thank you so much for making the loaf, and for leaving a review!
Lisa
She is 16 and loves to bake (and cook). She’s really good at GF baking too. I tried these today as muffins and they were great! I just added a bit more oil, traded some sugar for maple syrup and of course lowered the cook time. They are fab!
Sandra Valvassori
Ohhh that’s great you used the recipe for making muffins, Lisa! Thank you for sharing your adjustments, this is always so helpful to other readers 🤗